In this blog post we are going to take an in depth look at Microsoft Loop Workspaces and Pages and how to use them.
Loop Workspaces
Workspaces are the central container for all of your Loop pages and components. Think of each workspace as a standalone project to help you organise where information can be found and updated when required. Workspaces are comprised of pages and can consist of one or more pages.
Loop Pages
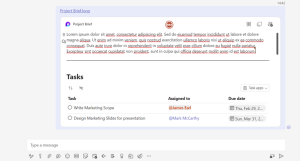
Loop Pages are spaces that help you bring all of your notes, ideas, plans and actions into a single location. Pages are always contained within a workspace. They can start of small and continue to grow to meet the project needs. Each page is an infinite canvas that can contain any number of individual components.
Find out more about Loop components here
How do you create Loop Workspaces?
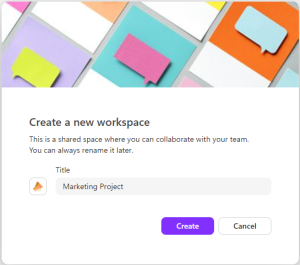
To create a new Loop Workspace first go to Microsoft Loop Once you’ve logged in you can click the “+” symbol on the right hand side to create a new workspace.
Give your workspace a name, and then customise it with a cover photo and an emoji. If you prefer, you can choose not to have either of these options. Currently, Microsoft Loop only allows you select a cover photo from a stock list, you are not able to upload your own cover photo.
How do you add documents and other files to Loop Workspaces?
There are two ways to add documents and files to a Loop Workspace. You can add links to them either in the workspace navigation pane on the left hand side, or by tagging them within a Loop page.
To add documents to the navigation pane:
- First, you will need to open the location where the file is stored.
- Right click on the document you want to add to the workspace and select “Show more options”.
- Select “Copy Link”
- In your workspace select the “+” button on the left-hand side to add a page or link
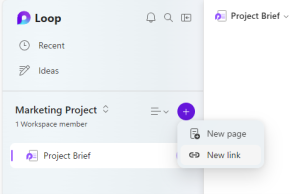
- Select “New Link”
- Give the document a name and paste the link you copied earlier
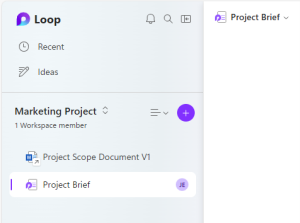
- A link to the document will be displayed in the left-hand toolbar
Top Tip: You can use the same process to add links to websites or other online resources
To tag documents within a Loop Page
- Go to the location on the Loop page you want to add the link
- Type “@” and then start typing the name of the file you want to link
How do you add components to a Loop Page?
To add components to a Loop page you just need to click where you want to add the Loop componenet and then type “/”. You can then continue to type the name of the componenet you want to add or select it from the list.
Find out more about Loop components here {link}
How do you share Loop Workspaces and Pages with other users?
- You can share a Loop Workspace with other users by selecting “Share” in the top right-hand corner
- Then click on “Workspace”
- Enter the names or email addresses of the users who you want to share the workspace with
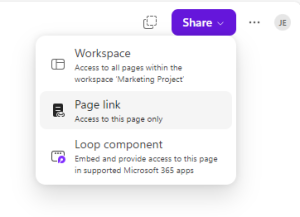
How do you share a Loop Page to other locations?
To share just an individual page with other users you have two options. You can either share a link to the page or you can share the whole page as a Loop component with Teams or Outlook
Share the Loop page URL
- Select “Share” in the top right-hand corner
- Then click “Page Link”
- Paste the link into Teams, an Email or anywhere else to share the URL
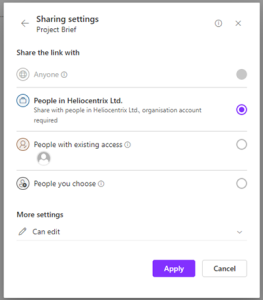
Top Tip: Use this method if you want to give view only access or restrict access using the link. Click “Settings” after the link has been created and change the permissions for the link.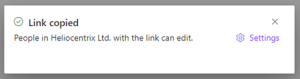
Share the Loop page as a Loop component
- Using the navigation pane on the left side of the workspace. Select the three dots next to the page you want to share
- Select “Share Loop Component”
- This will create a Loop component of the entire page that can be shared in Teams or Outlook
- Paste the URL to the location you want to share it
How do you tag users in a Loop Page?
Tagging users in a specific section of the page is a useful tool to bring this section to their attention. When a user is tagged they will receive an email notification that they have been tagged.
Note: Users will need to have access to the page or workspace to receive a notification.
- Select the location you want to tag the user
- Type “@” and then the users name