App/system: Microsoft Outlook
Learn: How to add automatic signatures onto Microsoft Outlook emails
Skill level: Beginner
Read time: 4 minutes
Having a smart, customised, consistent signature at the bottom of your emails is very beneficial:
- It looks professional.
- It contains important contact information your reader might need (such as your phone number).
- It’s an opportunity to reinforce your brand and promote your marketing messages.
- And, of course, it tells the reader who you are!
Setting up automatic email signatures saves time and creates a consistent ‘on brand’ message to go out with each communication.
There are two ways of setting up automated signatures in Outlook:
- Client-side
- Server-side
The following instructions are based on Outlook 365, but the steps are the same, or very similar, in older versions of Outlook.
Client-side automatic email signatures
Setting up client-side signatures means that each individual needs to manually add the signature to their Outlook application, on each device they use.
This could be a useful option if you are a very small business with just a few people and devices. For larger organisations it would quickly become unwieldy.
How to set up client-side signatures in Microsoft Outlook
On a desktop
- Open a new email in your Microsoft Outlook application.
- Find the Message menu and click on the Signature
- Under the Select signature to edit section click on the New A pop up box will appear; type a name for your new signature into the box and click on OK.
- Go into the section titled Edit signature and type in the signature you want to use. There are various formatting options and the ability to add images, business cards and hyperlinks.
If you prefer, you can set up the signature in Word (which means you can also use tables, bullets and borders) then copy and paste it into the Edit signature box. This is also a handy way of sharing the layout of the signature with others. You can also access email signature templates from Microsoft to help you style yours.
- When you’re happy with your signature, go to the Choose default signature In the E-mail account drop down list, select the email account you want to use this signature for. In the New messages and Replies/forwards drop downs, select which signature you want to use when sending a new message and when replying to a message or forwarding one. In most cases, you’d use the same signature for both.
- Click on the OK button at the bottom right to save your signature and its settings. Close the new email you had opened.
On a mobile phone
- Open the Microsoft Outlook app on your phone.
- Swipe right to open the menu then tap on this icon at the bottom left to open the Settings menu:

- Scroll down to the Signature option and tap on it.
- If you have more than one email account and wish to use a different signature for each one, tap on the Per Account Signature toggle so it’s on (it will turn blue).
- Tap on the word Signature or, if you’re doing different ones for different email accounts, tap on the word Signature under the account you want to change.
- Type in the signature you want to use. Note that you won’t have the formatting options which are available from the desktop version of Outlook.
- Tap on the tick at the top right of the screen to save your signature.
How to change email signatures in Outlook
- Open the signature screen, either by opening a new email in Outlook (on desktops) then clicking on the Signature button, or by going to Settings and the Signature option if you’re using a mobile phone.
- On desktop go to the Select signature to edit section and select the signature you want to amend, then make your changes in the Edit signature
On mobile, simply overtype the signature that’s on the screen beneath the appropriate email account name.
How to add a logo, photo or social media icons to your email signature in Outlook
A picture in your signature attracts the eye and gives you an opportunity to highlight important information. However, don’t rely solely on images for your signature as some email clients may not display them.
Businesses often include their logo, a photo of the individual and/or icons for their social accounts (eg LinkedIn, Instagram, YouTube).
Images can only be added to your Outlook signatures on your desktop, not on your mobile phone.
- Open a new email and click on the Signature button in the Message
- Opt to create a new signature or edit an existing one.
- Click on the Insert image icon:

- Browse to find the right image and click on Insert.
- The image will be added into your signature. You can add text above or below it. Note that you cannot resize the image once it’s in the signature, so this will need to be done before inserting it.
If you want the image to appear side by side with the text, the simplest way to do this is to use tables in Microsoft Word to create the signature. Make sure your table borders are set to No border if you don’t want them to be visible. When you’re happy with it, select the entire table, copy it and paste it into the Edit signature section in Outlook.
Alternatively you can use Microsoft’s signature templates, this gives you a Word document containing various example signatures in tables which you can adapt to your own details, then copy and paste into Outlook.
Server-side automatic email signatures
How to set up server-side signatures in Microsoft Outlook
Settling up server-side signatures is a much simpler way to achieve a consistent signature across your organisation.
You simply set up the signature and it’s automatically appended to all emails regardless of where they are sent from.
There are many advantages to using an email signature management system:
- Consistent, professional signatures automatically applied across your organisation.
- Quick and easy to update signatures for everyone simultaneously.
- More control over the design of the signatures (you can even create custom signatures from scratch in HTML).
- No reliance on the people in your business having the technical capability to manage their own signature.
- Confidence that the signature will appear consistently across various devices and operating systems.
- Ability to schedule signatures for particular time periods, for example to align to specific marketing campaigns, events or seasonal messages.
Exclaimer email management system
There are many different email management systems out there. We have chosen to work with Exclaimer.
![]()
Here’s a quick overview of how their automatic signatures work:
What your email signature should contain
Now you know how to set up your automatic email signatures, what should go in them?
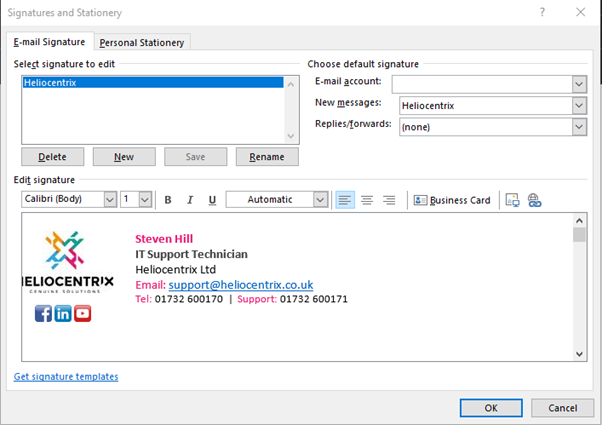
Here is ours as an example:
We’ve kept it quite succinct and simple, including the individual’s contact information, our logo and our social media links.
But there are plenty of other things you could include, for example:
- A photo of the individual.
- Information on your latest marketing initiative.
- A link to your latest news article.
- Customer satisfaction survey.
- Accreditation or award logos.
- Seasonal touches, such as Merry Christmas messages.
Basically, anything which will help to reinforce the expertise and professionalism of your organisation.
How we can help
We’re experts in all aspects of Microsoft 365 and, thanks to our partnership with Exclaimer, we can now extend those services to helping you set up an email management system for your organisation.
To find out more about this and our other services, give us a call on 01732 600 170.