App/system: Microsoft Outlook
Learn: How to set up Outlook out of office responses if you don’t use Microsoft Exchange
Skill level: Beginner
Read time: 4 minutes
Outlook comes with an excellent Automatic replies function which allows you to set up automated out of office responses.
However, this function is only available if you use the Microsoft Exchange email server. You can tell whether you use this or not by opening Outlook and clicking on File in the navigation bar.
If the email address in question has this symbol next to it then it uses the Microsoft Exchange server:

In this case, please follow our instructions for setting up out of office responses using Microsoft Exchange.
If it doesn’t have this symbol, then, unfortunately, you can’t use the Automatic replies function. Instead, you’ll need to use Outlook rules to set up your out of office response.
WARNING! Setting up rules-based out of office replies can lead to hideous loops where your out of office response responds to someone else’s out of office response, which then replies back to yours, and so on ad infinitum until your (or their) mailbox is full. Make sure you include exception criteria to minimise the risk of this happening.
Using rules to set up an out of office response
It’s important to note, that Outlook rules only work when Outlook is open. This means that you need to leave Outlook running while you’re away. Keep in mind that you can only set up rules on the desktop/laptop version of Outlook, not on your phone.
Create your out of office email
- Create a new email in Outlook and enter an appropriate subject and message for your out of office response.
- Select File from the navigation bar then Save As. Give your email a name and, in the Save as type section, select Outlook Template from the drop down list:

3. You can either save the template in the default location (usually c:usersusernameappdataroamingmicrosofttemplates) or choose somewhere else to save it. Click on Save.
Amending your out of office email
When you need a different out of office message, you can either amend the original template, or set up a new one using the instructions above.
Set up a rule to send your out of office email
- Go to File in the navigation bar then select Manage Rules & Alerts.
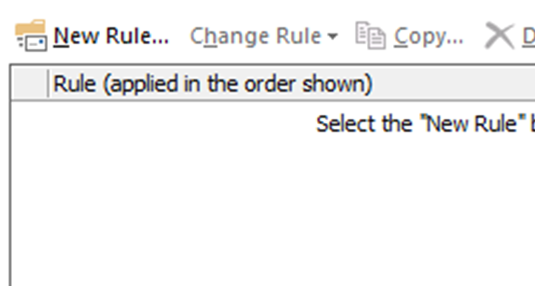
- A new window will pop up. Check that the correct email address is displaying in the Apply changes to this folder box then click on New Rule…:
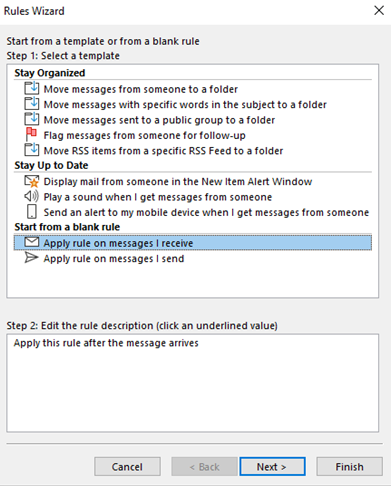
3. Click on Apply rule on messages I receive so it’s highlighted (as shown below), then click on the Next > button.
4. You move to a new window:
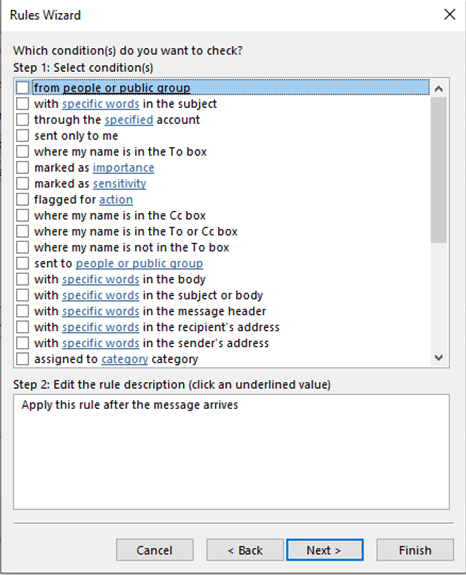
5. Assuming you want the out of office response to go to everyone who emails you, leave these options unticked and click on Next > and click Yes when asked if you want to apply the rule to all messages. If you want to set conditions for who should or shouldn’t receive your out of office response, then complete this window as appropriate before clicking on Next >.
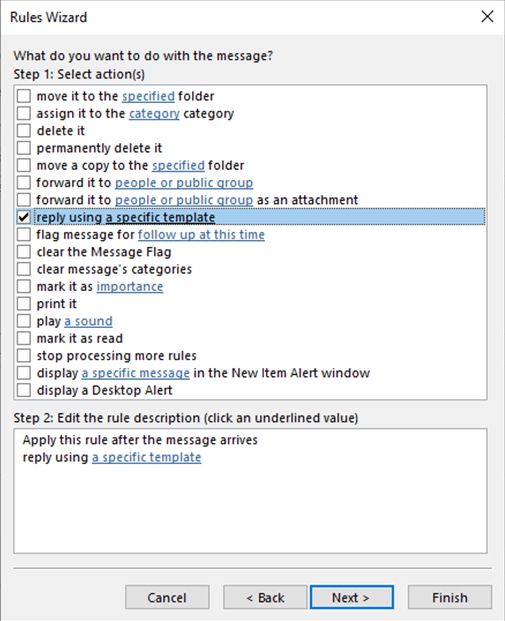
6. In the What do you want to do with the message window, tick the reply using a specific template option under Step 1, then under Step 2 click on a specific template.
- From the next pop up window select User Templates in File System using the drop down options.
- Next, select the template you created, click on Open and then Next >.
- You then have the option to set any exceptions to this rule. This is an important step to avoid never-ending ‘loops’ caused by out of office responses replying to each other. The following exceptions can be useful in minimising the risk of this:
• “except if it is an automatic reply” – setting this exception will block most, though not all, auto reply loops.
• “except if the subject contains specific words” – you can specify words or phrases such as “auto”, “automatic reply” or “out of office”, which are commonly used in out of office subject lines.
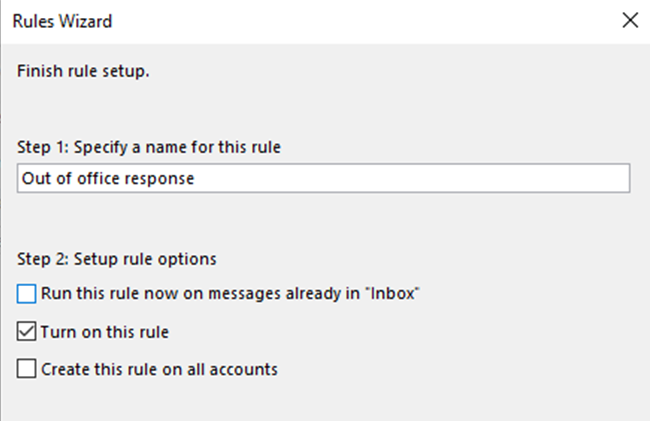
• “except if the body contains specific words” – again specifying words commonly found in out of office response emails. - Finally, give your rule a name. Note that the Turn on this rule tick box is ticked by default. If you don’t want the rule to run straight away, untick the box. Click on Finish to save your rule.
How to turn your Outlook out of office rule on and off
- Go to File in Outlook’s main navigation and select Manager Rules & Alerts.
- Under the E-mail Rules tab you should see your out of office rule listed:
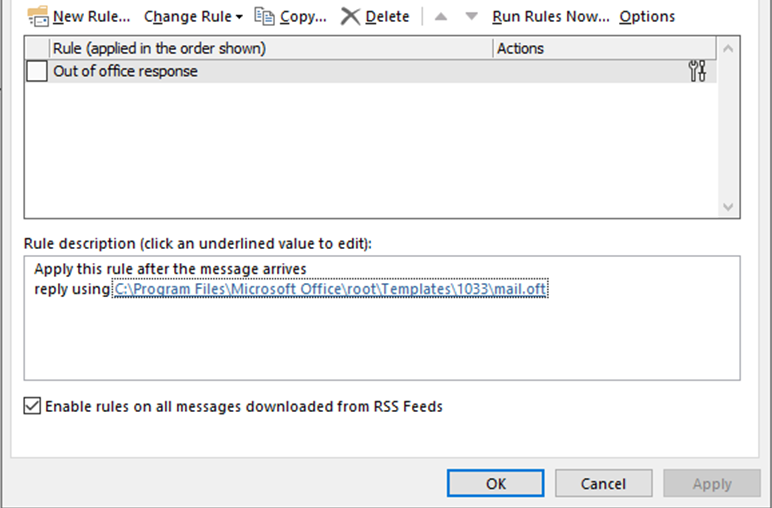
3. Simply tick the box to the left of your rule and select OK to turn it on. Untick the box and click on OK to turn it off.
Make out of office easier with Microsoft Exchange
Using the Microsoft Exchange server to host your emails offers a raft of benefits, including easier out of office management, without the need to keep Outlook running.
Contact us to find out more about Microsoft Exchange services for businesses.
You can also read our guide on how to set up out of office responses using Microsoft Exchange.