Microsoft Teams has become the central hub for communication and collaboration for many organisations — yet most people still only use a small part of what it can actually do. In Tech Talk Episode 7, we covered the 10 most useful Teams features that help you work smarter, stay organised, and avoid unnecessary distractions.
Don’t want to read this? Prefer to watch instead? Watch the full Tech Talk Episode 7
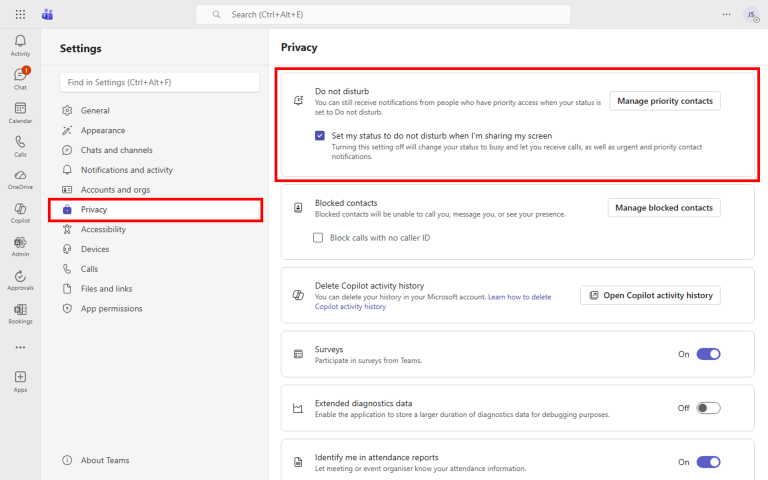
1. Use Do Not Disturb — and Priority Contacts — properly
Nothing derails a presentation faster than a notification popping up mid-screen share. Teams can automatically switch you to Do Not Disturb when you’re sharing your screen, so you never have to remember to set it yourself. And if you’re worried about missing something genuinely urgent, you can add priority contacts — a short list of key people who can still reach you even when DND is on.
How to set this up
- Click the “three dots (…)” next to your profile picture at the top right
- Go to “Settings” > “Privacy”
- Tick “Set my status to do not disturb when I’m sharing my screen”
- Click “Manage priority contacts” to add the key people who can still reach you during Do Not Disturb

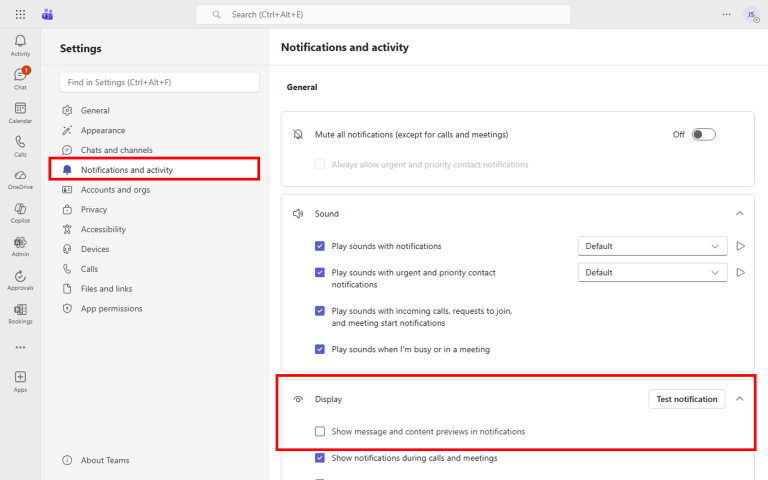
2. Turn off message previews
When you’re sharing your screen on a call, or showing a colleague something, message previews can flash up confidential or embarrassing content for everyone to see. Turning off previews means you’ll still get notified that a message has arrived, but the actual text won’t appear on screen. It’s a small change that avoids awkward moments.
How to set this up
- Click the “three dots (…)” next to your profile picture
- Go to “Settings” > “Notifications and activity”
- Scroll down to the “Display” section
- Untick “Show message and content previews in notifications”
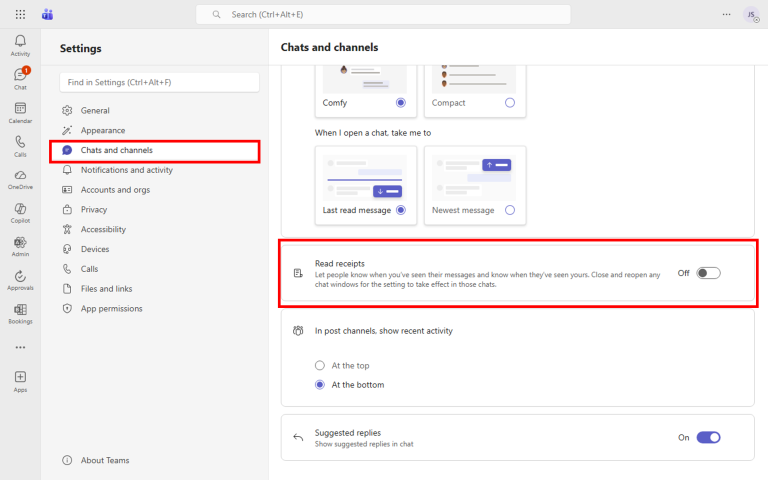
3. Disable read receipts
Read receipts create an unspoken pressure to reply immediately — the other person can see you’ve read their message, so now you feel obligated to respond straight away. Turning them off lets you read messages in your own time and reply when you’re actually ready, without anyone feeling ignored.
How to set this up
- Click the “three dots (…)” next to your profile picture
- Go to “Settings” > “Chats and channels”
- Find the “Read receipts” toggle
- Switch it “Off”
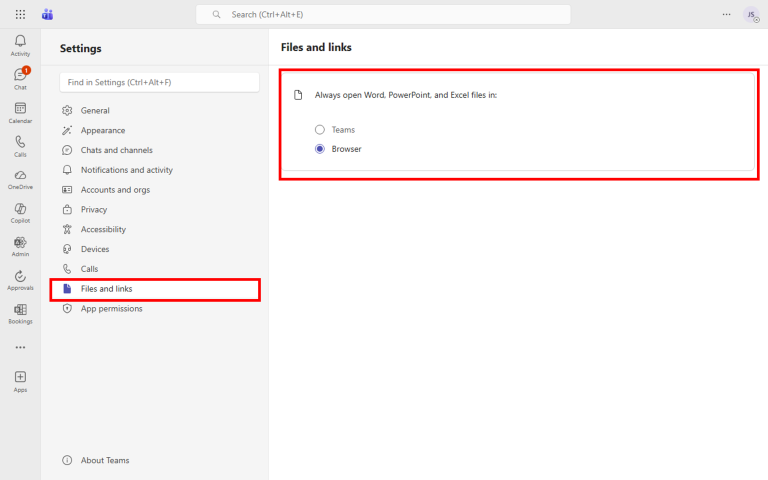
4. Open files in your preferred interface
By default, Teams opens Word, Excel, and PowerPoint files inside its own built-in editor, which is more limited than the full desktop apps. If you find yourself constantly clicking “Open in Desktop App” every single time, you can change the default so files always open in the desktop app (or browser) automatically.
How to set this up
- Click the “three dots (…)” next to your profile picture
2. Go to “Settings” > “Files and links”
3. Under “Always open Word, PowerPoint, and Excel files in”, select “Desktop app” (or “Browser” if you prefer)
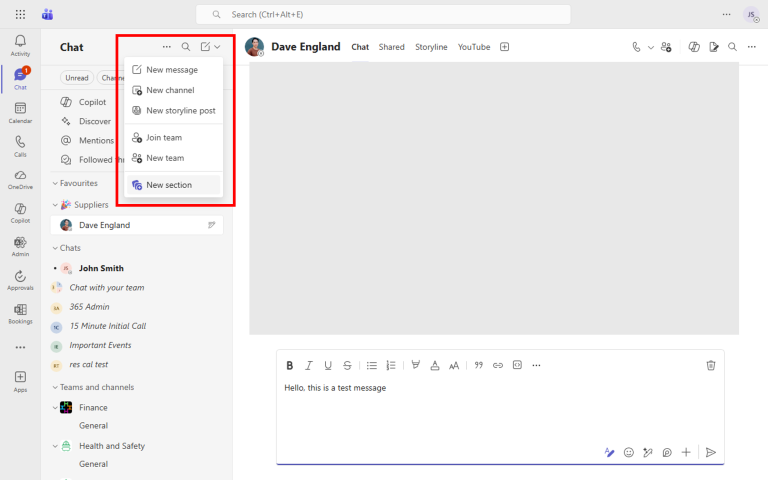
5. Organise your chats with sections
Once you’ve got more than a handful of active chats, the list quickly becomes overwhelming. Sections let you group chats by client, team, project, or however makes sense for you — so instead of scrolling through a long flat list, you can jump straight to the right group.
How to set this up
- In the Chat pane on the left, click the “down arrow” next to the new message button (top right of the chat list)
- Select “New section”
- Give your section a name (e.g. “Clients”, “Projects”, “Internal”)
- Drag and drop chats into your new sections, or right-click a chat and choose “Move to”
6. Schedule messages
Just because you’re working at 10pm doesn’t mean your colleague needs a notification at 10pm. Scheduled messages let you write a message now but have it delivered at a more appropriate time — great for respecting working hours, different time zones, or making sure an important message lands when people are actually at their desks.
How to set this up
- Type your message in a chat as normal
- Instead of clicking “Send”, right-click (or long-press) the “Send” button
- Choose “Schedule send”
- Pick a date and time, then click “Send at scheduled time”

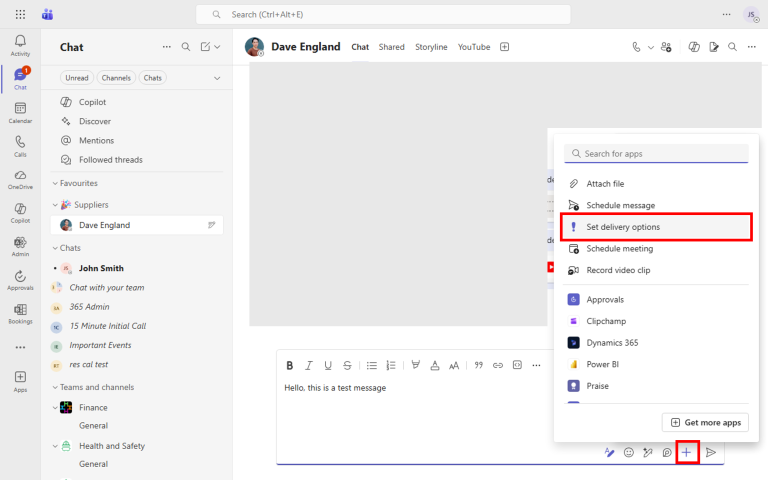
7. Use priority and urgent messages sparingly
Sometimes a message genuinely can’t wait. Marking a message as “Important” flags it with a red exclamation mark so it stands out. Marking it as “Urgent” goes further — Teams will notify the recipient every 2 minutes for 20 minutes until they read it. Use this sparingly, though — if everything is urgent, nothing is.
How to set this up
- In the compose box, click the “Show formatting options” button (or press “Ctrl+Shift+X”)
- Click the “Actions and apps” button (below the compose box)
- Select “Set delivery options”
- Choose “Important” or “Urgent” depending on the priority
8. Use Open Notes (Loop pages)
Every one-to-one or team chat can have a shared Notes page built right in. It’s powered by Loop, so everyone in the chat can edit it in real time. It’s ideal for meeting agendas, shared action items, running task lists, or just keeping track of things you’d otherwise lose in the chat history.
How to set this up
- Open a one-to-one or group chat
- Click the “Open notes” button in the toolbar at the top right of the chat
- A Loop-powered Notes panel will open on the right
- Start typing — you can add tables, checklists, task lists, and more

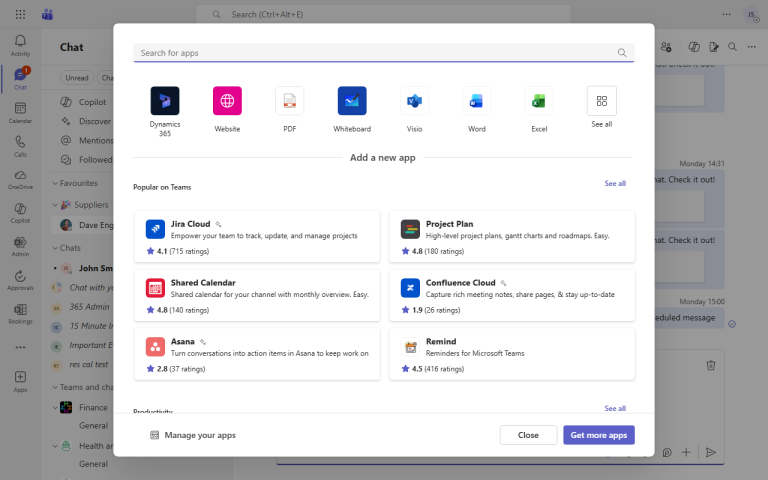
9. Add apps as tabs
Instead of constantly switching between Teams and other tools, you can pin apps directly into any chat or channel as a tab. That means your Trello board, SharePoint list, website, or any other tool is one click away — right where the conversation is happening.
How to set this up
- Open any chat or channel
- Click the “+” (Add a tab) button in the tab bar at the top
- Search for the app you want (e.g. Website, Whiteboard, Word, Excel, Jira, Asana)
- Select the app and follow the prompts to configure it
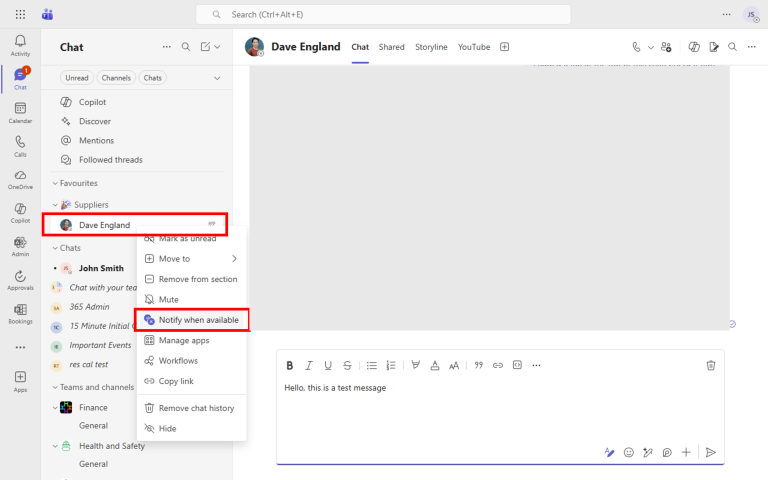
10. Use “Notify When Available”
Need to speak to someone who’s currently offline or in a meeting? Rather than repeatedly checking their status, Teams can watch for you and send you a notification the moment they come back online. It’s one of those features most people don’t know exists, but once you use it, you’ll wonder how you managed without it.
How to set this up
- In the Chat pane on the left, find the person’s chat
- “Right-click” on their name in the chat list
- Select “Notify when available”
- Teams will send you a notification the next time that person comes online