The use of Display Screen Equipment (DSE) has become an integral part of many jobs in today’s digital age. However, prolonged use can lead to health issues, emphasising the importance of working safely with such equipment. The Health and Safety (Display Screen Equipment) Regulations in the UK provide clear guidelines for employers and employees alike, ensuring a safe and healthy work environment.

Important Note: This blog post offers a condensed overview of the guidelines for working safely with Display Screen Equipment. For the most comprehensive and updated information, it’s always best to refer directly to the original source at the Health and Safety Executive’s website

The Legal Framework and Who it Applies To

The Health and Safety (Display Screen Equipment) Regulations apply to workers who use DSE, such as PCs, laptops, tablets, and smartphones, daily for an hour or more continuously. These workers are described as ‘DSE users’. The regulations do not apply to workers who use DSE infrequently or for a short time.

Workstation Assessment: A Vital Step

If workers use DSE daily as part of their normal work, employers must conduct a workstation assessment. This assessment includes evaluating the entire workstation, including equipment, furniture, and work conditions, the job being done, and any special requirements of a staff member. Where risks are identified, steps must be taken to mitigate them.

You can find a copy of the Workstation Assessment template here

A man sitting at a desk looking at a computer monitor and smiling.

The Importance of Breaks in the Work Routine

The law mandates employers to plan work routines in such a way that there are breaks or changes of activity for DSE users. The frequency and duration of these breaks can depend on the nature of the work. However, it is generally better to take short breaks often, rather than longer ones less frequently. For instance, 5 to 10 minutes every hour is more beneficial than 20 minutes every two hours.

Eyes and Eyesight Testing

Prolonged DSE work does not cause permanent damage to eyes, but it can lead to tired eyes, discomfort, temporary short-sightedness, and headaches. Therefore, the law stipulates that employers must arrange an eye test for DSE users if they request one and provide glasses if needed specifically for DSE use.A pair of glasses and contact lenses placed on a opticians eye testing board where the letters get smaller and smaller as you look down the board.

Health and Safety Training for DSE Users

Employers must provide health and safety training for DSE users. This training should cover the risks involved in DSE work and how to avoid them through safe working practices. The training should include aspects like good posture, adjusting chairs and other furniture, arranging desk space, adjusting screens and lighting, taking breaks, and conducting risk assessments.

Conclusion

Safeguarding health while working with Display Screen Equipment is a shared responsibility between employers and employees. By adhering to regulations and best practices, we can ensure a safer and healthier digital workspace.

Sources:

Working safely with display screen equipment: Overview – HSE

Introduction

In the highly competitive business landscape, the ability to boost business productivity is essential for success. Companies must continuously seek innovative ways to enhance efficiency, optimize operations, and ultimately, increase profits. With the rapid growth of technology and evolving workforce dynamics, businesses need to adapt to stay ahead. In this blog post, we’ll explore three powerful strategies to boost business productivity: training, equipment, and software.

Empower Your Workforce with Targeted Training

A skilled and knowledgeable workforce is vital to any successful business, especially when it comes to IT. When employees possess the right technical abilities and expertise, they’re better equipped to tackle challenges, solve problems, and devise innovative solutions. Investing in targeted IT training programs and ongoing learning opportunities enables team members to stay current with industry trends, best practices, and emerging technologies. This, in turn, will enhance their confidence, job satisfaction, and ability to boost business productivity.

Effective IT employee training strategies include:

  • Identifying skill gaps in areas such as cybersecurity, and addressing them through targeted IT training initiatives
  • Encouraging self-paced learning and offering access to online courses and certifications in relevant technologies and platforms
  • Providing cross-functional IT training to foster collaboration and a comprehensive understanding of various business processes and systems

Heliocentrix is proud to offer a number of solutions for Simulations and Bespoke Training, and Cyber Awareness Training.

Invest in State-of-the-Art Equipment for Enhanced Efficiency

Outdated or poorly maintained equipment can impede productivity and contribute to increased costs due to downtime and inefficiencies. Investing in modern, reliable equipment can significantly elevate overall productivity and ensure that employees have the tools required to excel.

Steps to optimize equipment include:

  • Regularly assessing the condition of equipment and machinery and upgrading or replacing as necessary
  • Ensuring proper maintenance schedules are followed to minimize downtime
  • Investing in ergonomic office furniture and equipment to reduce employee fatigue and improve comfort

Boost Business Productivity with A HP X360 laptop docked with a Philips Ultrawide monitor

If you are thinking of upgrading some of your equipment, see the solution we now recommend to all of our clients.

Harness the Power of Cutting-Edge Software Solutions

In today’s digital era, businesses heavily rely on software solutions to manage various aspects of their operations. The appropriate software can streamline processes, automate tasks, and improve collaboration among team members.

To maximize productivity, businesses should:

  • Evaluate their current software solutions and identify areas needing improvements or upgrades
  • Research and invest in software solutions aligned with the company’s goals and objectives
  • Train employees on effectively using the software to enhance their productivity

The beauty of custom software is that it can be developed to serve whatever requirements you have. Click here to find out more. 

Conclusion

To boost business productivity, it’s crucial for companies to focus on training, equipment, and software, creating a more efficient and effective working environment. However, managing these improvements can be challenging, especially for small and medium-sized enterprises with limited resources.

Partnering with a Managed Service Provider (MSP) can help businesses address these challenges and further boost business productivity. MSPs provide expert advice on the best technology solutions, offer proactive maintenance and support, and ensure that your employees have the necessary training and resources to make the most of the improvements. By leveraging the expertise of an MSP, businesses can not only enhance productivity but also gain a competitive edge in the market.

Ready to boost business productivity?

Contact Heliocentrix today to discuss how our IT solutions can help you excel.

Find out how we partnered with the award winning Sevenoaks Town Council to provide them with the IT systems and support to match their ambitions.

Introduction


In today’s interconnected world, even the most robust and well-maintained software can be compromised by cyber attacks that target supply chain dependencies. These attacks exploit vulnerabilities in third-party components to infiltrate a wide range of systems and can cause significant damage to businesses and their reputation. In this blog post, we will explain the concept of supply chain cyber attacks, reference the infamous SolarWinds attack of 2020, and discuss the ongoing 3CX situation. We will then emphasize the importance of managing IT effectively and partnering with a managed service provider (MSP) to help safeguard your business from these threats.

Cyber Security


Understanding Supply Chain Cyber Attacks


A supply chain cyber attack occurs when cybercriminals exploit vulnerabilities in one component of a software supply chain to compromise the entire system. Software applications often rely on multiple third-party libraries or components to function correctly. If one of these components becomes compromised, the attackers can potentially gain access to all systems that rely on it. We are finding more that attackers will specifically target these dependencies in an effort to reach all users of their software.


The SolarWinds Attack of 2020


The SolarWinds attack in 2020 is a prime example of a supply chain cyber attack. In this incident, cybercriminals targeted the SolarWinds Orion Platform, a widely used IT management and monitoring solution. By injecting malicious code into one of the software’s updates, the attackers were able to compromise numerous government and private organizations. This sophisticated attack demonstrated the potential reach and impact of supply chain cyber attacks.


The Ongoing 3CX Situation


Today we have had another incident where the 3CX phone system has been compromised by a supply chain attack. While it is early days the reports suggest that the attackers were able to infect a dependency of the phone system which was then passed on to all users of their desktop software. Due to advances in security monitoring it would appear that the impact of this is far lower than it could have been.


What steps can you take


Every piece of software you have on your machines adds to your risk. We get almost daily notifications of new security vulnerabilities affecting our clients. To reduce your risk you can:

  1. Uninstall any software you do not need
  2. Update software when updates become available


Manage IT, Don’t Let IT Manage You


Now more than ever, it is crucial for businesses to take control of their IT infrastructure and actively manage potential risks. This involves keeping software up-to-date, regularly reviewing third-party dependencies, and investing in employee education to ensure they are aware of the latest threats and best practices.


Partnering with a managed service provider (MSP) can significantly improve your company’s cybersecurity posture and help you navigate the complexities of today’s digital landscape. MSPs can offer a range of services that help protect your business from supply chain cyber attacks, including:


  1. Secure Configuration: Best practice changes all the time on how best to configure computers to reduce the risks of a serious breach. MSPs can assist in implementing this and keeping it up to date.
  2. Vulnerability assessments and management: MSPs can identify and address vulnerabilities in your software and third-party dependencies, reducing the risk of exploitation.
  3. Patch management: MSPs can ensure that your software and third-party components are regularly updated and patched, minimizing the likelihood of a successful cyber attack.
  4. Security awareness training: MSPs can provide ongoing training for your employees, keeping them informed about the latest threats and how to safeguard your business.
  5. 24/7 monitoring and incident response: MSPs can offer round-the-clock monitoring and swift response to potential threats, allowing you to focus on your core business operations with peace of mind.


Conclusion


Supply chain cyber attacks, such as the SolarWinds incident and the ongoing 3CX situation, highlight the need for businesses to take control of their IT infrastructure and proactively manage potential risks. Partnering with a managed service provider (MSP) can help you stay one step ahead of these threats, ensuring your business remains secure and resilient in an ever-evolving digital landscape. By taking a proactive approach to IT management, you can focus on what matters most—growing and nurturing your business—while knowing that your technology is in capable hands.


Heliocentrix can provide robust security setups for your business. To find out more about the services we offer click here!

The world has come a long way in terms of technological advancements, and the rapid digital transformation has shifted the global economy into a new paradigm. Today, regardless of their industry, every business is a technology business. This may seem like a bold statement, but let’s delve into the key points that support this notion.

Technology Business

1. Ubiquitous Internet Access

The widespread availability of internet access has changed the way people interact, communicate, and consume information. The internet has become an integral part of our daily lives, and businesses need to adapt to this new reality. With websites, social media platforms, and online advertising, businesses now have numerous opportunities to reach customers and build their brands in the digital world.

2. E-commerce and Online Presence:

The rise of e-commerce platforms has made it possible for businesses to sell their products and services online, reaching customers beyond their local market. The online shopping trend shows no signs of slowing down, and businesses need to establish an online presence to remain competitive. This necessitates an investment in technology, from website development to online payment processing systems.

3. Data-driven Decision-making:

Technology has given businesses access to massive amounts of data that can be used to gain insights, inform strategies, and drive decision-making. By leveraging data analytics and business intelligence tools, companies can make more informed decisions, improve efficiency, and reduce costs. In this way, technology has become an essential component of business strategy, regardless of the industry.

4. Automation and Efficiency:

Businesses today rely on technology to automate repetitive tasks, streamline processes, and increase efficiency. From manufacturing to customer service, technology has enabled businesses to do more with less, reducing costs and freeing up resources for more strategic initiatives. Automation technologies like robotic process automation (RPA) and artificial intelligence (AI) have transformed industries, making technology an indispensable part of business operations.

5. Collaboration and Remote Work:

The COVID-19 pandemic accelerated the adoption of remote work and forced businesses to find new ways to collaborate effectively. Technology has played a crucial role in enabling remote work and facilitating collaboration among team members. With communication tools, project management software, and cloud-based solutions, technology has become a vital enabler of the modern, flexible workplace.

Remote working

Embracing Technology for Growth and Productivity

By recognizing that every business is a technology business, companies can embrace digital transformation and leverage technology to drive productivity and growth. As the world becomes increasingly interconnected and competitive, businesses that focus on technology will be better positioned to adapt, innovate, and thrive. This means investing in the right tools, adopting a digital mindset, and continually seeking ways to optimize operations through the use of technology. By doing so, businesses can unlock their full potential and ensure long-term success in the digital age.

Make your business a technology business

At Heliocentrix, our mission is to help businesses like yours unlock their full potential by embracing technology and digital transformation. With our expertise in the latest tools, strategies, and trends, we can guide you on the path to greater efficiency, productivity, and growth.

Don’t let the digital revolution pass you by. Contact us today for a free consultation and discover how we can help you more effectively use technology to propel your business forward in this competitive landscape. Click the “Get In Touch” button below to get started.

Discover how we helped this London based capital raising firm and investment consultancy harness the power of technology to help their business.

Most office workers have now been using MS teams with its video conferencing and chat functionality for some time. However, many of our clients are still only familiar with a fraction of what Teams can do. Have you got to grips with the webinar function and what it can do for your business yet?

If not, read on …

Expand your communication with your teams and clients

The webinar functionality in Microsoft Teams enables you to organise webinars for up to 10,000 participants, therefore webinars are an excellent way to share your message with a large number of people anywhere in the world.

In contrast to a standard Teams video call, a webinar is an online broadcast where you can allocate a presenter role to specific invitees and determine the level of interactivity you need to communicate effectively. This could be a simple presentation (more like a broadcast) or a more interactive session with different levels of audience participation.

Webinars are increasingly used to share important information within businesses, engage with prospective purchasers or provide support services to existing clients.

Businessman working on laptop.

Setting up a webinar in Microsoft Teams

If you use Microsoft Teams then you already have its webinar functionality at your fingertips.

The Teams webinar utility provides you with a customisable registration process. Depending on what you need, you can choose Everyone to allow anonymous users to join or stick to Everyone in the organisation, allowing only users within your organisation to register.

Teams will make things easy for you by providing custom registration pages and allowing you to create attendee emails.

Microsoft Teams webinar attendee limit

As with any meeting, it’s important to know the maximum number of people you can accommodate.

You can register up to 1,000 attendees for a fully interactive webinar and this function is available to users on all Microsoft license plans. For those with a Microsoft Enterprise license, you can also host “Live Events” with up to 10,000 attendees, who will have a view-only experience.

If you already have an enterprise license, Microsoft will keep things simple for you  by seamlessly scaling up your webinar once you reach the 1,000 attendee limit. More attendees will be able to join, and will join in view-only mode, up to a limit of 10,000 attendees. (NB: Microsoft had increased the limit to 20,000 during the pandemic, yet have announced that this will drop back down to 10,000 on 31 December 2022). In addition to general attendees, your webinar can include multiple presenters, as chosen by the webinar organiser.

Registration screen

Host a webinar in Microsoft Teams

When it comes to hosting and delivering your webinar, you have a suite of services within Teams to assist you.

You can use the standard Teams presentation option (“Presenter View”) and add in the functionality of PowerPoint Live. This organises your screen so you can see your notes, audience, upcoming slides and chat panel, all in one view.

The chat window can be used to encourage interaction, particularly helpful if you choose to mute attendees for some or all of the webinar. Chat can also be employed to create polls or surveys to launch during your webinar and seek real-time feedback.

The usual Teams reactions are available, allowing attendees to share emojis on screen or raise their virtual hand to get your attention.

Microsoft Teams webinar
Image courtesy of Microsoft.

Using the Presenter modes in Microsoft Teams webinar

As well as the more standard way of presenting Powerpoint slides, you can also use presenter modes to overlay your image on your slides. You can choose between StandoutSide-by-side, or Reporter layouts in a Teams webinar.

Microsoft Teams presenter mode
Standout presenter mode; image courtesy of Microsoft.

Following up after your event

Once you’ve completed your event, you want to make the most of all the contacts you’ve made, particularly if it was an external webinar for prospects or clients.

The Teams webinar function allows you to produce an attendee report, so you can feed this into your CRM application to manage your post-event follow up activity. If you use Microsoft’s Dynamics 365 marketing capability, your attendee information can feed directly into this, providing further opportunities to build engagement and increase conversion.

Businesswoman working at laptop.

Want to find out more about using Microsoft Teams webinars to communicate professionally with the right audience?

Call our team of friendly Microsoft experts, who will be happy to help.

Contact: 01732 600 170.

User logging on to website with the aid of an authenticator app

Below is a quick access directory for all of our ‘How To’ guides on setting up multi-factor authentication (MFA) for various accounts. If you don’t know what MFA is or why it’s important, check out our What is MFA? article for a detailed explanation.

Continue your cyber security journey

MFA is a critical part of securing your personal and business data, but it’s by no means the only step you need to take.

If you’re concerned about IT security for your business, get in touch with our friendly team to find out more. Call 01732 600 170 or email [email protected].

App/system: Instagram account
Learn: How to set up multi-factor authentication
Skill level: Beginner
Read time: 3 minutes

Do you or your employees use Instagram for personal or business activities? If yes, have you considered the security vulnerabilities this opens up for your business?

Cyber attacks are estimated to cost an average of £4200 per business. From July 2021 to July 2022, 39% of UK businesses identified a cyber attack against them. By far the most common (83%) was phishing attempts, where hackers try to access employee passwords or other log-in information.

Information above is taken from the UK Cyber Security Breaches Survey 2022.

Why is multi-factor authentication important?

Many of us still use only a basic, password based authentication to access email, Google, Microsoft and social media accounts, despite plenty of evidence that passwords are easily and regularly hacked. Multi-factor Authentication (MFA) takes moments to set up and makes it much harder for hackers to gain access.

Think of your password as the first ‘layer’ of your security. If you add a second ’layer’ this increases the work required to ‘break-in’ and hack the account. Further, this second layer may involve a fingerprint scan, another device or generating a limited-time code and is therefore much harder to steal or falsify than a password. MFA improves account security and better protects you and your organisation from anyone trying to access information they shouldn’t.

Read on for our guide to walk you through setting up MFA for your Instagram account.

Step by Step: Set up MFA for your Instagram Account

You can set up MFA for Instagram on either your mobile or computer and the process for setting it up differs slightly from one to the other.

Setting up MFA on either your computer or mobile device will give you the same options, either SMS (text) or authentication app.

Setting up MFA on your computer

To set up MFA on your computer you first need to go to Instagram and login to your account and follow these steps:

  1. Click on your profile icon in the top right corner of the screen
  2. When the menu appears, click Settings
  3. Using the menu on the left side of the screen, select Privacy and Security
  4. Scroll down and under Two Factor Authentication, click Edit two-factor authentication
  5. Select the option you would like to use and follow the on-screen steps
  6. When you have finished, Instagram will present you with some recovery codes in case your chosen option fails. Write these down and store them somewhere safe.

Setting up MFA on your mobile device

To set up MFA on your mobile device you first need to open your Instagram app and login to your account and follow these steps:

  1. Click on the profile icon in the bottom right-hand corner of the screen
  2. Click on the three horizontal lines to open the menu
  3. Tap Settings and then Security
  4. Click on Two-factor authentication
  5. Hit the Get Started button and follow the on-screen instructions
  6. When you have finished, Instagram will present you with some recovery codes in case your chosen option fails. Write these down and store them somewhere safe.

Continue your cyber security journey

MFA is a critical part of securing your personal and business data, but it’s by no means the only step you need to take.

If you’re concerned about IT security for your business, get in touch with our friendly team to find out more. Call 01732 600 170 or email [email protected].

In the immortal words of Slade … it’s Chriiiiiistmas!

We are getting into the Christmas spirit and what better way to do it than to delve into some local Christmas traditions? Here are some of our favourite Christmas activities from our home county of Kent.

Wassailing

Did you know that the term wassail comes from the Anglo-Saxon “waes haeil” which means to be whole or healthy? Wassailing is about blessing the apple trees and warding off evil spirits to ensure a good crop in the coming years.

For this reason it’s long been a tradition in Kent and other cider producing areas like Sussex, Somerset and Devon. It involves tying red ribbons to an apple tree and putting cider soaked bread on the branches or pouring cider over the roots of the tree. The wassailers then sing, bang sticks and hit saucepan lids together to make a lot of noise and frighten away the evil spirits. Finally they pass around a bowl of spiced cider.

Here’s a video from the Keston Wassail, revived from the ancient tradition by the Ravensbourne Morris side. The video also includes snippets of their Mumming Play, another Christmas tradition you can read more about below.

Mumming and Hoodening

As mentioned above, Mumming is a Christmas tradition in Kent (and in various other places across the UK) where ancient mumming plays are still performed by folk groups in local pubs around Christmas and New Year, along with lots of drinking and laughter.

The general story of each play is a battle of good and evil with some very recognisable characters like Father Christmas, King George and the Dragon, also a Doctor whose role is to revive the loser of the battle.

The custom of Hoodening, however, is uniquely Kentish. The hoodening horse is a wooden hobby horse mounted on a pole and carried by someone hidden under sack-cloth. Originally farm labourers would travel as teams to carry the hooden horse around the local area, accompanied by music and expecting coins in return for their entertainment. Nowadays, the hooden horse has become incorporated into many Kentish Mummers plays and Morris dances.

Deal Hoodeners
Image credit: H.B.Collis, published in Percy Maylam’s 1909 book The Hooden Horse. This image is now in the public domain.

Santa Specials on the Romney, Hythe and Dymchurch Railway

We’re not quite sure how this one started, but we like the combination of Santa Claus and stream trains. The Romney, Hythe & Dymchurch Railway is a steam train service and tourist attraction that runs along part of the South Kent coast from Hythe along to Dungeness. In December, you can take a return trip from New Romney to Hythe and meet Santa as part of the trip.

The Santa Special service has been running since 1981, offering children a chance to visit Santa’s grotto and making sure there are plenty of mince pies to go around.

Rochester Dickensian Christmas Festival

How better to get into the Christmas spirit by going back to the time of Charles Dickens? It’s usually futile to avoid mentions of A Christmas Carol at this time of year, so why not go back to the Victorian era and really make the most of the Dickensian characters and the dressing up?

This Kent tradition is more recent than others, but we found photographic evidence that it goes back to at least Christmas 2008. One of the main highlights is a candlelit parade of costumed characters that takes place in the early evening, before carol singing at 5pm.

The Council and other partners create a programme of events over the first weekend of December, here’s the festival website for more details. You can also see photo galleries from previous festivals here.

Canterbury Cathedral Girls Choir: breaking a 900 year tradition

In 2014 history was made at Canterbury Cathedral when an all-girls choir was formed and performed their first Christmas Concert. This marked a significant milestone because for over 900 years only men and boys had been able to become choristers at the famous cathedral.

We’re happy to see Canterbury have created a new Christmas tradition of letting girls sing. The girls’ choir currently has 25 members aged between 12 and 18, with students at local secondary schools auditioning to join. They’ve had an exciting 8 years which includes releasing an album of Christmas Carols in 2017 and performing live on BBC and ITV television.

Feed the Reindeer in Ashford

We can’t imagine Christmas without Santa’s reindeer, especially Rudolph. We’re lucky in Kent, as it’s only a short journey for us to meet real life reindeer. The Ashford Reindeer Centre is home to one of the largest private herds of reindeer in the UK.

They look after over 100 of these majestic creatures and also hire them for private parties, Christmas functions, children’s parties and school visits. You can visit and feed the reindeer from mid-November onwards.

Reindeer
Image credit: Ashford Reindeer Centre

Folkestone’s living advent calendar

Another relatively new tradition for Christmas, Folkestone hosts a living advent calendar with a different door in the town opening each night to reveal a surprise live performance.

Started by Jim Jam Arts in 2015, the events are free for all to attend. Different organisations and locations around the town volunteer to host a performance behind their door, each door opens at 6pm on one of the days of December, right up to Christmas Even on the 24th.  Each day, crowds gather at the door for that day and chant a countdown to its opening.

It is a ‘living’ advent calendar in more ways that one – not only are they all live performances, the audience can also get very close to the performers and truly be involved, for a magical experience. What a wonderful, creative and inclusive Christmas tradition.

Folkestone’s living advent calendar
Image credit: Folkestone Living Advent Calendar 2022

Contact Heliocentrix for IT support across Kent.

App/system: Facebook account
Learn: How to set up multi-factor authentication
Skill level: Beginner
Read time: 3 minutes

Do you or your employees use Facebook for business activities? If yes, have you considered the security vulnerabilities this opens up for your business?

Cyber attacks are estimated to cost an average of £4200 per business. From July 2021 to July 2022, 39% of UK businesses identified a cyber attack against them. By far the most common (83%) was phishing attempts, where hackers try to access employee passwords or other log-in information.

Information above is taken from the UK Cyber Security Breaches Survey 2022.

Why is multi-factor authentication important?

Many of us still use only a basic, password based authentication to access email, Google, Microsoft and social media accounts, despite plenty of evidence that passwords are easily and regularly hacked. Multi-factor Authentication (MFA) takes moments to set up and makes it much harder for hackers to gain access.

Think of your password as the first ‘layer’ of your security. If you add a second ’layer’ this increases the work required to ‘break-in’ and hack the account. Further, this second layer may involve a fingerprint scan, another device or generating a limited-time code and is therefore much harder to steal or falsify than a password. MFA improves account security and better protects you and your organisation from anyone trying to access information they shouldn’t.

Read on for our guide to walk you through setting up MFA for your Facebook account.

Step by Step: Set up MFA for your Facebook Account

You can set up MFA for Facebook on either your mobile or computer but the process for setting it up differs slightly from one to the other.

Even if you have set up MFA on your computer, you may still need to set it up on your mobile device. You will have the same options (SMS or authenticator app) whether you set up on your computer or mobile device.

Facebook will only ask you to complete an MFA login if you are logging in from an unknown device.

Setting up MFA on your computer

To set up MFA on your computer you first need to open your browser, go to Facebook and login to your account and follow these steps:

  1. Click the arrow in the top right corner of the screen and select Settings
  2. From the menu on the left side select Security and Login
  3. Scroll down and find the Two-factor authentication section
  4. Click Edit next to Use two-factor authentication
  5. Select the authentication method you wish to set up and follow the on-screen instructions
  6. Click Finish when the authentication methods have been set up

Setting up MFA on your mobile device

To set up MFA on your mobile device you first need to go to your Facebook App, or the Facebook website via your browser, login to your account and follow these steps:

  1. In the bottom left of the screen select the button that looks like three lines
  2. In the menu that opens scroll down and select Settings & Privacy
  3. Under Settings & Privacy select Settings
  4. Find the option Security and Login and tap it
  5. Scroll down and tap Two-factor authentication
  6. Select the Get Started button and follow the on-screen instructions

Continue your cyber security journey

MFA is a critical part of securing your personal and business data, but it’s by no means the only step you need to take.

If you’re concerned about IT security for your business, get in touch with our friendly team to find out more. Call 01732 600 170 or email [email protected].

App/system: Facebook Messenger
Learn: How to set up multi-factor authentication
Skill level: Beginner
Read time: 3 minutes

Do you or your employees use Facebook Messenger for business activities? If yes, have you considered the security vulnerabilities this opens up for your business?

Cyber attacks are estimated to cost an average of £4200 per business. From July 2021 to July 2022, 39% of UK businesses identified a cyber attack against them. By far the most common (83%) was phishing attempts, where hackers try to access employee passwords or other log-in information.

Information above is taken from the UK Cyber Security Breaches Survey 2022.

Why is multi-factor authentication important?

Many of us still use only a basic, password based authentication to access email, Google, Microsoft and social media accounts, despite plenty of evidence that passwords are easily and regularly hacked. Multi-factor Authentication (MFA) takes moments to set up and makes it much harder for hackers to gain access.

Think of your password as the first ‘layer’ of your security. If you add a second ’layer’ this increases the work required to ‘break-in’ and hack the account. Further, this second layer may involve a fingerprint scan, another device or generating a limited-time code and is therefore much harder to steal or falsify than a password. MFA improves account security and better protects you and your organisation from anyone trying to access information they shouldn’t.

Read on for our guide to walk you through setting up MFA for your Facebook Messenger account.

Step by Step: Set up MFA for your Facebook Messenger Account

Facebook Messenger is a standalone app on mobile, separate from the main Facebook app. Therefore, MFA for Facebook Messenger can only be set up on a mobile device by following these steps:

  1. Go to your Facebook Messenger app and login
  2. Tap on your profile picture in the top left corner of the screen
  3. Scroll down in the menu and tap Account Settings
  4. Find the Security section and select Security and Login
  5. Tap the option for Use two-factor authentication
  6. Select the authorisation method you would like to use and follow the on-screen instructions

Continue your cyber security journey

MFA is a critical part of securing your personal and business data, but it’s by no means the only step you need to take.

If you’re concerned about IT security for your business, get in touch with our friendly team to find out more. Call 01732 600 170 or email [email protected].

App/system: LinkedIn account
Learn: How to set up multi-factor authentication
Skill level: Beginner
Read time: 3 minutes

Do you or your employees use LinkedIn for personal or business activities? If yes, have you considered the security vulnerabilities this opens up for your business?

Cyber attacks are estimated to cost an average of £4200 per business. From July 2021 to July 2022, 39% of UK businesses identified a cyber attack against them. By far the most common (83%) was phishing attempts, where hackers try to access employee passwords or other log-in information.

Information above is taken from the UK Cyber Security Breaches Survey 2022.

Why is multi-factor authentication important?

Many of us still use only a basic, password based authentication to access email, Google, Microsoft and social media accounts, despite plenty of evidence that passwords are easily and regularly hacked. Multi-factor Authentication (MFA) takes moments to set up and makes it much harder for hackers to gain access.

Think of your password as the first ‘layer’ of your security. If you add a second ’layer’ this increases the work required to ‘break-in’ and hack the account. Further, this second layer may involve a fingerprint scan, another device or generating a limited-time code and is therefore much harder to steal or falsify than a password. MFA improves account security and better protects you and your organisation from anyone trying to access information they shouldn’t.

Read on for our guide to walk you through setting up MFA for your LinkedIn account.

Step by Step: Set up MFA for your LinkedIn Account

You can set up MFA for LinkedIn on either your mobile or computer and the process for setting it up differs slightly from one to other.

If you set up MFA on one device, you may still need to set it up on others.

Setting up MFA on your computer

You first need to open your browser, head to LinkedIn and log in to your account. Then complete the following steps:

  1. In the top right of the screen, click Me
  2. From the drop-down menu, click Settings & Privacy
  3. Scroll down the to Login and Security section
  4. Find Two-Step Verification and click Change to turn it on
  5. LinkedIn may ask you to verify your identify by entering your password or a one-time verification code
  6. Follow the steps on screen to add the additional authorisations

Setting up MFA on your mobile device

Go to the LinkedIn mobile app and login to your account. Then complete the following steps:

  1. Click on your profile picture in the top left-hand corner of the screen
  2. Click on it again to take you to your profile
  3. In the top right of the screen tap the Cog icon
  4. Select the Privacy tab
  5. Scroll down and find Two-Step Verification
  6. Tap Set Up and follow the on-screen instructions

Continue your cyber security journey

MFA is a critical part of securing your personal and business data, but it’s by no means the only step you need to take.

If you’re concerned about IT security for your business, get in touch with our friendly team to find out more. Call 01732 600 170 or email [email protected].

App/system: eBay account
Learn: How to set up multi-factor authentication
Skill level: Beginner
Read time: 3 minutes

Do you or your employees use eBay for personal or business activities? If yes, have you considered the security vulnerabilities this opens up for your business?

Cyber attacks are estimated to cost an average of £4200 per business. From July 2021 to July 2022, 39% of UK businesses identified a cyber attack against them. By far the most common (83%) was phishing attempts, where hackers try to access employee passwords or other log-in information.

Information above is taken from the UK Cyber Security Breaches Survey 2022.

Why is multi-factor authentication important?

Many of us still use only a basic, password based authentication to access email, Google, Microsoft and social media accounts, despite plenty of evidence that passwords are easily and regularly hacked. Multi-factor Authentication (MFA) takes moments to set up and makes it much harder for hackers to gain access.

Think of your password as the first ‘layer’ of your security. If you add a second ’layer’ this increases the work required to ‘break-in’ and hack the account. Further, this second layer may involve a fingerprint scan, another device or generating a limited-time code and is therefore much harder to steal or falsify than a password. MFA improves account security and better protects you and your organisation from anyone trying to access information they shouldn’t.

Read on for our guide to walk you through setting up MFA for your eBay account.

Step by Step: Set up MFA for your eBay AccountPerson entering security code from mobile device

You can set up MFA for your eBay account either on your computer or mobile device. The process differs slightly for each option.

Setting up MFA on your computer

First you need to open your browser, go to eBay and login to your account. Then complete the following steps:

  1. In the top left corner of the screen click on your name
  2. Select Account Settings from the drop-down menu
  3. Under My eBay, select Sign in and security
  4. Find 2 step verification and click Edit
  5. Select the additional authorisation you would like to set up and follow the on-screen instructions

Setting up MFA on your mobile device

To set up MFA on your mobile device, open the eBay mobile app and login to your account. Then complete the following steps:

  1. Click the three lines in the top left corner to open the menu
  2. Scroll down and select Settings
  3. Tap Sign-in and security
  4. Click 2-step verification
  5. Select the additional authorisation you would like to set up and follow the on-screen instructions

Continue your cyber security journey

MFA is a critical part of securing your personal and business data, but it’s by no means the only step you need to take.

If you’re concerned about IT security for your business, get in touch with our friendly team to find out more. Call 01732 600 170 or email [email protected].

App/system: Apple ID
Learn: How to set up multi-factor authentication
Skill level: Beginner
Read time: 3 minutes

Do you or your employees use Apple ID for email or for other business purposes? If yes, have you considered the security vulnerabilities this opens up for your business?

Cyber attacks are estimated to cost an average of £4200 per business. From July 2021 to July 2022, 39% of UK businesses identified a cyber attack against them. By far the most common (83%) was phishing attempts, where hackers try to access employee passwords or other log-in information.

Information above is taken from the UK Cyber Security Breaches Survey 2022.

Why is multi-factor authentication important?

Many of us still use only a basic, password based authentication to access email, Google, Microsoft and social media accounts, despite plenty of evidence that passwords are easily and regularly hacked. Multi-factor Authentication (MFA) takes moments to set up and makes it much harder for hackers to gain access.

Think of your password as the first ‘layer’ of your security. If you add a second ’layer’ this increases the work required to ‘break-in’ and hack the account. Further, this second layer may involve a fingerprint scan, another device or generating a limited-time code and is therefore much harder to steal or falsify than a password. MFA improves account security and better protects you and your organisation from anyone trying to access information they shouldn’t.

Read on for our guide to walk you through setting up MFA for your Apple ID.

Step by Step: Set up MFA for your Apple ID

You can set up MFA for your Apple ID on either your computer or mobile device. The process differs slightly from one to the other.

Setting up MFA on your computer

The following process applies to OS X El Capital or later.

  1. Head to the apple menu and select System Preferences
  2. Find and click iCloud
  3. Then click Account Details
  4. Go to the Security tab
  5. Find Two-Factor Authentication and turn it on
  6. Follow the onscreen instructions to set up the additional authorisations

Setting up MFA on your mobile device

The following process applies to iOS 10.3 or later

  1. Go to the Settings app
  2. Click on your name to open your profile
  3. Go to Password & Security
  4. Tap Two-Factor Authentication to turn it on
  5. Follow the on-screen instructions to set up the additional authorisations

Continue your cyber security journey

MFA is a critical part of securing your personal and business data, but it’s by no means the only step you need to take.

If you’re concerned about IT security for your business, get in touch with our friendly team to find out more. Call 01732 600 170 or email [email protected].


App/system: PayPal account
Learn: How to set up Multi-factor authentication
Skill level: Beginner
Read time: 3 minutes

Do you or your employees use PayPal to create and manage business payments? If yes, have you considered the security vulnerabilities this opens up for your business?

Cyber attacks are estimated to cost an average of £4200 per business. From July 2021 to July 2022, 39% of UK businesses identified a cyber attack against them. By far the most common (83%) was phishing attempts, where hackers try to access employee passwords or other log-in information.

Information above is taken from the UK Cyber Security Breaches Survey 2022.

Why is multi-factor authentication important?

Many of us still use only a basic, password based authentication to access email, Google, Microsoft and social media accounts, despite plenty of evidence that passwords are easily and regularly hacked. Multi-factor Authentication (MFA) takes moments to set up and makes it much harder for hackers to gain access.

Think of your password as the first ‘layer’ of your security. If you add a second ’layer’ this increases the work required to ‘break-in’ and hack the account. Further, this second layer may involve a fingerprint scan, another device or generating a limited-time code and is therefore much harder to steal or falsify than a password. MFA improves account security and better protects you and your organisation from anyone trying to access information they shouldn’t.

Read on for our guide to walk you through setting up MFA for your PayPal account.

Step by Step: Set up MFA for your PayPal Account

You can set up MFA for your PayPal account on either your computer or mobile device and the process is very similar for both. First you need to access PayPal either via your browser or your mobile app and then follow these steps:

  1. In the top right corner of the screen click on My Account
  2. Select Settings
  3. Find Security or Login and Security
  4. Select the option for 2-Step Verification
  5. Choose the type of authorisation you want to add
  6. Follow the on-screen instructions
  7. Click Done when you are finished

Continue your cyber security journey

MFA is a critical part of securing your personal and business data, but it’s by no means the only step you need to take.

If you’re concerned about IT security for your business, get in touch with our friendly team to find out more. Call 01732 600 170 or email [email protected].

App/system: WhatsApp
Learn: How to set up multi-factor authentication
Skill level: Beginner
Read time: 3 minutes

Do you or your employees use WhatsApp to communicate and share business images and documents? If yes, have you considered the security vulnerabilities this opens up for your business?

Cyber attacks are estimated to cost an average of £4200 per business. From July 2021 to July 2022, 39% of UK businesses identified a cyber attack against them. By far the most common (83%) was phishing attempts, where hackers try to access employee passwords or other log-in information.

Information above is taken from the UK Cyber Security Breaches Survey 2022.

Why is multi-factor authentication important?

Many of us still use only a basic, password based authentication to access email, Google, Microsoft and social media accounts, despite plenty of evidence that passwords are easily and regularly hacked. Multi-factor Authentication (MFA) takes moments to set up and makes it much harder for hackers to gain access.

Think of your password as the first ‘layer’ of your security. If you add a second ’layer’ this increases the work required to ‘break-in’ and hack the account. Further, this second layer may involve a fingerprint scan, another device or generating a limited-time code and is therefore much harder to steal or falsify than a password. MFA improves account security and better protects you and your organisation from anyone trying to access information they shouldn’t.

Read on for our guide to walk you through setting up MFA for your WhatsApp account.

Step by Step: Set up MFA for your WhatsApp Account

First you need to go to the WhatsApp application on your mobile device and complete the following steps:

  1. In the bottom right corner click the Settings cog. If you are on Android, you will need to click on the three dots menu icon in the top right corner of the screen
  2. Click on Account
  3. Tap Two-Step Verification
  4. Click Turn On
  5. Enter a memorable six-digit pin
  6. Provide your email address as a backup if you forget your pin
  7. MFA set up is now complete for your WhatsApp account

You will need to use the six-digit pin if you try to register your account on a new device, if you upgrade your phone for example.

Continue your cyber security journey

MFA is a critical part of securing your personal and business data, but it’s by no means the only step you need to take.

If you’re concerned about IT security for your business, get in touch with our friendly team to find out more. Call 01732 600 170 or email [email protected].

App/system: Yahoo! account
Learn: How to set up multi-factor authentication
Skill level: Beginner
Read time: 3 minutes

Do you or your employees use a Yahoo! account for email or any other purpose? If yes, have you considered the security vulnerabilities this opens up for your business?

Cyber attacks are estimated to cost an average of £4200 per business. From July 2021 to July 2022, 39% of UK businesses identified a cyber attack against them. By far the most common (83%) was phishing attempts, where hackers try to access employee passwords or other log-in information.

Information above is taken from the UK Cyber Security Breaches Survey 2022.

Why is multi-factor authentication important?

Many of us still use only a basic, password based authentication to access email, Google, Microsoft and social media accounts, despite plenty of evidence that passwords are easily and regularly hacked. Multi-factor Authentication (MFA) takes moments to set up and makes it much harder for hackers to gain access.

Think of your password as the first ‘layer’ of your security. If you add a second ’layer’ this increases the work required to ‘break-in’ and hack the account. Further, this second layer may involve a fingerprint scan, another device or generating a limited-time code and is therefore much harder to steal or falsify than a password. MFA improves account security and better protects you and your organisation from anyone trying to access information they shouldn’t.

Read on for our guide to walk you through setting up MFA for your Yahoo! account.

Step by Step: Set up MFA for your Yahoo! Account 

You can set up MFA for your Yahoo! account on either your computer or your mobile device.

Setting up MFA on your computer

You first need to login to your Yahoo! account and then follow the below steps:

  1. In the top right corner of the screen click on your user icon
  2. Then click on Settings
  3. Using the menu on the left-hand side, select Account security
  4. Scroll down and find Two-step verification and click the toggle to turn it on
  5. Follow the on-screen instructions to set up the additional authorisations

Setting up MFA on your mobile device

Open your Yahoo! app and then make sure you are logged in before completing the following steps:

  1. Click the user icon
  2. Then find Settings and then click Manage Accounts
  3. Next, click Account Info on the account you wish to set up MFA
  4. Find Security Settings and tap it
  5. Enter your credentials or use Touch ID or Face ID
  6. Next to Two-step verification hit the toggle to turn it on
  7. Follow the on-screen instructions to set up the additional authorisation

Continue your cyber security journey

MFA is a critical part of securing your personal and business data, but it’s by no means the only step you need to take.

If you’re concerned about IT security for your business, get in touch with our friendly team to find out more. Call 01732 600 170 or email [email protected].

App/system: Twitter account
Learn: How to set up multi-factor authentication
Skill level: Beginner
Read time: 3 minutes

Do you or your employees use Twitter for personal or business related activities? If yes, have you considered the security vulnerabilities this opens up for your business?

Cyber attacks are estimated to cost an average of £4200 per business. From July 2021 to July 2022, 39% of UK businesses identified a cyber attack against them. By far the most common (83%) was phishing attempts, where hackers try to access employee passwords or other log-in information.

Information above is taken from the UK Cyber Security Breaches Survey 2022.

Why is multi-factor authentication important?

Many of us still use only a basic, password based authentication to access email, Google, Microsoft and social media accounts, despite plenty of evidence that passwords are easily and regularly hacked. Multi-factor Authentication (MFA) takes moments to set up and makes it much harder for hackers to gain access.

Think of your password as the first ‘layer’ of your security. If you add a second ’layer’ this increases the work required to ‘break-in’ and hack the account. Further, this second layer may involve a fingerprint scan, another device or generating a limited-time code and is therefore much harder to steal or falsify than a password. MFA improves account security and better protects you and your organisation from anyone trying to access information they shouldn’t.

Read on for our guide to walk you through setting up MFA for your Google account.

Step by Step: Set up MFA for your Twitter Account

You can set up MFA for Twitter on either your mobile or computer and the process for setting it up differs slightly from one to the other.

Setting up MFA on your computer

You first need to open your browser, go to Twitter and login to your account. Then you can complete the following steps:

  1. Click the profile icon in the menu on the left-hand side of the screen
  2. In the menu that appears select Settings and Privacy
  3. Select Account
  4. Find and click Security
  5. Select Login Verification
  6. Hit the Start button
  7. You may be required to re-enter your password
  8. Follow the on-screen instructions to add the additional authorisations

Setting up MFA on your mobile device

Unlock your mobile device, open the Twitter app and login to your account. Then follow the steps below:

  1. In the top left of the screen select the profile icon
  2. On the menu that appears, tap Settings and privacy
  3. Select Account
  4. Then go to Security
  5. Click Login Verification
  6. Use the toggle to turn it on
  7. Follow the on-screen instructions to add the additional authorisations

Continue your cyber security journey

MFA is a critical part of securing your personal and business data, but it’s by no means the only step you need to take.

If you’re concerned about IT security for your business, get in touch with our friendly team to find out more. Call 01732 600 170 or email [email protected].


App/System: Microsoft 365
Learn: How to set up multi-factor authentication
Skill level: Beginner
Read time: 2 minutes

Microsoft

Why does security matter?

Did you know that cyber security breaches in the UK cost an average of £4200 per business over a period of 12 months, according to the UK Cyber Security Survey 2022 report? 39% of businesses identified they were victim to a cyber security attack and it’s possible this number was underreported, as those businesses with lower cyber-security may not even realise they’ve been attacked.

Of those 39%, 83% of the attacks reported were phishing attempts, where hackers try to get access to username and password information. If you don’t have multi-factor authorisation in place, they can use this stolen information to log into your business critical systems and steal your documents and other sensitive information.

What is MFA?

MFA stands for multi-factor authentication, and it is a way to prove more securely who you are when trying to sign into an account online. To find out more about MFA see our article: What is MFA?

Before you can set up MFA

If you are part of an organisation, before you are able to set up MFA for your Microsoft 365 account the system administrator for your organisation will need to have turned on the MFA option.

Administrators can follow this link to find out how to turn on MFA for their organisation. Set up multifactor authentication for users – Microsoft 365 admin | Microsoft Docs

Setting Up MFA

Once your system administrator has turned on MFA you simply need to login into your account. If you are already logged in you will need to logout first, and then log back in.

After you have entered your login credentials you will see an additional screen that advises you need to provide more information.

Microsoft dialogue - More information required

Click Next and you’ll be advised to set up MFA with the free Microsoft authenticator app. If you already have the app set up, you can follow the on-screen prompts to add this account to your app. If you don’t have the app there will be a link to download it, or head to the App Store on your device.

You can also use other authenticator apps; just ensure they are legitimate before you download and install them on your device. Microsoft have now removed the option to use SMS as your MFA as authenticator apps are more secure, so using an authenticator app is your only option.

Once you’ve set up MFA you can see the methods you’re using in the M365 account, under security settings.

MS365 security screen.

Using MFA when you log in

The next time you sign in you will be required to provide the code displayed in your app .

MS365 MFA verification screen

Unless your organisation requires it, you won’t usually have to use MFA every time you sign in. Only when you change your password, sign in on a new device, or into a new app.

Find out more

Want to ensure your business data is secure? Arrange a 15 minute call with an expert to review your IT and security set up.
Speak to one of our experts

We are excited to announce that the team at Heliocentrix is growing and we’ve recently welcomed three new starters to help us maintain our high quality of service for IT Support in Kent.

Aurora, Mark and Edward have joined us to support the day to day workload as our business continues to grow. This allows our more experienced staff to dedicate themselves to the more complex, strategic elements of our projects.

Our friendly team enjoy getting to know our customers and to start off that process for our newest team members, here’s an introduction to each of them.

Aurora

Aurora

Aurora has been interested in IT since she was a toddler, so we’re quite certain she’s keen on working in the industry. She has always liked opening up electrical items and taking them apart to understand how they work. This has naturally evolved into an interest in software and then into a career choice. She comes to Heliocentrix having completed an apprenticeship in a previous role.

She’s always curious and happy to ask questions in order to learn. Whenever any one of us encounters a problem that’s new to Aurora, she is not shy about asking how they how approached it and solved it. She thinks that might mean she comes across as nosey, but we love her enthusiasm.

Outside work we’ve discovered that she loves aerial fitness and dance. She also enjoys weight training and playing video games.

Mark

Mark

Drawn to the role with Heliocentrix by the blend of IT and customer service, Mark joins us after studying IT at university and this is his first IT support role. His interests include data analysis and he’s looking forward to expanding his knowledge in this area.

The fact that there’s always more to learn in IT, because it’s ever changing, really attracts him. He tells us that he’s been interested in IT ever since he started playing computer games on his first computer.

Easy to talk to and always willing to help anyone who needs it, Mark is a great fit in our team and for our customers. When he’s not wrestling with IT, he can often be found gaming and loves F1 racing games. He also hosts his own YouTube and TikTok channels where he channels his creative side to recreate famous film clips using GTA 5 (for any non-gamers: that’s Grant Theft Auto, the car theft video game series).

Edward

Edward

In an interesting career twist, Edward has worked as a chef for a few years and now joins us in an apprenticeship role. He chose to fund himself through IT training, which we think speaks volumes about his passion and commitment, and has joined us as apprentice.

Edward was attracted to the role with Heliocentrix by our friendly and knowledgeable team and says he’s looking forward to learning lots and advancing his career.

There’s also a definite theme emerging, because like Aurora and Mark, Edward has had a passion for technology since he was very young. He’s been a keen observer of the changes in technology over the last twenty years and is fascinated by how far and fast technology has evolved. This is ideal for our clients: we live and breathe IT and we enjoy sharing our knowledge to help their businesses grow.

Are you looking for your next role in IT?

Contact us if you’re interested in joining our team, we are always looking for friendly, talented people.

Everyday hackers and cyber criminals spend their time trying to break into online accounts to access the data held within. The costs of poor data security for businesses can be high: the UK Cyber Security Survey 2022 reports that cyber security breaches cost an average of £4200 per business over a period of 12 months. When only medium and small businesses are considered the average cost jumps to £19400.

Security is important

With this ever-increasing risk, it’s more important than ever to ensure all your employee accounts are as secure as they can be and MFA provides this extra layer of security. Even if passwords are compromised, hackers will find it much harder to get through the extra authentication steps.

As a result of the additional security that MFA provides, many tech organisations are predicting that passwords will be replaced entirely by MFA within the next 5-10 years.

Person entering security code from mobile device

What is MFA?

The clue is in the name, multi-factor authentication. It requires more than one “factor” or “thing” to prove who you are and be able to log in and access your account.

You may also have heard of 2FA or two-factor authentication, which is a form of MFA. When you sign in with 2FA, there are two things or factors needed to log in and access your account. When using MFA there will be two or more factors needed to log in and gain access.

What is a factor?

A factor is a thing that confirms your identity. There are three main types:

  1. Something you know – a username, a password, or a pin number
  2. Something you have – a phone or a secure USB
  3. Something you are – your fingerprint, facial or voice recognition

Until MFA was bought in as the standard, most login procedures only required you to complete one factor, Something you know, which would typically be a username and password.

However, with the increase of online accounts for everything from banking and working to shopping and social media, the number of passwords required increased as well. This meant that people were often using simple passwords and they repeated them across multiple sites. Simpler passwords are easier to break, and if broken in one location they could be used to gain access to multiple accounts across the web. Combine this with easy to guess usernames (usually just an email) and accounts without MFA are no longer as secure.

How does MFA work?

Most online services that use MFA will only require you to use it the first time you login on a device. However, this will depend on the service and your account settings.

When you first log in to your account you will enter your username and password and the service will then usually prompt you to let you know more information is needed to complete the sign in. Depending on the service provider and your account settings, you may be given an option of how to provide an additional factor or you may only have one choice.

If you’re using an authenticator app on your mobile device as your second factor you can open it, find the code and submit it to the site. You will then be granted access to your account.

If a hacker tried to access your account, even if they knew your username and password they would not be granted access without the code from your authenticator app. In addition they wouldn’t be able to see the code unless they physically had your phone in their hand.

Top tip: The key to the security of MFA is having two or more factors from different factor types. Two factors from the same type is not MFA. For example a password and a pin are of the same type, so using both doesn’t significantly increase security.

User logging on to website with the aid of an authenticator app

MFA options

The most common MFA options are:

  • A one-time password (OTP) sent to either your email, mobile phone via SMS or as a phone call
  • A unique code produced by an authentication app such as Microsoft Authenticator

Other options include:

  • A physical key, similar to a USB, that can be inserted into the computer to log in
  • Biometric verification such as fingerprint scanning or facial/voice recognition

How secure is MFA?

Unfortunately, even with the added security benefits of MFA, your accounts still aren’t 100% secure.

For example, if you lose your phone and it lands in the hands of a cybercriminal. With access to your phone they could access your authenticator app or receive one-time passcodes by email or SMS. They would then only need your username and password to access your account. As it is commonplace for devices to store login credentials these days, this still presents a significant security risk.

Top Tip: If you use your phone for MFA, ensure it has a passcode to further protect yourself should the device be lost or stolen.

Hackers have also been known to impersonate banks or other organisations claiming they need you to log in via a “secure site”. They will ask you to enter your email address and password and then provide the MFA code. The secure site will be a fake page used simply to gather your username, password and MFA code and gain access to your real account. Never give your MFA code to another person.

Setting up MFA

We have a number of helpful articles that include step by step guides on how to set up MFA on a variety of platforms and services.

Find out more

Want to ensure your business data is secure? Speak to one of our expert technicians today about how we can help.
Speak to one of our experts

Did you know that David Bowie was part of a Maidstone based band? Before becoming popular, the musical icon was part of Maidstone band The Manish Boys, who performed regularly at the Royal Star Arcade.

It’s surprising what you can find out about a place when you take an interest and start to look a little deeper. Our engineering team do a lot of work on IT support in Maidstone, so we’ve put together some of our favourite discoveries about the county town of Kent.

1. Blue plaque for David Bowie in Royal Star Arcade

David Bowie was playing in Maidstone with The Manish Boys during the mid-60s, not long before he found mainstream success. The Manish Boys released a single in 1964 called ‘I Pity The Fool’ and the publicity shots were taken in Mote Park.

In 2017 a blue plaque was installed at the Royal Star Arcade to commemorate the town’s part in Bowie’s history, to raise awareness of this little known fact.

David Bowie

2. Benjamin Disraeli elected MP for Maidstone

On the theme of notable people, Benjamin Disraeli (later to serve as Prime Minister of the UK, twice) started his political career in Maidstone. He was elected to represent the town in 1837, along with another Conservative candidate, Wyndham Lewis.

He was openly mocked during his first speech as an elected MP, however he did not let this deter him and he later became known as a compelling speaker. He held the office of Chancellor of the Exchequer, become Prime Minister for less than a year in 1868 and finally became Prime Minister again from 1874 to 1880. Disraeli’s government was responsible for great social reform, passing laws to prevent labour exploitation and to recognise trade unions.

3. Battle of Maidstone 1 June 1648

Going back further into British history, Maidstone was the location of one of the most fiercely contested battles of the English Civil War. Maidstone was strongly Royalist and over 10,000 men were gathered at Penenden Health just outside the town. From here they were dispatched to defend nearby Gravesend, Rochester, Dover and of course Maidstone.

2,000 Royalists were left to defend Maidstone and most of them were not trained soldiers. On 1st June 1648 the Parliamentary forces won, killing about 300 Royalists and taking around 1,300 as prisoners.

Battle of Maidstone

Looking at the town today, it barely seems possible it could have been the site of such a bloody battle, but two blue plaques, one in Bank Street and one at Brenchley Gardens, serve as a reminder.

4. Megalithic Maidstone

The Medway Megaliths represent the only known prehistoric megalithic monuments in eastern England, created between the 4th and 3rd millennia BC. There are a handful of sites dotted around the lower valley of the River Medway, each one created from local sarsen stone and soil. Megalithic means ‘large stones’, the best known Megalithic monument in England being Stonehenge.

Only 8 minutes drive from Maidstone town centre you can find ‘Kit’s Coty House’ in an open field that’s accessible to all, where you can see part of the original structure with three upright stones holding up a large capstone. These stones were once the entrance to a long barrow, which is a communal burial site from the Neolithic period.

Kit's Coty House

5. Maidstone’s very own dinosaur

Fossils dated from before the megaliths or any human activity give us an idea of pre-human history and Maidstone has its own share of clues to this time period too. In 1834 the skeleton of an Iguanodon was found in a quarry near Queen’s Road and the dinosaur is depicted on the Maidstone coat of arms.

Iguanodons are thought to have been between 9 and 11 metres long and weighing 4.5 tons, and part of the excitement about the Iguanodon discovery in Maidstone was the sheer size of the fossil fragments. At the time, it was the best articulated specimen of an Iguanodon and this allowed Gideon Mantell to reconstruct the skeleton of this prehistoric animal and to create a new science of palaeontology. You can find out more about the Iguanodon at Maidstone Museum.

6. Award winning space in Mote Park

As is the case for many large public parks in the UK, Mote Park was once a family estate belonging to wealthy landowners. In 1929 the 2nd Viscount Bearsted sold most of the estate to Maidstone Borough Council for £50,000. It is now a well loved part of Maidstone’s green space, providing a beautiful space to get into the great outdoors for local residents.

In 2014 the park was voted by the 2nd in the UK in the Green Flag awards, which allows the public to vote on park maintenance and management for parks across the UK. (This followed an award for 3rd place in the UK in 2013).

Mote Park, Maidstone

7. Audio innovation by Kent Engineering & Foundry

That may not sound very interesting at first, but Kent Engineering & Foundry (KEF) have been manufacturing speakers and sound equipment since 1961. Their innovative research has created a number of world firsts in sound technology including:

  • first loudspeaker manufacturer in the world to use computer in loudspeaker design and measurement
  • first coincident source speaker driver in 1988 called Uni-Q
  • pioneered the use of Metamaterial Absorption Tehcnology (MAT) in 2020

As an indication of their world standing, KEF has published over 50 academic papers, received two Queen’s Awards for Export Achievement, holds over 150 patents and won over 300 awards.

8. UKs largest independent television studios

Based at Vinters Business Park, The Maidstone Studios are the UK’s largest independent television studio complex. Its largest studio can accommodate an audience of 2,000 people and covers 12,000 square feet.

Many well known British television programmes have been produced there including BBC2’s Later… with Jools Holland from 2013 to 2018. Other well known TV programmes made here include Take Me out and long running quiz show, Catchphrase. Some readers may remember Coast to Coast, the daily regional news programme for the South and South-East regions, which was broadcast from the studios in the 1980s.

Originally owned by Television South, the complex was later bought by a consortium of local business people for a cool £4.25 million.

9. Still searching for the oldest pub in Maidstone

Apparently there is fierce debate about which of Maidstone’s existing pubs is the oldest, so we think that’s a good reason to visit the most likely contenders when we’re in the area.

So far we’ve discovered Ye Thirsty Pig, which was thought to be built around 1430 to 1440. It wasn’t always a pub and was first used as a farmhouse, so even though it’s believed to be the third oldest building in the town it probably doesn’t qualify for oldest pub.

Ye Olde Thirsty Pig, Maidstone

Other possibilities include:

  • The Swan, opened at 87 High Street in 1476. It was later demolished and the Brenchley pub opened on the same site.
  • The Fisherman’s Arms in Lower Stone Street. The building dates back to 1430, but it’s not clear when it became a public house.
  • The Royal Albion in Havelock Lane, which has been a tavern since at least 1648 and some believe it’s been a pub for at least 500 years.

We’ve yet to visit them all, so we’ll reserve judgement for now.

If you’re based in or around Maidstone, Heliocentrix can offer comprehensive IT support. Get in touch with our friendly team by calling 01732 600 170 or emailing [email protected].

Whether this fills you with joy or dread, Christmas is now only 45 days away. Which means that Black Friday and Cyber Monday are nearly here.

Black Friday, when many stores offer huge discounts, is on the 25th November this year. It’s swiftly followed by Cyber Monday, which is the online store equivalent. But, to be honest, the two tend to merge into one big long weekend of shopping – online and offline.

It’s a fantastic opportunity to bag some bargains…but it’s also an opportunity for cyber scammers to take advantage of the buying frenzy.

In 2021 £9.4bn was spent by UK consumers over the Black Friday weekend, £5.74bn of which was online (source: statista.com). And criminals are as keen as ever to see a piece of the action.

Black Friday/Cyber Monday scams

Amazing deals by email

“Phishing” emails are one of the most common starting points for online scams. Criminals are experts at making emails look like they come from familiar brands, enticing you to click on links and enter personal details.

Image courtesy of The Defence Works

Phishing emails pretend to be from a well known company (the lure) and usually include some sort of special offer (the bait) with a website link for you to click on (the hook). When you go to the website they might ask you to enter your bank details or other personal information, which, to extend the fishing analogy, is them reeling you in.

In other cases, the link will send you to a dodgy website or download viruses onto your computer.

Order confirmation emails

This is another type of phishing email, where you receive a message which appears to come from a well known brand, such as Amazon, confirming your order.

The tactic is to encourage you to look at it and think “I didn’t order that”, so you click on the link to check at the order details.

‘Account verification’ emails

Yet another kind of phishing email, this time you receive an email that plays on our worries about online security. The message claims that someone tried to hack into your account and will provide a link for you to log in and verify your account information. They’ll use convincing looking branding and logos, to help persuade you to share your account details and password.

Gift Card Scam

Did you know that gift card purchases can’t be tracked? Similar to cash, once the money has been used there’s no way to recover it and hence they’re a popular target for scammers.

An online store will ask you to pay for something using a digital gift card, encouraging you to type in the gift card number and PIN. Once they have this, they can spend your money from your card.

A legitimate online retailer will never instruct you that you must use a gift card to pay for your purchases, so always be wary of any suggestion that you have to pay using a giftcard.

Fake product reviews

How often do you check online reviews to help guide your purchases? With so many of us relying on those reviews, the scammers have now turned their attention to them. Bots can be used to write a swathe of glowing reviews to try and trick consumers into buying poor quality products. Unsurprisingly the number of fake, bot-written reviews tends to boom around Black Friday and Cyber Monday when online sales also tend to peak.

You can usually spot review from bots because they use a lot of technical jargon and often contain awkward and unusual phrases.

How to spot fake product reviews
Image from Review Trackers

Bank notifications

These are emails which purport to come from your bank, letting you know that a purchase can’t be processed.

They then give you a link to click on in order to complete the purchase, which then presents you with a form to enter your payment details.

“Your order has been cancelled” emails

Similar to the bank notifications, these emails pretend to be from the store and tell you that the item you ordered is out of stock. They then provide you with a link to claim your refund by entering your bank details.

Delivery notifications

Recently there’s been a spate of fake emails, texts and messages purporting to be from delivery companies. We suspect that these will increase in volume over the Black Friday/Cyber Monday season

The message will often mention a problem with the delivery and ask you to click on a link to fix it.

This is an example pretending to be from Royal Mail:

Lookalike pages

Some criminals create replicas of popular websites, such as Amazon or eBay, to make users think they’re shopping with a familiar brand.

This is easier than you might think, as they can simply “scrape” the genuine website and recreate it for themselves.

We came across one example where a scammer had registered the domain name www.next.vo.uk. They were cleverly banking on people mistyping the “co.uk” with the letter next to the c on a keyboard. When you visited the fake address it fully replicated the genuine NEXT website, including, of course, the form for you to enter your payment details into.

Malicious browser extensions

Third party browser extensions for use with Google Chrome and Microsoft Edge can also be a source of scams. Because they are listed as add-ons for these well known browsers, it’s easy to be taken in.

According to a report released by Guardio Labs in October 2022, the most recent wave of malicious extensions seem harmless enough, in offering options to customise the colour palette on your device. Cleverly, the initial download and installation has no malicious code, so it’s difficult to detect and has been given the name “Dormant Colours.” It isn’t until later that the extension redirects the user to web pages that then covertly load the malware to your device.

If you install a malicious browser extension it could redirect you to phishing sites so you then fall victim to one of the other scams listed here or even directly steal your personal data. While there’s no evidence of this yet, experts warn that the malware could potentially gather Microsoft 365, Google Workspace or even banking log-in details.

Image from Guardio

Tabnapping

Fraudsters can take advantage of this by “tabnapping” one of your browser tabs and redirecting it to show a fake store log-in screen. The aim is that the user will think they’ve been logged out of the shop and will then enter their username and password to get back in, inadvertently sending that information to the criminals.

The scammers can only access your browser if they have already planted code (malware) on your computer, which can happen if you click on a link in a phishing email, for example.

Using public wifi

When you use a public wifi network, such as in a shop or café, you don’t know how secure it is. Criminals can exploit these networks and intercept any data being transmitted. Which means that if you make online purchases using public wifi networks you’re at risk.

Using your mobile data is more secure, though even that isn’t 100%. It’s better to wait until you’re back home or at work in the safety of your private internet connection.

Messages from family and friends

A common use of a hacked account (such as an email, WhatsApp or Facebook account) is to send out scam messages.

So, you might be on WhatsApp, and you get a message from a friend about this great Black Friday deal at M&S. You click on the link, because it came from a friend so must be legit, and unknowingly end up on a fake website.

It’s important to remember that scammers will use any and every platform they can to steal your personal information and money.

How to shop safely online

Research the shop

If you’re buying from a store for the first time, do some basic research to make sure they’re above board. This could include:

  • Checking their reviews on independent sites such as Trustpilot.
  • Asking family and friends if they’ve used them before.
  • Making sure they have an address and phone number on their website.
  • Reading through their returns policy and other terms and conditions.

Use your credit card or third party providers

Most major credit card providers insure your online purchases. So, even if things do go wrong, you can still get your money back. Check your credit card’s terms and conditions to find out what you’re insured for.

Equally, many third party providers, such as PayPal, will refund you for any fraudulent charges. Plus using them gives you the advantage of not needing to enter you bank details into the store’s website.

Never pay by bank transfer and try to avoid using debit cards.

Install security updates

Don’t put off installing updates on your devices, many of these will include security updates to help protect you from online scams.

Be particularly careful to ensure that your anti-virus and anti-spyware software are up to date, and that you switch on the tools in your browser to block dodgy sites (often these are automatically enabled).

Use secure passwords and two-factor authentication

Make sure all your passwords are:

  • Unique (so if one is stolen it doesn’t give the criminals access to anything else).
  • At least 8 characters long.
  • Not obvious, so avoid family names, pets, birthdays, the word “password”, etc.
  • Fairy random, avoiding numerical sequences (12345) or other easily recognised patterns (qwerty).

The current advice is to choose three random words for each password, as this gives it a good length as well as being ‘unguessable’. You can also add a number and/or special character to it for additional security.

If you have trouble keeping track of your online passwords, there are secure password management applications available and you can also save them to your browser.

Perhaps the most secure thing to do is to write them down in a notebook that you keep somewhere safe at home, so they are never recorded online.

Where possible, set up two-factor authentication (2FA), particularly for your online payments and your email address.

Don’t click on links unless you’re 100% sure

When you receive emails, texts or messages including links, don’t click on them unless you’re absolutely certain they are legitimate. This applies to any emails from stores, your bank, delivery companies, friends, etc.

If you’re at all unsure, contact the sender by phone to ask them about it first.

Scrutinise website addresses

Check website addresses carefully to make sure that a letter hasn’t been switched or missed, or an extra one added. Also, be more cautious of websites which don’t have a “.com” or “.co.uk” suffix.

Note that this isn’t absolutely foolproof as fraudsters who have planted malware on your device can display a legitimate address when you’re actually on a fake website.

Make sure the website is secure

Any website you purchase from should have SSL encryption, which means that the data you send to them is encrypted. Sites with SSL will have a padlock symbol next to their address in your browser. For example, this is how the padlock appears in Microsoft Edge:

Don’t trust sites that ask you for too much information

Online shopping should not require you to enter your mother’s maiden name, your first pet’s name or which primary school you went to. They should only ask you for personal information which is absolutely necessary to complete your purchase.

Don’t create accounts unless you shop there a lot

Minimise your digital footprint by declining the option to set up an account with an online store, unless it’s one that you use frequently.

The fact that a store gives you the option to set up an account isn’t necessarily a bad thing (in fact it’s very convenient if you shop there a lot). But you should avoid setting up unnecessary accounts, otherwise it’s just another company that’s holding your personal data and therefore is at risk of losing it to criminals.

Avoid FOMO

FOMO, or “Fear Of Missing Out”, is a tactic used by many scammers. They want you to feel that you must act now, or miss out on a great deal.

Don’t allow yourself to be played in this way. Always take any purchase decisions slowly and carefully, particularly when they are online.

Trust your instincts

If a website looks not quite right (poor quality photos, bad spelling) or an email doesn’t quite ring true, then trust your instincts.

And use the old adage:

If it seems too good to be true then it probably is.

What to do if you think you’ve been scammed

First of all record the full name of the website address and, if possible, take a screen shot of it. Then close down your internet browser.

If you have entered your payment details then contact your bank and let them know what has happened.

You should then report it to the police, using their Action Fraud reporting form.

If you entered a password, immediately change this password on all the sites you use it on.

If you’ve received a suspicious email but haven’t clicked on anything, you can report it by forwarding the email to the police’s Suspicious Email Reporting Service at [email protected]. Then delete the email.


App/system: Google account
Learn: How to set up two-factor authentication
Skill level: Beginner
Read time: 3 minutes

Do you or your employees use Google for email or to create and share business documents? If yes, have you considered the security vulnerabilities this opens up for your business?

Cyber attacks are estimated to cost an average of £4200 per business. From July 2021 to July 2022, 39% of UK businesses identified a cyber attack against them. By far the most common (83%) was phishing attempts, where hackers try to access employee passwords or other log-in information.

Information above is taken from the UK Cyber Security Breaches Survey 2022.

Why is multi-factor authentication important?

Many of us still use only a basic, password based authentication to access email, Google, Microsoft and social media accounts, despite plenty of evidence that passwords are easily and regularly hacked. Multi-factor Authentication (MFA) takes moments to set up and makes it much harder for hackers to gain access.

Think of your password as the first ‘layer’ of your security. If you add a second ’layer’ this increases the work required to ‘break-in’ and hack the account. Further, this second layer may involve a fingerprint scan, another device or generating a limited-time code and is therefore much harder to steal or falsify than a password. MFA improves account security and better protects you and your organisation from anyone trying to access information they shouldn’t.

Read on for our guide to walk you through setting up MFA for your Google account.

Step by Step: Set up MFA for your Google Account

Tip: Google uses the terms “Two-factor Authentication” and “2-Step Verification” instead of multi-factor authentication, because two-factor authentication is a form of MFA. So once you find the settings for 2-Step Verification, you are in the right place.

  1. Make sure you are logged into your Google Account and open your Google Account page. You can do this here: https://www.google.com/account/about/
  2. From the options on the left-hand side of the screen, click on Security.
    Google Account Security tab
  3. Scroll down to Signing in to Google and click on 2-Step Verification. Google may ask you to log in again to verify that it’s really you that wants to make the changes to your account security.
  4. When the 2-Step Verification screen opens click the GET STARTED button at the bottom of the screen.
  5. The next screen will give you the options for setting up MFA, usually these include:
    1. Google Prompt
    2. Text message or voice call
    3. Authenticator App
  6. If you don’t see all these options click on Show more options. The steps below will take you through how to set up each option (you only need to do one of them).
    Google Account 2 step verification options

Google Prompt

  1. To use this option, you need to be signed into your Google Account on your mobile phone.
  2. The set up screen will show you a list of devices you can use to get security prompts. If your mobile phone is listed, click Continue. (If your mobile phone is not listed click Don’t see your device for instructions on how to sign into Google on your phone.)
  3. Google will now ask you to add a backup option for sending you a security code. Follow the on screen instructions to set up your backup option.

Text message or voice call

  1. Select this option and click Continue.
    Text message or voice call
  2. Enter your mobile phone number and select the correct country code from the drop down menu (for the UK this is +44).
  3. Under How do you want to get codes click either Text message or Phone call.
  4. Click NEXT.
  5. Google will send you a verification code using the method you just selected. On the next screen, enter the code and click NEXT.
  6. On the next screen click TURN ON. You will now have enabled 2-Step Verification.

Authenticator app

  1. Select this option.
  2. If you are already using an authenticator app, open the app on your mobile phone. If you aren’t already using one, open Google Play Store or iOS App Stores on your mobile phone and download Google Authenticator (or another authenticator app).
  3. Click + Set up authenticator and follow the onscreen instructions. You will need to open your authenticator app, set up a new service and scan the QR code shown on your Google set up screen.Set up authenticator app
  4. Enter the 6-digit code shown on your authenticator app and click Verify.

Continue your cyber security journey

MFA is a critical part of securing your personal and business data, but it’s by no means the only step you need to take.

If you’re concerned about IT security for your business, get in touch with our friendly team to find out more. Call 01732 600 170 or email [email protected].

App/system: Microsoft Word
Learn: How to add headings and subheadings to a Word document
Skill level: Beginner
Read time: 2 minutes

If you want to structure and format your document so it looks professional and is consistent with your branding, using the Styles feature in Microsoft Word is an efficient way to do it. Our video and guide below will show you how to add headings and subheadings and make sure different types of heading use the same font and formatting.

  1. Highlight the text you want to turn into a heading or subheading and make sure you are on the Home tab.
    Highlighted text on home tab
  2. In the Styles section of the ribbon, click on the heading level you want. Heading 1 is typically used for document titles. Heading 2 is generally used for subheadings.
    Choosing heading in the Styles section
  3. If you want to customise the text formatting for headings or subheadings (for example, the font, the text size or anything else), highlight the heading text and use the font tools to change the formatting. In the video, we demonstrate how to do this for the subheading.
  4. Move your cursor to Heading 2 in the Styles section and right click. Click Update Heading 2 to Match Selection.
    Update Heading 2 to Match Selection
  5. Word will change the formatting for Heading 2 and any other subheadings where you use the Heading 2 style will automatically be updated.
    Subheadings where you use the Heading 2 style will automatically be updated

Find out more

Could you be getting more from Microsoft 365? We can help with specific systems like M365 and general IT Support to maximise your productivity.
Speak to one of our experts

App/system: Microsoft Word
Learn: How to add a header or footer Word document
Skill level: Beginner
Read time: 1 minute

If you are working with long, multi-page documents you can use headers and footers to display information that you want to keep consistent from page to page, for example document titles, author names, logos and page numbers.

This video will show you how to add a header and footer to your word document.

To add a Header

  1. Go to the Insert tab and click on Header.
  2. The gallery will open and you will see the pre-styled header options. Click on the one you want to use.
    Insert header in Word
  3. Add the text or information you want to appear in the header and click Close Header and Footer.
    Close header and footer In Word

To add a Footer

  1. Go to the Insert tab and click on Footer.
  2. The gallery will open and you will see the pre-styled footer options. Click on the one you want to use.
    Insert footer in Word
  3. Add the text or information you want to appear in the footer and click Close Header and Footer.
    Close header and footer In Word

Find out more

Contact Heliocentrix for more help with getting the most from Microsoft 365. If you need fast, flexible IT Support we have the expertise across our team to deliver it for you.
Speak to one of our experts

Presentations: love them or hate them, they’re here to stay in the business world. Whether you’re a seasoned PowerPoint professional or a beginner there’s always more to learn, especially as new features are always being added for Microsoft 365 subscribers.

What is PowerPoint?

Microsoft PowerPoint helps you to create slideshows for professional presentations. It allows you to easily share information, charts and images. With more of us working remotely and now running fully remote or hybrid meetings, being able to use PowerPoint well has never been more important.

As with most professional software, it can take a long time to get familiar with all the features and handy short-cuts so in this guide we’ll help you to save time while creating even better results.

Did you know that Microsoft was first developed in 1987 for the Mac? It was created by a company called Forethought Inc. and was purchased by Microsoft in 1990. The latest version of Microsoft PowerPoint is available in Microsoft 365 (M365) as both PowerPoint for web and PowerPoint desktop application. This How-To guide is for the M365 version of PowerPoint.

How do I find a feature quickly?

Microsoft has introduced a new feature to Microsoft 365 – the Search bar. It’s designed to save you time, so it’s worth knowing how to use it.

It might be in different places depending on your set-up. Find it:

  • in the Ribbon to the right of all the tab headers
  • above the Ribbon in the red title area
  • using the keyboard short-cut Alt-Q

Type in the function or task you are looking for, for example change handout orientation. The menu will now show you search results for this task, saving you from clicking through all the tabs trying to find the feature. It will also remember features you’ve previously clicked on in the search box so tasks you often perform are listed first and therefore easier to find.

Screenshot by blog author.

How to create or delete slides in PowerPoint?

By using different slide layouts you can break things up by adding image based slides and sub-title slides to keep your audience engaged. Did you know that you can quickly and easily choose the layout you want for each slide from the pre-set options?

Add:

  1. Open the presentation you’re working on.
  2. In the slide thumbnails on the left pane, select the slide you want the new slide to go in after.
  3. Or, go to the Home tab and in the Slides section, select New Slide. This will open a drop-down gallery and you can select the layout you want from the gallery.

Delete:

  1. In the slide thumbnails on the left-hand pane, select the slide you want to delete.
  2. Right click and select Delete Slide from the menu that appears.
  3. To delete more than one slide at once, press and hold Ctrl. In the thumbnail pane on the left, select the slides. Right-click your selection and select Delete Slide.

How to copy a slide in PowerPoint?

If you are creating a number of slides with the same layout or images, it will save you time to copy them instead of creating each one from scratch.

  1. Select the thumbnail of the slide you want to copy. (To select multiple slide thumbnails, press and hold CTRL)
  2. Right click and select Duplicate Slide.

How to make slides portrait in PowerPoint?

This feature is sometimes easy to miss as the default orientation is landscape slides. Here’s how to make them portrait.

  1. Select the Design tab of the toolbar ribbon.
  2. Select Slide Size, towards the far-right end of the toolbar.
  3. Select Custom Slide Size and select the Portrait radio button.

How to change slide shape and size in PowerPoint?

Sometimes you don’t want the usual landscape or portrait slides. This option is especially useful if you’re creating a poster.

  1. Select the Design tab of the toolbar ribbon.
  2. Select Slide Size, towards the far-right end of the toolbar.
  3. Select the option that fits what you need (options are: Standard(4:3 aspect ratio) or Widescreen (16:9) or Custom Slide Size.)

Find out more

Would you like help with any aspect of using Microsoft 365? We are more than happy to help.
Speak to one of our experts

How to add a GIF to PowerPoint?

We all know that adding images helps break up the bullet points and makes a presentation more interesting. Did you know you can go one step further and add a GIF?

  1. Go to the Insert tab and select Pictures.
  2. Select the animated GIF you want to add.
  3. Select Slide Show to see the animated GIF play.

How to add a video to PowerPoint?

If you’ve got a video you’d like to include in your presentation, whether it’s one created by you and you have the file on your laptop or if you only have a link from YouTube.

Go to the Insert tab and select Video from the Media section, and then choose:

  1. This Device: Add a video that’s stored on your computer.
  2. Stock Videos: Choose to purchase a video from a stock library.
  3. Online Videos: Add a video from YouTube or paste in an embed code.

Add video to PowerPoint
Image from https://support.microsoft.com/en-us/office/

How to add (speaker) notes to a PowerPoint presentation?

PowerPoint gives you the option to add speaker notes, that only you as the presenter can see. This can be useful if you’re creating a presentation that a colleague will be giving.

  1. Click in the Notes pane below the slide. (If you don’t see the Notes pane under the slide, try going to View and clicking Notes.)
  2. Type your notes and save as you normally would.
  3. To read your notes: when using Presenter View (note that this is only available if you’re using Microsoft Teams to present or have two monitors), your Notes for each slide appear under the Next slide. Scroll to view all of them if necessary.

How to add a hyperlink in PowerPoint?

The basic way to add a hyperlink is to type (or cut & paste) the address of an existing webpage (e.g. https://heliocentrix.co.uk/ ). The hyperlink is added automatically after press Enter.

To link text, a shape or picture to a website:

  1. Select the text, shape, or picture that you want to use as a hyperlink.
  2. Go to the Insert tab and select Link then Insert Link.
  3. Select Existing File or Web Page, and add the website address.
  4. Text to display: Type the text that you want to appear as hyperlink.
  5. ScreenTip: Type the text that you want to appear when the user hovers over the hyperlink (optional).
  6. Address: If you haven’t already selected a location above, insert the URL for the web site you want to link to.
  7. Select OK.

Find out more

Discover the difference that Microsoft 365 can make to your business. Get in touch to find out more.
Speak to one of our experts

How to curve text in PowerPoint?

Have you ever wondered how some people manage to create text that curves and jumps out of the screen on their presentation? It’s easy to do within PowerPoint if you make use of the WordArt function.

  1. Create the text you want to curve and make sure it’s selected. Click on the Format tab and choose the text style you want.
  2. From the Shape Format tab select Text Effects then Transform. Choose the curve effect you want from the menu that appears.
  3. You can drag the textbox handles and yellow dot to adjust the curve and shape of the text.

Curving text in PowerPoint
Screenshot by blog author.

How to flip an image in PowerPoint?

In order to get exactly the visual impact you’re looking for, you can rotate and also flip pictures, shapes and also text boxes.

  1. Select the item that you want to rotate.
  2. To rotate: select the rotation handle at the top of the object, and then drag in the direction that you want.
  3. To flip an object, go to the Picture Format tab and select Rotate and then Flip Vertical or Flip Horizontal.

How to add footer to PowerPoint slides?

If you want to add references to your slides or any other supplementary information, you can use the Footer setting. You can have different information in the footer for each slide or you can set the footer to be the same for all.

  1. On the Insert tab, click Header & Footer (if you’re using the PowerPoint web application it may be just Footer)
  2. A new dialogue box or side bar will open. Select Footer and type in your footer text to add it to the current slide. Click Apply to All to add this footer to all slides.

How to use subtitles in PowerPoint?

Microsoft have introduced the ability to include real-time, automatic subtitles in your PowerPoint presentations.

Subtitles can be really useful in the following situations:

  • If your audience is deaf or hard of hearing
  • If your audience speaks a different language
  • If your audience is watching remotely with the sound turned off

To access the subtitle functionality: Go to the Slide Show menu and select Subtitle Settings.

See our in depth article: How to use subtitles in PowerPoint for more information.

How to record a PowerPoint?

A new feature for Microsoft 365 has been rolled out just this year, you can now record yourself giving your presentation so others can play it back later.

Select the Record tab and choose the options you require. (If you don’t see the Record tab, you may first need to go to Customize Ribbon and make the Record tab visible.)

  1. When you’re ready, select Record and press the round RECORD button to start.
  2. You can record audio or video narration as you run through your presentation.
  3. Use the onscreen laser, coloured pens, or highlighters and these will be recorded too.
  4. PAUSE the recording as needed or select STOP if you’re done.
  5. Save your presentation.
  6. Click FileExport > Create a Video (or, on the Recording tab of the ribbon, click Export to Video) and follow the on screen prompts.

Find out more

Get the most from Microsoft PowerPoint and other Microsoft 365 apps with our managed IT support.
Speak to one of our experts

How to add music or audio to a PowerPoint?

Note: if you’re using PowerPoint for the web you can play music or sound effects that you’ve added to your slides but you can’t add them from within PowerPoint for web. Make sure you open your presentation from the Desktop Application before you try to add audio/music.

Once you’ve opened the presentation you want to work on:

  1. Go to the Insert tab and select Audio.
  2. Select Audio on My PC.
  3. In the Insert Audio dialog box, select the audio file you want to add.
  4. Select Insert.

If you want to record audio, for example your own narration of your slides then you need to:

  1. Go to the Insert tab and select Audio.
  2. Select Record Audio.
  3. Type in a name for your audio file, select the red dot Record button, and then speak.
  4. Select OK when you are happy with your recording.

How to reduce the file size of a PowerPoint?

PowerPoint files can sometimes be large, especially if you’ve added images and video. To make them easier to store and send, you can use the compression feature to reduce the file size. You need to be using the PowerPoint desktop application to do this.

  1. Open the presentation that contains the audio or video files.
  2. On the File tab, select Info, and then in the Media Size and Performance section, select Compress Media*. (Embedded subtitles and alternate audio tracks are lost in this compression process.)
  3. You can choose the quality of the video, which will determine the size of the video file. Choose a lower quality to create a smaller file size.
  4. To compress pictures in your PowerPoint presentation: select a picture in your document. The Picture Format tab appears.
  5. On the Picture Format tab, in the Adjust group, select Compress Pictures.
  6. Under Compression options you can Apply only to this picture; Delete cropped areas of pictures or set the resolution.

PowerPoint compress picture dialogue box
Image from https://support.microsoft.com/en-us/office/

What is a slide master in PowerPoint?

A slide master is used to add consistency to your colours, fonts, headings, logos, and other styles. It’s a great way to ensure company branding is used consistently on presentations, no matter who creates them.

Go to the View tab and select Slide Master. The master slide is the top slide in the thumbnail pane on the left side of the window. The related layout masters appear just below the slide master (as in this picture from PowerPoint for macOS):

PowerPoint slide master
Image from https://support.microsoft.com/en-us/office/

How to create or modify a slide master in PowerPoint?

  1. Go to the View tab then select Slide Master.
  2. Make the text, colour, and alignment changes you want.
  3. If you want to use a predefined theme, select that first by clicking Themes on the Slide Master Then proceed with selecting ColorsFontsEffects, and Background Styles.
  4. Remember to select Close Master View when you’re finished – it’s easy to forget this step!

How to make a PowerPoint template?

You can create a template PowerPoint template (.potx file) to share slide branding and layouts with colleagues. To create a template you’ll need to modify a slide master and a set of slide layouts. If you’ve not yet read the previous section on How to create and modify master slides in PowerPoint, we recommend you scroll up and read it first.

  1. On the File tab, click Save As or Save a Copy.
  2. In the Save As dialog box, in the Save as type list, choose PowerPoint Template.
  3. When you choose the “template” type, PowerPoint may automatically switch the storage location to the appropriate folder, the Custom Office Templates
  4. In the Save Asdialog box, in the File name box, type a file name for your template, or do nothing to accept the suggested file name.
  5. Select Save.

How to convert my PowerPoint to a PDF?

Not everyone can open PowerPoint files as not everyone has the software. How do you share your presentations with anyone? The answer is to save them as a PDF or XPS file.

  1. Go to the File tab and select Export from the options on the left.
  2. Click the Create PDF/XPS
  3. In the File Name box, enter a name for the file, if you haven’t already.
  4. In the Save as type list, ensure that PDF (*.pdf) is selected.
  5. If you want the file to open in the selected format after saving, select the Open file after publishing check box.
  6. Click Options to set the pages to be printed, to choose whether markup should be printed, and to select output options. Click OK when finished.
  7. Click Publish.

Would you like help with any aspect of using Microsoft 365? Or maybe some support on reliable IT with minimal downtime? Contact us, we’ll be more than happy to help!

Deciding whether an off-the-shelf application or custom build is right for your organisation is a complex question.

You’re unlikely to need bespoke software for every aspect of your business. For example, developing a bespoke video conferencing application would be a poor investment for most companies.

But where you have very specific requirements, a constantly evolving market or a need for an enhanced user experience, made-to-measure could be right for you.

Let’s start with a couple of definitions.

What is bespoke software?

A custom-built application will be created from the “ground up” to your exact specifications.

Custom apps are developed using a range of programming languages, frameworks and tools to create tailored functionality and a user experience which meets your specific requirements.

What is off-the-shelf software?

Also known as COTS (commercial off-the-shelf) these are ready-made applications which are available to everyone.

They serve broad needs (such as word processing software) or more narrow ones (such as room booking applications for hotels). There may be some scope to customise your experience (such as adjusting your menu options in Microsoft Word) however this will be limited.

The advantages of bespoke software

Software developers at work

Fit the software to your business, not your business to the software

The obvious advantage of custom apps is that they are built to your specific requirements.

Inevitably, with any off-the-shelf software, at some point you’ll need to adjust your business processes to how that software is built. To what extent this becomes a problem will vary from business to business – but if the number of compromises are damaging your business’ performance, then custom software might be the answer.

There can be tangible benefits from made-to-measure software. If you’re implementing it to reduce repetitive, administrative tasks, a bespoke solution will eliminate more of them and in exactly the way you need it to, so the cost saving will be greater.

If you’re using it to enhance your customer experience through improved customer relationships or case management, a bespoke system will give you the opportunity to offer a better service in every way you can imagine. And it will result in a unique sales proposition and high customer retention rates.

How we helped HDC

We supported pensions adviser HDC to simplify the process of producing detailed product comparisons for their clients. Each document is between 100 and 150 pages and, when collated manually, this took a large amount of time.

An off-the-shelf solution couldn’t have managed the complex level of detail and numerous algorithms involved in creating the report.

We created a bespoke application which constructs the framework of each report quickly and easily, giving significant administrative cost savings. The consistency which this approach provides also makes it quicker and easier for the advisers to add their bespoke advice to each report.

You don’t pay for what you don’t need

An off-the-shelf system will come with an abundance of functionality – almost certainly more than you need. So, you may find you are paying a significant licence cost and only using a fraction of the software’s capability.

A bespoke solution will be leaner, built to only include the functionality you need. This will also make it a simpler and more intuitive landscape for your users.

You’ll receive more effective support

Assuming that you sign up to a support contract for your bespoke software, that support should be superior in a couple of ways.

Firstly, the technician providing your support service should have an intimate understanding of both your business and how you’re using the software, and therefore be able understand and manage issues more effectively.

Secondly, you will often continue to have access to the individual who developed the application and therefore is able to resolve any issues very quickly.

It is important to consider the support contract with your software developer. It should contain clear agreements and SLAs, and specify these for all areas of support, including security updates, integration updates, hosting and bug fixes. If this isn’t clearly defined and agreed from the outset, then you will not benefit from the superior support which should be possible from a bespoke build.

It will grow with your business

Investing in a bespoke application is often a key part of a growth strategy. Custom software doesn’t just solve the problem you have today (eg reducing costs, speeding processes, enhancing your customer experience), it will grow with your business long-term.

Custom applications are scalable in a way that off-the-shelf packages aren’t. Even with the ubiquitous Microsoft 365, you need to move between different packages as your company expands.

Bespoke software will scale with your business and the only time your application will change is when your requirements change.

It’s your software

This might seem like an obvious point, but if you develop a custom app then any future developments and changes are yours to control and align to your business’ roadmap.

With an off-the-shelf application you’re in the hands of the software company. If they decide to make a change, there’s usually little you can do about it. You will have to adapt your business processes to suit the software.

There’s also a risk that they simply decide to stop supporting the software or go out of business. OK, it’s pretty unlikely that Microsoft will ditch Excel or file for bankruptcy overnight, but this is a real risk with more niche off-the-shelf applications. With a bespoke application you have full control.

The advantages of off-the-shelf software

Microsoft storefront, London

Speedy set up times

When you buy off-the-shelf your software is usually “plug and play”, requiring minimal work to establish it within your business. Training information is likely to be abundant and easy to access for your teams.

A bespoke build will take far longer. You will probably spend weeks (if not months) simply defining your exact requirements from the system, let alone the time needed to actually build it. A custom build is not for the faint hearted!

It’s cheaper (probably)

Generally speaking, an off-the-shelf purchase will be cheaper. This is certainly true in the short term: you can purchase a licence to use an application relatively cheaply and require few resources to implement it.

The cost of implementing a bespoke application will almost certainly be much higher. Aside from the cost of paying a company to carry out this custom development for you, there will also be much more time required from you and your people. You’ll need to create detailed requirements, be involved in the project as it progresses and test the final output.

Longer term, the cost comparison becomes a greyer area. If you need to change your off-the-shelf software because your business outgrows it, this can be costly both in terms of purchasing the new licences and the time and disruption of integrating it into your business and re-training your team. With a bespoke application you will be able to adapt the functionality to your new requirements with less disruption for your business, however you will still need to pay the development costs.

Gain benefits you wouldn’t have thought of

Off-the-shelf applications may have more functionality than you’ll ever need, but they can also contain really useful tools which you simply didn’t realise you needed.

These applications have been continually developed for years (decades in some cases) to meet the needs of their users in the most effective way possible. CRM systems, in particular, are a good example of this – it’s a very competitive market which pushes all the companies within it to strive for excellence.

This can be particularly useful for startups where their requirements list for a bespoke build might be unclear due to their short time in business.

More extensively tested

When you purchase off-the-shelf software you are automatically benefiting from the years of development and testing which have gone into it, and the experience of thousands, if not millions, of other users.

This means that any bugs in the software are more likely to be quickly identified, simply due to the sheer volume of people using it each day. With a bespoke build there is a higher chance that you’ll come across bugs – even with the most assiduous testing regime, something always slips through the net.

Of course, whether they are quickly fixed by your off-the-shelf software provider may be another matter.

Which is right for your business?

We specialise in helping organisations to make the right technology decisions.

For example, read how we supported Brooknight Security to streamline and future-proof their software through a combination of off-the-shelf and bespoke applications.

Call us on 01732 600 170 to discuss whether off-the-shelf or bespoke might be right for you, or email us at [email protected].

App/system: Microsoft Teams
Learn: How to fully exit Teams
Skill level: Beginner
Read time: 2 min

By default, when you close Microsoft Teams by clicking on the cross at the top right, it doesn’t quit the Teams application. It just closes down that particular Teams window. Microsoft Teams keeps running in the background.

This means that it’s still using your computer’s resources to keep it running, leaving fewer for the applications you’re actually using.

Plus, if you try to re-open the window you closed, you probably won’t be able to. Cue intense user frustration!

But don’t despair – one simple setting change will stop this happening.

How to change what happens when you close Teams

At the top right of your screen, to the left of your initials/photo and company name, you’ll see three dots. Click on these and this menu will open:

Teams settings menu

Choose Settings from the menu.

This opens your Settings options:

Teams settings

As shown above, you should find that, in the General section, the On close, keep the application running option is ticked.

Click on it to untick it:

Teams settings - unchecked

There’s no need to restart Teams or your computer, as soon as the box is unticked the change in settings will take effect.

Then simply close down the Settings options window by clicking on the cross at the top right.

Alternative solution – change how you close Teams

If, for whatever reason, you prefer not to change this setting, then you can instead simply change how you close down your Teams window.

If you right click on the Teams icon in your Windows taskbar, you’ll see this menu:

Teams taskbar menu

The Close window option will purely close down the current Teams window, not the application.

However, if you click on Quit then it will close down Teams altogether.

Similarly, if you right click on Teams in your Start menu you will see the same option to Quit.

What you’ll miss when you close Teams

One of the reasons Microsoft keeps the Teams application running in the background is so that it can continue to send you notifications.

Breaking news

More top Teams Tips

Here are just a few of our other Teams ‘how to’ articles you might find useful:

We offer support with Teams, and other Microsoft applications, on a pay-as-you-go or Managed IT basis. Call us on 01732 600 170 to find out more.

If you’re using Microsoft 365 you’ve probably come across Viva in one form or another. Perhaps you’ve received emails from Viva summarising your upcoming activity, providing tips on working more productively or encouraging you to consider your digital wellbeing. Or maybe you use Viva through Teams to check in on your stress levels or send a message of thanks to a colleague.

But this is just the tip of the iceberg – Viva can do much more to support employee wellbeing, development and engagement.

In this article we look at what Microsoft Viva is and how you can make the best use of it for your organisation.

What is Microsoft Viva?

Microsoft Viva is an “employee experience platform” which combines all your organisation’s communications, knowledge and learning into intuitive dashboards based in existing Microsoft 365 apps such as Teams and Sharepoint.

It aims to increase employee engagement, productivity and wellbeing.

There are currently four elements to Microsoft Viva.

Microsoft Viva elements: Insights, Topics, Learning, Connections

Viva Insights

Microsoft Viva Insights focuses on creating a balance between productivity and wellbeing, particularly in a hybrid working environment.

Its main interface is through Microsoft Teams, where employees see a dashboard summarising their actions for the day. It encourages them to block out (“protect”) time to focus on particular tasks, make space for meeting-free days, or take a break for a quick mindfulness activity.

This dashboard is created by collating information from various Microsoft apps, including your emails, calendar and Teams activity.

Viva Insights also help you to collaborate more effectively and courteously. For example, you can set it to delay delivering emails until a time when the recipient is at work (and set your own working hours so they can reciprocate).

As well as the Teams interface, Viva Insights is also used to generate daily emails, for example encouraging you to reserve time for important activities:

Microsoft Viva email
A Viva email encouraging the user to book out time to focus on important activities.

At the end of each month it sends you a summary of your activity, who you’ve collaborated with and how well you’ve maintained your work life balance.

These insights are also provided to managers on an aggregated basis (not on an individual level) so they can review working habits across their team. This is a useful tool for optimising team performance and to provide an early warning system for issues such as burnout.

Microsoft are currently developing meetings-related functionality for Viva Insights, to support you in planning and running meetings more effectively.

Viva Topics

Microsoft Viva Topics accumulates information about your business in an easy-to-access format which is available to all employees.

It uses machine learning artificial intelligence to identify common topics and create a page of information about each one, including links to related files, people in your organisation who are involved with or interested in the topic, and a visual guide to other commonly associated topics. Pages can also be set up manually. Every page can be edited by users, ensuring that the information remains accurate and up to date.

Each topic page is distilled into a topic card. When a subject is mentioned, for example in a Microsoft Teams chat, Viva Topics will automatically add a hyperlink onto the topic title, so that users can view the topic card as a pop up, clicking through to the full topic page for more information. The same process applies in Microsoft Sharepoint, Outlook, Bing and Yammer.

Over time Viva Topics will create a highly detailed yet easily accessible repository of all your company knowledge, immediately available to your team.

Access the Viva topics demo.

Viva Learning

The Viva Learning system enables you to bring together all your people development options into one central hub.

This is accessed through a Microsoft Teams interface which gives your employees access to learning opportunities, such as bookable courses or self-service webinars.

Microsoft Viva Learning

As well as incorporating your in-house training and development, your employees can also use Viva Learning to access thousands of courses from organisations such as LinkedIn, SAP and, of course, Microsoft.

Viva Learning can integrate with many existing learning management systems and content providers.

Each employee’s learning is tracked, providing them with an overview of their development, as well as giving your management and HR teams valuable insights.

Access the Microsoft Viva Learning demonstration.

The aim of Microsoft Viva Connections is to improve engagement and interaction among your employees. It does this by bringing together all organisational communications into one social-media-esque interface.

Viva Connections, which is accessed via Microsoft Teams or Sharepoint, provides access to your company’s news, conversations and communities. It encourages inclusive sharing of information across your organisation (not just top down) and conversations beyond each employee’s normal peer group.

You can customise the branding and curate the content on Viva Connections, ensuring that, while each individual will receive a personalised view, everything is still in line with your overall mission and values.

Microsoft offers integrations between Viva Connections and partners such as Qualtrics and Workday. Viva Connections also provides a centralised point through which your people can access the other Viva elements such as Viva Topics.

Objectives and Key Results (OKR) app

The next development for Viva will be an OKR element, which will focus on each teams’ objectives and progress against them.

As well as providing a useful project tracking tool, the aim is that this will help employees to feel that they’re working together towards a collective goal and that they can see their own personal impact on progress.

The benefits of Microsoft Viva

The ultimate aim of all four elements of Microsoft Viva is to make it easier to work productively and happily in a hybrid environment.

Increased productivity

Many facets of Viva support productivity:

  • Viva Topics ensures that everyone in your organisation has quick and easy access to the information they need.
  • Viva Insights helps your people to dedicate time to focus on key tasks, and to recharge through breaks and mindfulness.
  • Insights also provides you with valuable management information so you can support your teams to achieve higher performance levels without risking their wellbeing.
  • Through Viva Learning your people will have access to a wealth of information to help them develop their job skills and personal capabilities.

Increased engagement

Increasing employee engagement doesn’t just mean getting better results in your end of year satisfaction survey. It can make a material difference to your bottom line. Gallup research shows that businesses whose employees are highly engaged see a 41% reduction in absenteeism and a 17% increase in productivity.

Viva helps your teams to feel a sense of belonging and engagement in many ways:

  • Throughout the Viva suite there is an emphasis on personal ownership, whether that’s through managing your own time or updating the collective company knowledge in Topics.
  • Viva Learning helps your people to seek out new development opportunities and encourages them to learn as and when it suits them.
  • Viva Connections helps everyone in your business to focus on your mutual goals and values.
  • Connections also encourages collaboration across your organisation, giving everyone an equal voice, whoever they are and wherever they work.
  • Viva Insights supports your commitment to employee wellbeing, enabling your managers to better understand, and better care for, your people.

Increased retention

Keeping your people engaged and motivated, while avoiding burnout, will also result in higher retention rates.

The Gallup research looked at the link between engagement and retention, showing that where people were highly engaged in high-turnover organisations, employee turnover reduced by 24%. In low-turnover organisations highly engaged business units saw 59% less employee attrition.

The disadvantages of Microsoft Viva

As with any new application, there is a certain amount of adaptation required to get the most benefits from using it. Because Viva is so focused on collaboration and communication it’s important that it’s implemented wholesale throughout your organisation – otherwise no-one will achieve the full benefits.

Big brother

There may be some reticence to use Viva because it can be seen as a way of spying on employees, particularly because of the management information generated by Viva Insights.

When implementing Viva it’s important, therefore, to be clear with your teams about how the management information is aggregated and anonymised, and to reassure them about your motives for using it. Otherwise, you risk employee disengagement and attempts to work outside the system so they don’t feel they’re being ‘tracked’.

How much does Viva cost?

If you use Microsoft 365 you will already have the full Microsoft Viva Connections functionality, and some of the Viva Learning and Viva Insights capabilities.

The full Microsoft Viva Suite is charged at a per user price, please enquire for details.

Is Viva right for your organisation?

If you’re already using Microsoft 365 then the full Viva could be a beneficial next step, particularly if your people are working remotely or hybrid.

We provide IT support in Kent and across the south east to define their technology strategy and understand where systems such as Viva could be of tangible benefit. Get in touch to arrange a 15 minute call to find out more.

App/system: Microsoft Outlook
Learn: How to link emails to a task in Microsoft Outlook
Skill level: Beginner
Read time: 2 minutes

Most people struggle to manage their email inboxes, at least some of the time. This neat little function to link emails to tasks can help you to deal with emails more efficiently and keep your inbox under control.

Why link emails to tasks

Treating your email inbox like a to do list is not ideal.

There are several reasons for this:

  • Not every task has to be done straight away, but do you really want an email hanging around in your inbox for weeks waiting for the right time to action it?
  • While there are plenty of ways to sort and filter your inbox, it doesn’t have the same “to do list” features that Outlook’s tasks do.
  • One task can often relate to several emails, so creating a task will help you consolidate them into one place.

How to link emails to tasks

There are two ways to do this:

Method 1 – drag and drop

  1. Left click and hold on the email in your inbox. Drag the email down to the task icon at the bottom left of your screen until the icon turns blue and your cursor acquires a + symbol.
  2. This will create a new task and put the content of the email into the description of that task.

Please note that this won’t include any email attachments – they will be listed but not attached to the task.

  1. Make any adjustments to the task (start/due dates, categories, reminders, etc) then click on Save & Close.
  2. Once the task is saved, if you want to move it into a sub-folder, you can do this from your task.

Method 2 – quick steps

  1. Right click on the email in your inbox. From the menu that appears, select Quick Steps and then Create a task with at…

  2. This will open a new task for you, with the email subject as the title and the email itself attached (retaining any attachments within the email).
  3. You simply need to make any other adjustments you need (start/due dates, categories, reminders, etc) then click on Save & Close.
  4. Once the task is saved, you can go into your task list and move it into any sub-folders, as required.

Note that the task will always link to the correct email, even if you move the email to a different folder.

How to add extra emails to your task

  1. Open your task and then click on the Insert tab in the navigation.
  2. Click on the Outlook Item option, then select the email you want to append from your inbox or another folder.

Note that you can also add other files to the task by using the Attach File option.

Is your inbox out of hand?

We have 21 ways you can manage your email inbox – using the task list is just one of them.


We’ve had a facelift!

With help from brand agency Tomango, we’ve given our brand and website a new lease of life.

Our new logo and colours

As you can see, our new logo retains many of its predecessor’s original elements, reflecting the fact that our business will continue to provide the same quality of service we always have.

The colours have been refreshed and our 4-H emblem has been rotated. Why the rotation? Because Tomango pointed out to us that it was forming a diagonal cross (associated with closing a window) rather than a straight cross (associated with positivity). A subtle but important difference!

We’ve also added the strapline “IT Consultancy + Support” to make it clear what we’re about. Note the use of the + symbol again (it’s clever stuff this!).

Our new website

Of course, once we had our new brand, the natural next step was to update our website. As you can see, we have a fresh new look and have improved the content of the website to give you clearer information on the services we offer.

A bright future

Our bright new look symbolises the positivity of our business as we look to a future of continuing to serve our clients with only the highest standard of support. We hope you like our facelift as much as we do.

Do you ever experience the fear of opening your email? Of discovering how many new messages have been added to your already-hideously-large inbox?

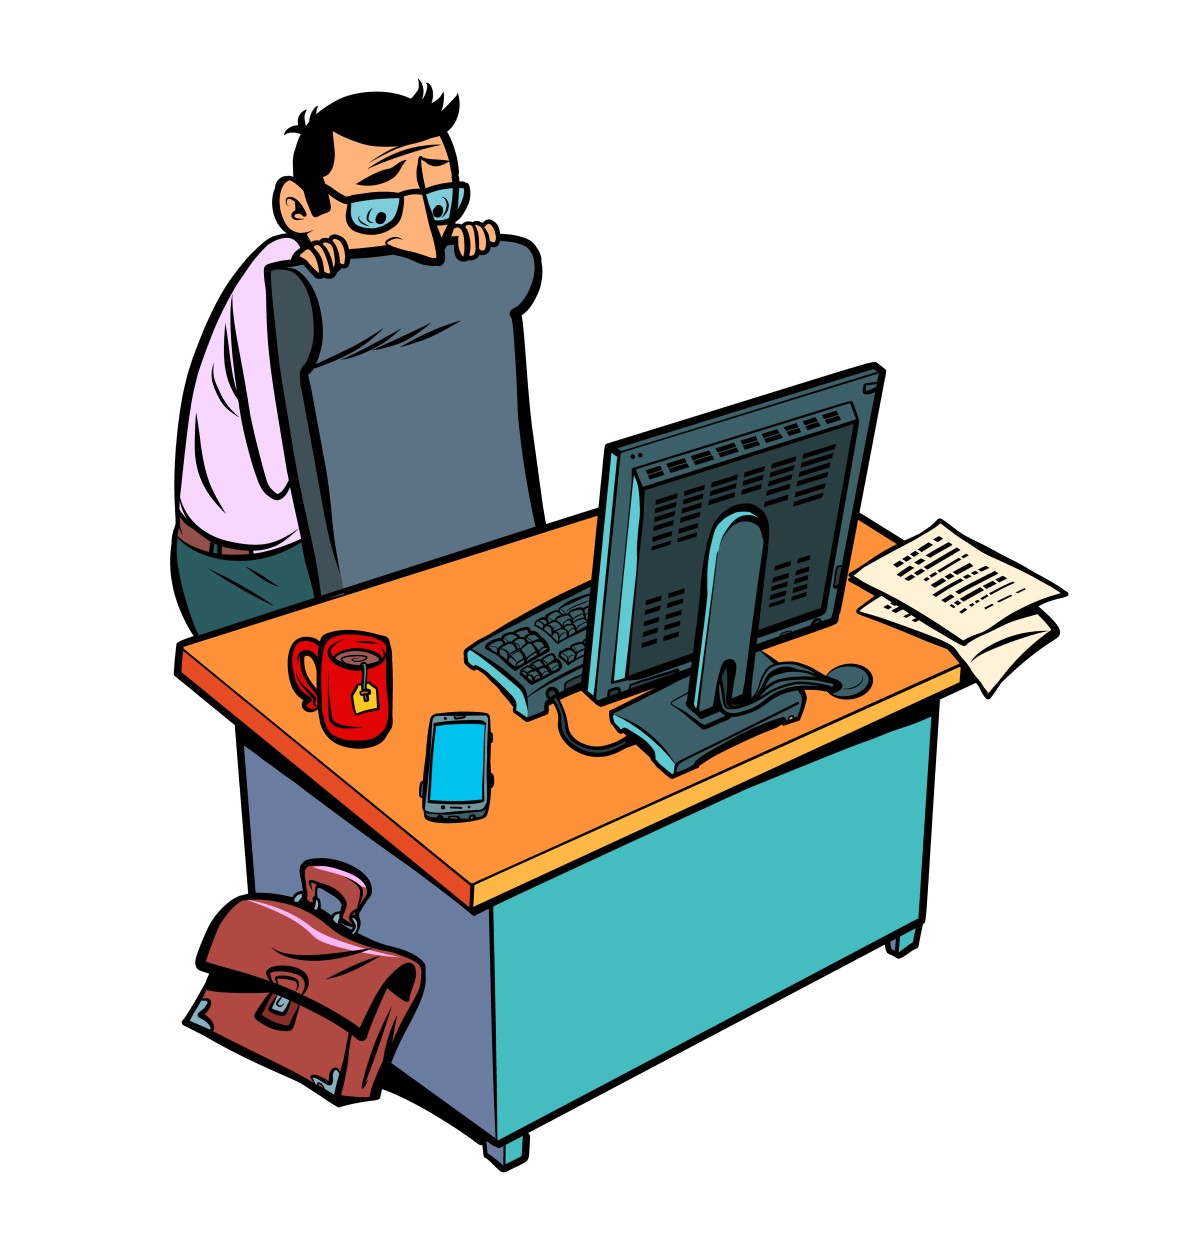
These feelings are very real and very common. And, while we might joke about them, they can have significant impacts on employee efficiency and wellbeing.

For organisations this can create a hidden drain on productivity.

A study by Gloria Mark at the University of California indicated that employees who spent more time on email each day felt they had been less productive overall. In addition, increased time spent checking email was also associated with higher levels of stress.

In this article we look at 21 ways to better manage your emails, to increase productivity and reduce the stresses of email overload. And we discuss how Microsoft 365 can support you in achieving inbox nirvana.

Get the right infrastructure

Life is too complicated not to be orderly.
Martha Stewart

1. Use the right software for the right task

Email software, such as Microsoft Outlook, is excellent for managing emails. But that doesn’t mean that it’s a great workflow management system or that it can be your CRM application.

Trying to manage complex activities involving multiple people, or tracking and sharing important customer information, is not a job for your email system. You won’t be able to carry out these activities effectively and will put unnecessary strain on your inbox.

Instead, invest in systems which were developed to do the tasks you need, and which work alongside your email client. That way you can enjoy smooth and efficient integration between your emails and other activities without clogging up your inbox.

2. Banish spam

Billions of spam emails are sent around the world every day (source: Statista), so ensuring that as few as possible hit your inbox is the first step in managing your email volumes.

With a robust anti-spam technology, such as that offered by Microsoft Exchange and Microsoft 365 Defender, you should receive very few spam emails. The vast majority will be stopped before they reach your inbox. Of the few that do get through, most of those will be automatically sent to your ‘Junk Email’ folder.

If any do make their way into your inbox, make sure you right click and select Junk then Block Sender before you delete the email, to ensure that no more arrive.

It’s also useful to occasionally check your ‘Junk Email’ folder to make sure no legitimate emails are in there. You can let Outlook know that they aren’t junk by right clicking and selecting Junk then Not Junk.

Note that you can ‘dial up’ or ‘dial down’ the strength of your spam filter. If too many emails are going into junk or quarantine you might want to dial it down a bit. However, if too many are landing in your inbox, then dialling it up should help.

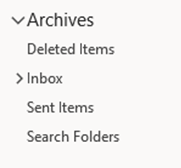
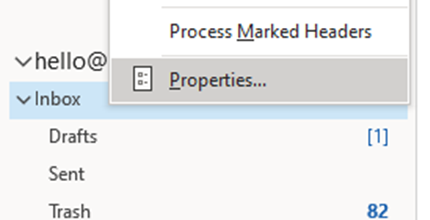
3. Using folders wisely

Setting up an efficient email folder system will be enormously helpful in sorting through your current inbox and managing future email arrivals.

There are a few different ways you can consider organising your email folders.

Minimalist and efficient

An approach which requires fewer folders is generally the best solution. Having too many folders can cause Outlook to operate more slowly, because you’re asking it to synchronise more folders with the cloud (read more about how to speed up Outlook). It will also take you longer to organise your emails if you have too many folders to sort them into.

The excellent sort and search functions in Outlook means that, even if you have only a few folders, it’s still easy to find emails from a particular person or on a particular topic.

You might, for example, have these folders:

  • Need to reply
  • Need to action
  • Need to read
  • For reference
  • Archive

Or perhaps organise your emails into days of the week according to when you’re going to deal with them:

  • Monday
  • Tuesday
  • Wednesday
  • Thursday
  • Weekend reading

Or simplify it even further by following the Marie Kondo method for managing paperwork, which involves discarding almost everything and sorting everything that remains into two categories:

  • To be saved
  • To be dealt with

The two-folder method is the one we advocate.

A bit less minimalist

If you can’t bear the thought of only having a few folders, then at least make sure that the ones you have are for essential reasons. Perhaps one for each major project or one for each major client (minor clients can be bunched together in one folder as you probably don’t get many emails from them).

In addition, you might find it useful to have a general ‘reference’ or ‘things to read’ folder for items of general interest or reference.

4. Focus on what is important

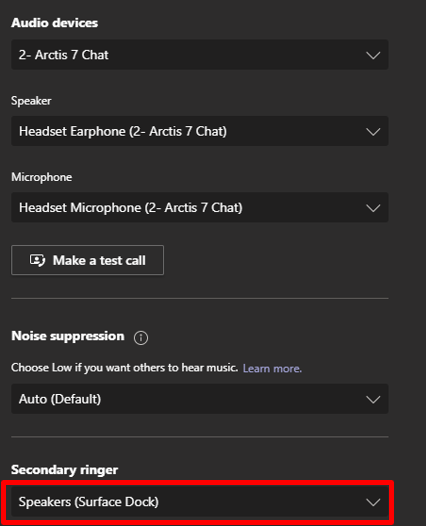
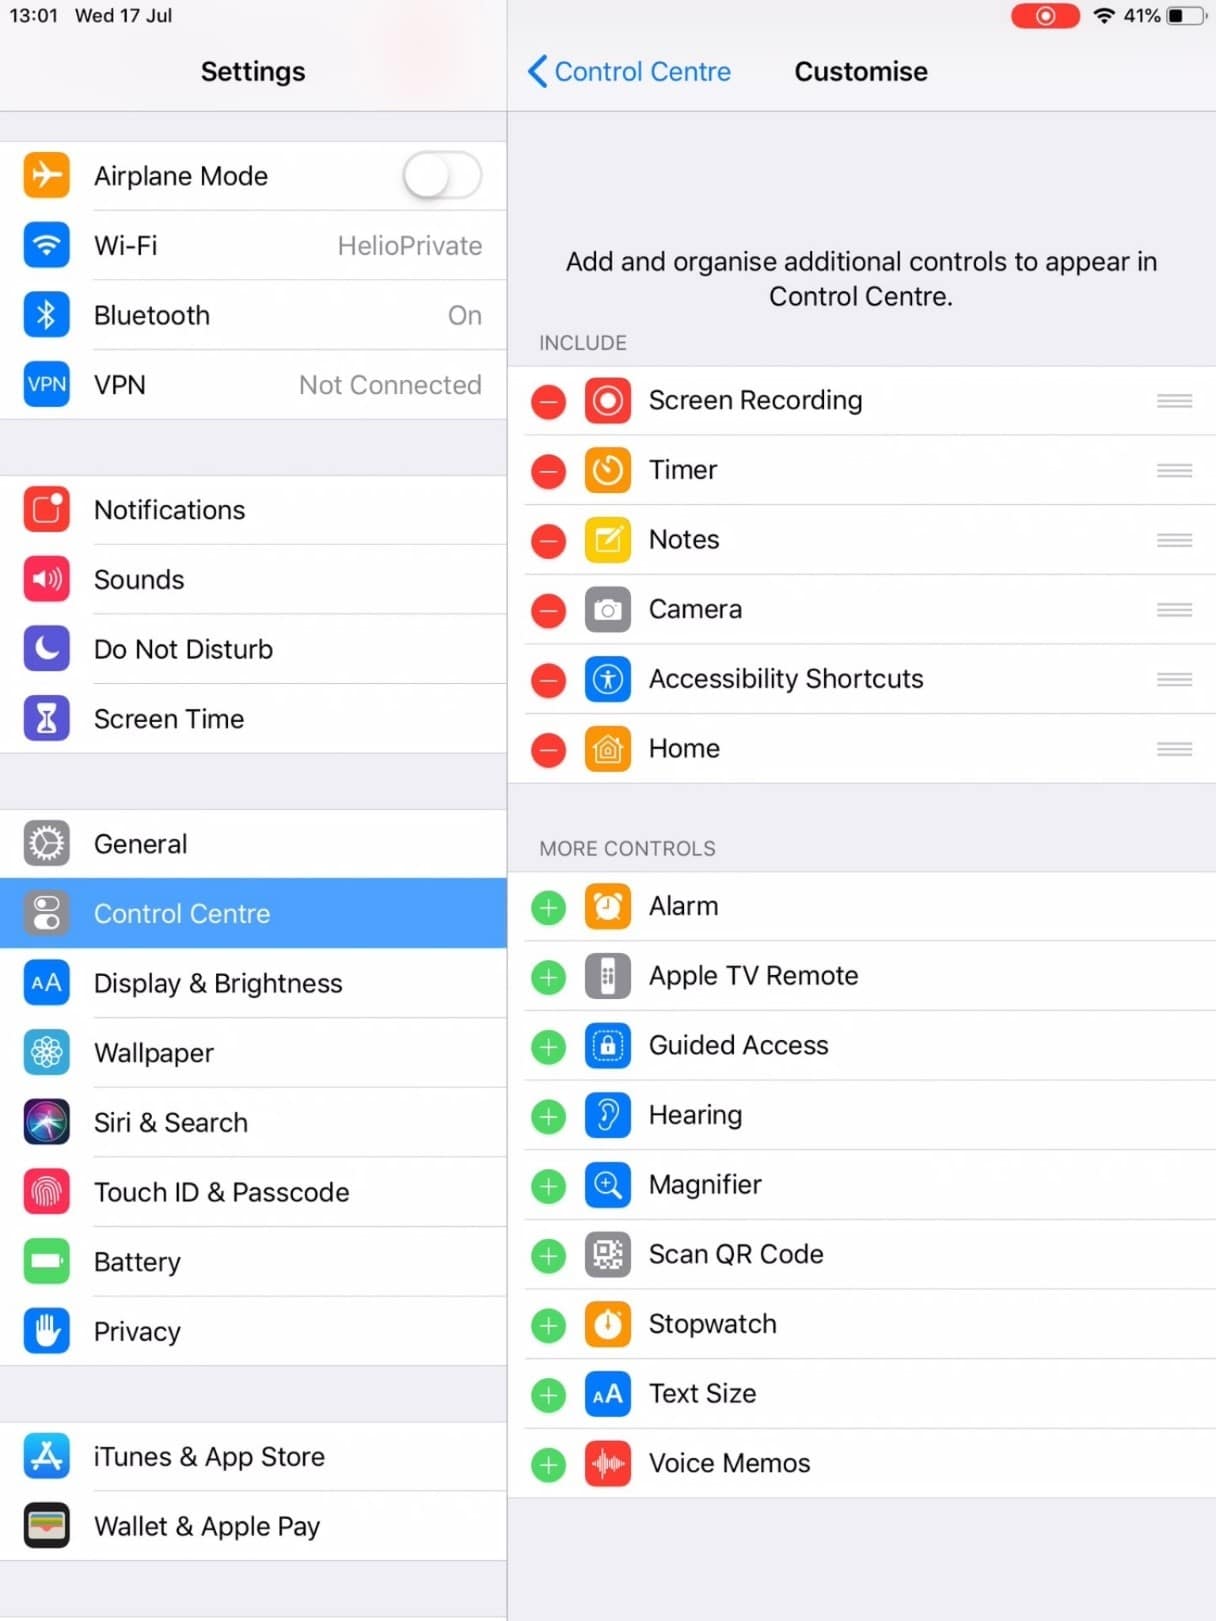
Most major email services will automatically sort your inbox for you, to help you prioritise the most important emails. In the case of Outlook, it sorts it into your ‘Focused’ and ‘Other’ inboxes.

Outlook learns what emails are important to you by monitoring how you deal with each email that arrives in your inbox. After a few weeks of using it, Outlook learns which emails are your priority (which will be sorted into ‘Focused’) and which are not (‘Other’).

This gives you an immediate aid to managing your inbox.

And, if Outlook gets it wrong, you can help it to learn by right-clicking on the wrongly categorised email and selecting to Move to Other or Move to Focused as appropriate.

5. Unsubscribe from email newsletters

When each email newsletter lands in your inbox, think carefully about whether you really want to receive it. Will you actually read it? Is it useful or interesting to you?

If the answer to any of these is “no” then unsubscribe from it. Don’t just mark it as junk or delete it – actually unsubscribe so it never clogs up your inbox again.
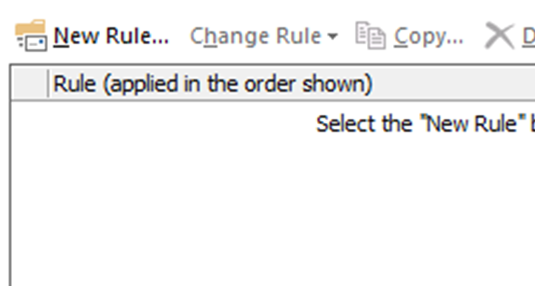
6. Rule your inbox

Rules are another hugely time-saving way of clearing your inbox.

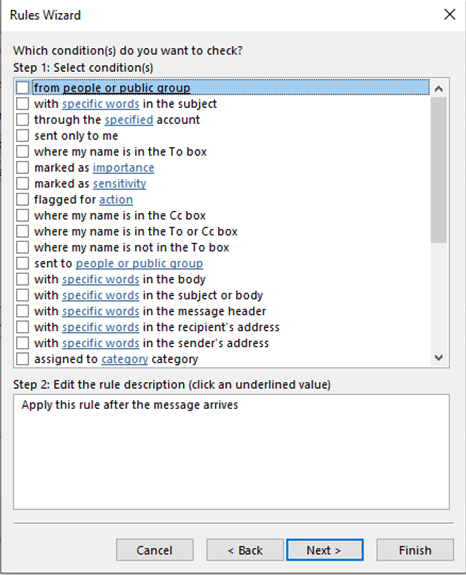
In Outlook you can set up rules which take actions for specific types of email, based on criteria such as who they are from and the subject line.

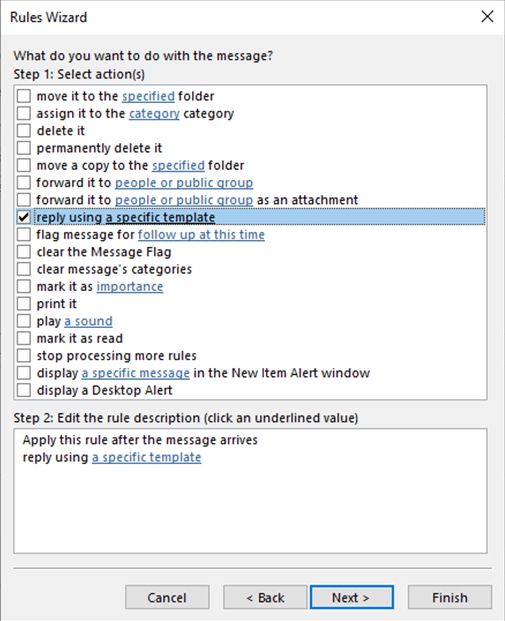
Outlook can then take specified actions for each type of email. For example, if you receive regular newsletters or company updates it can automatically move them to a ‘Things to read’ folder. If you need to prioritise emails from a particular person it can flag these emails or even send an alert to your phone when they arrive.

Get down to zero (or near enough)

The best way out is always through.
Robert Frost

Once you’ve organised your email structure and rules, the next step is to deal with your current inbox. It’s big… it’s scary… but it has to be done.

7. Plan in time for a bit clear out

It’s easy to put off sorting out an overloaded inbox which you’ve been ignoring for weeks or even months. The task can feel overwhelming and impossible. However, the relief you’ll feel when it’s done will make it well worth the effort.

The easiest way to make sure you get it done is to plan it into your diary as you would for any other major piece of work. Assume it’s going to take a whole day – if you get it done sooner that’s a bonus.

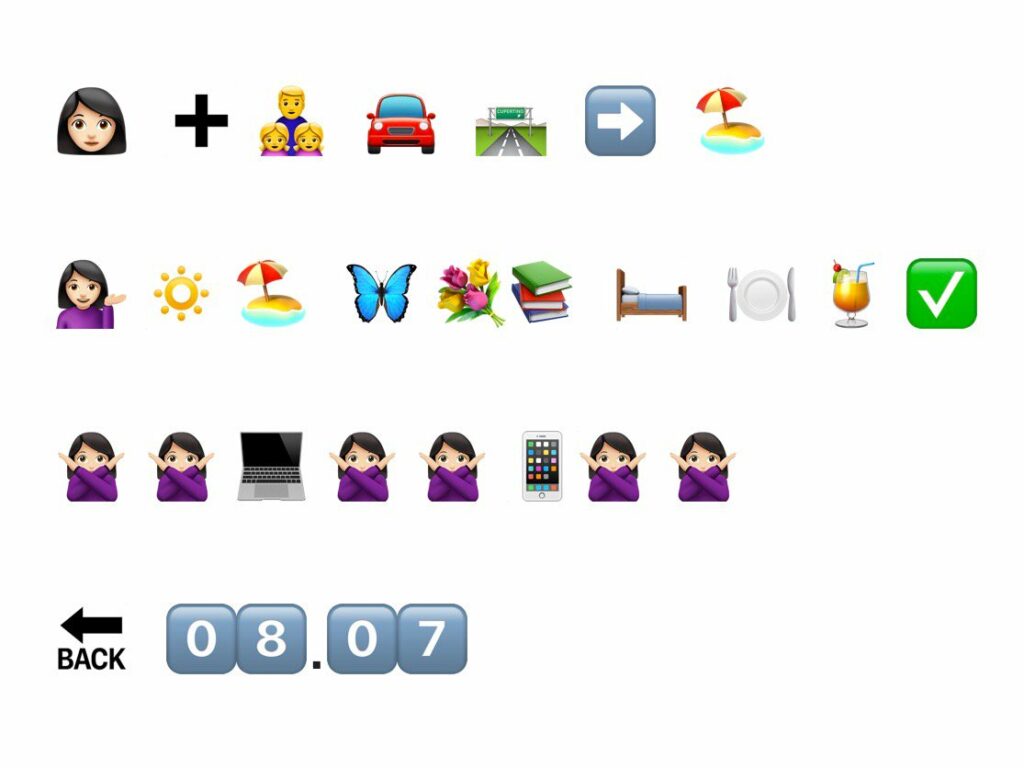
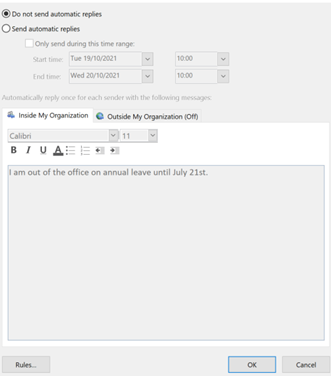
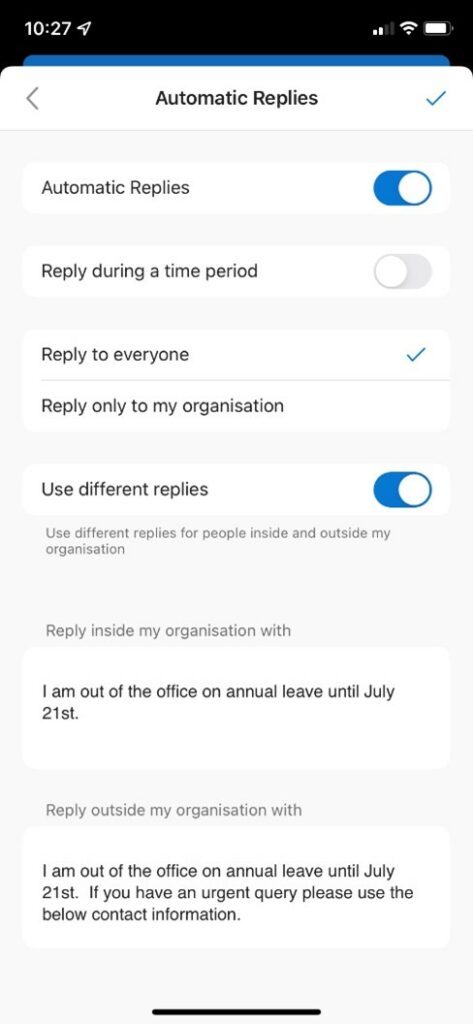
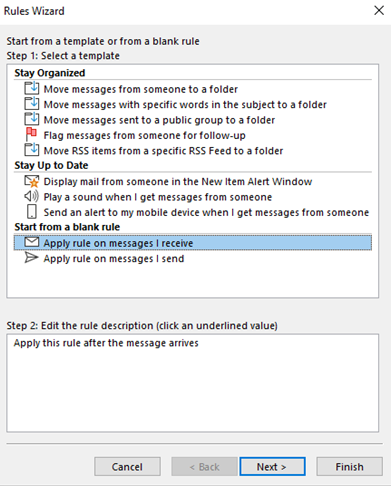
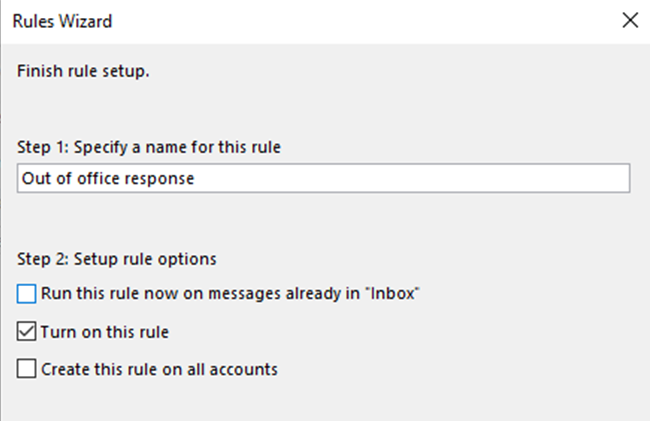
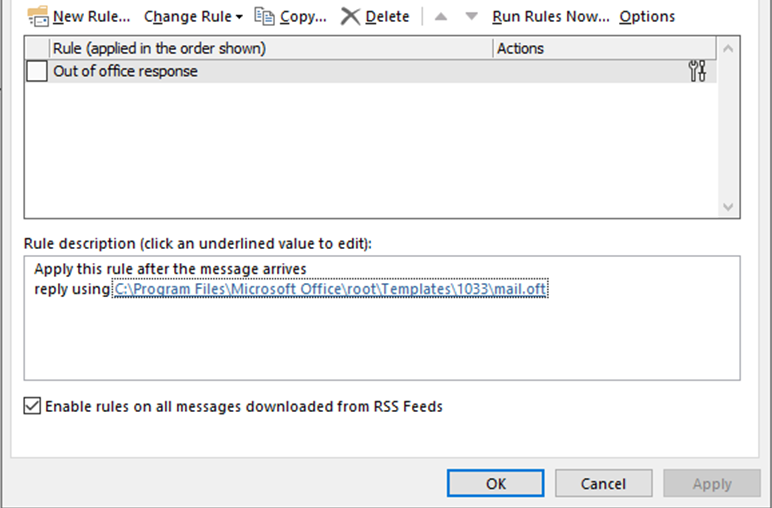
Tell people you won’t be available and put an out of office response onto your email and phone for the day.

8. Get away from your desk?

One of the major benefits of Microsoft 365 is the ability to work anywhere anytime, and you can use this to your advantage to get your inbox cleared.

Working at your desk in the office might not be the best idea, as it’s too easy to be distracted by colleagues and, let’s face it, more interesting things than clearing out your emails.

Working from home is one solution. But you might find that a trip to your local café makes the job more enjoyable.

The important thing is that you are working in an environment with few distractions.

9. Stop the flow

When you start working on your inbox it’s a good idea to turn your email offline, so new emails don’t start popping up while you’re working. In Outlook you do this by going to Send / Receive in the navigation menu and selecting Work Offline.

What to do with all those emails

It's fine to decide not to decide about something. You just need a decide-not-to-decide system to get it off your mind.
David Allen

Now you have your email structure in place and the time to deal with your inbox. So next you need to think about how to process each individual email.

10. The 2 minute rule

In David Allen’s book Getting Things Done he has a simple system for assessing each email. First of all, do you need to take an action as a result of this email? If not, delete it or store it in an appropriate folder.

If it is actionable, will it take 2 minutes or less to complete? If the answer is yes, do it.

If it will take longer than 2 minutes, then decide if it can be delegated. If it can, delegate it. Delete the email or file it in an appropriate folder.

If it will take longer than 2 minutes, but can’t be delegated, then you defer it. This means moving the email to an appropriate folder and adding the action to your to do list or, if it has to be done on a particular date, to your calendar.

Through this process, every email will either be dealt with quickly or you can file it away safe in the knowledge that the action required is listed somewhere. See points 12 and 13 below for ideas on how to use Outlook to manage actions through tasks and calendar.

11. Flagging emails

When you move emails into folders it can be useful to add a flag onto any which need to be dealt with, so they become easy to identify.

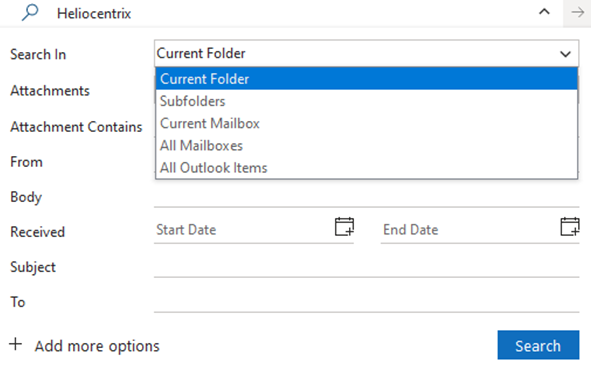
This means that you can then either sort the folder by Flagged Mail to see all the ones you’ve marked. Or you can add a Flag Status into your options when you search in Outlook, so the search only returns flagged emails. This is a really useful method, though it’s important to be disciplined about removing the flags (or deleting the emails) once the action is completed.

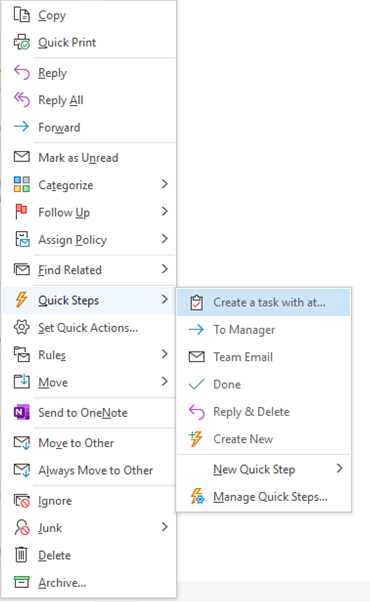
In Outlook you can also flag an email so it automatically adds to your task list/To Do list. To create a task from the email, right click on the flag icon and select Add reminder.

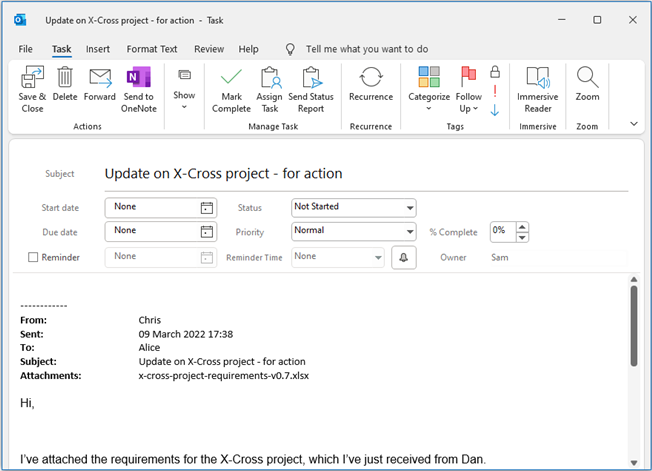
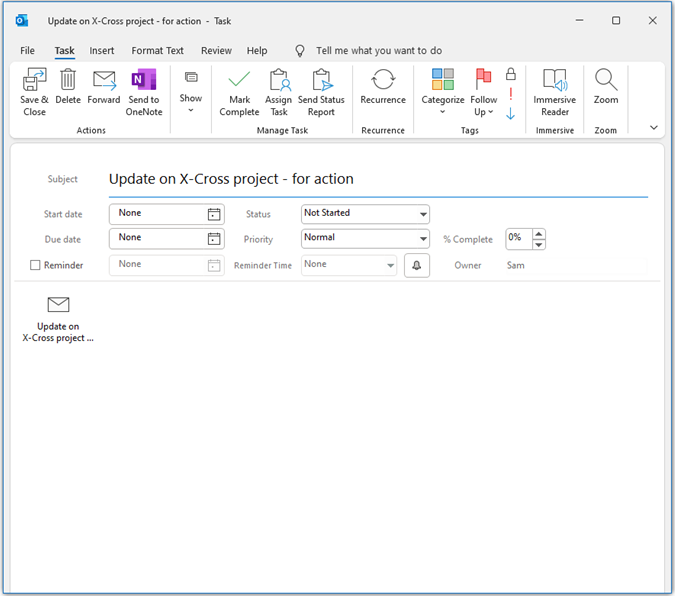
12. Managing actions through tasks

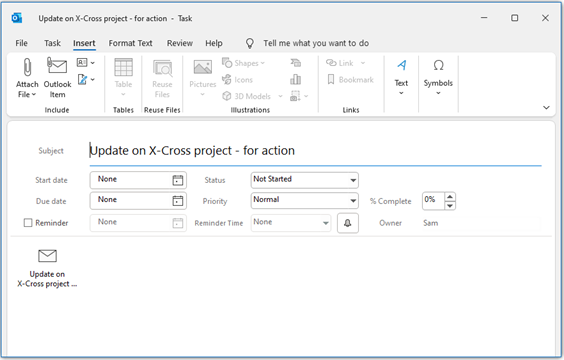
A to do list is an excellent way of recording actions from emails. The task function in Microsoft Outlook makes it straightforward to link emails and tasks. Creating tasks might sound like you’re just duplicating the email, but you’ll find that a single task probably relates to many different emails.

Outlook tasks have plenty of functions which make it easy to organise your email actions:

  • Attach function which allows you to attach emails or other files to the task.
  • Colour-coded categorisation to help you sort your tasks.
  • Automated reminders.
  • Recurrence function for repeating tasks.
  • Ability to assign the task to someone else.

Once all your actions are safely in your to do list, then you can simply review your tasks on a daily or weekly basis, depending on how often you like to plan your work.

Outlook tasks can also be integrated with other Microsoft applications, such as OneNote and Sharepoint.

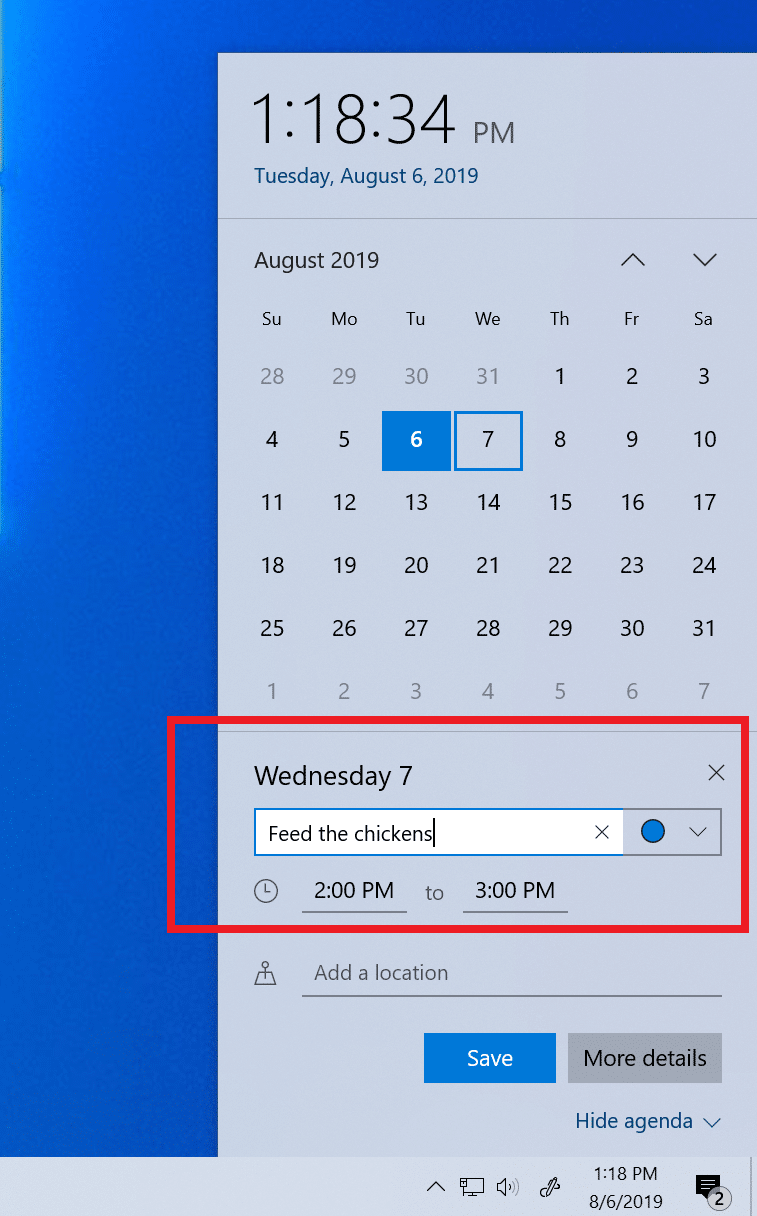
13. Managing emails through a calendar

In the Getting Things Done model David Allen suggests that the only tasks which should go into your calendar are those which have to be done on a particular date. That way, when you open your calendar in the morning, it doesn’t look too overwhelming.

However, if you prefer, you could use your calendar as the single place to manage all your actions from your emails.

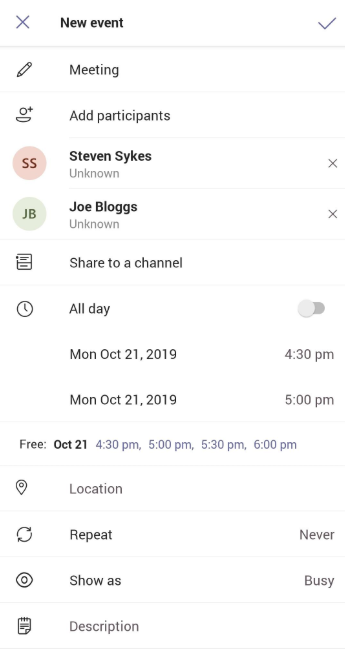
In Outlook, creating a calendar entry from an email is quick and easy. You simply right click on the email and select Move then Calendar. Outlook will automatically set up a new calendar entry, using the subject of the email as the title and with the email itself attached.

As with Outlook tasks, the calendar also includes functionality such as colour-coding, reminders and repeated events.

Learn new habits

Productivity is never an accident. It is always the result of a commitment to excellence, intelligent planning, and focused effort.
Paul J. Meyer

Once you’ve completed the job of clearing your inbox (well done!) you need to keep it that way.

14. Decide how often to check your emails

Research for University College London by Adam Bradley, Duncan Brumby and Anna Cox in their paper How to Manage Your Inbox: Is a Once a Day Strategy Best sought to discover whether checking your emails just once a day can reduce the pressures of email overload.

They found that, firstly, most participants in the study struggled to only check their email once a day, although they did manage to check it less than normal (down from 8 times a day on average to 3.6 times). They found that checking emails less frequently gave participants a significant time saving in terms of overall time spent on email management.

So, scheduling in specific time in your day to check your emails, and not checking them at other times, could be a useful way of managing your inbox more productively. Remember, people really don’t expect you to reply to every email within five minutes – and if anything is that urgent they can always call you.

You can also consider other opportunities in your day when you could take just a few minutes to clear out some emails. For example if you’re in a waiting room, queue or hanging around to pick up your children, use the time to clear out a few emails on your phone. Other tips to get more from your day with your phone.

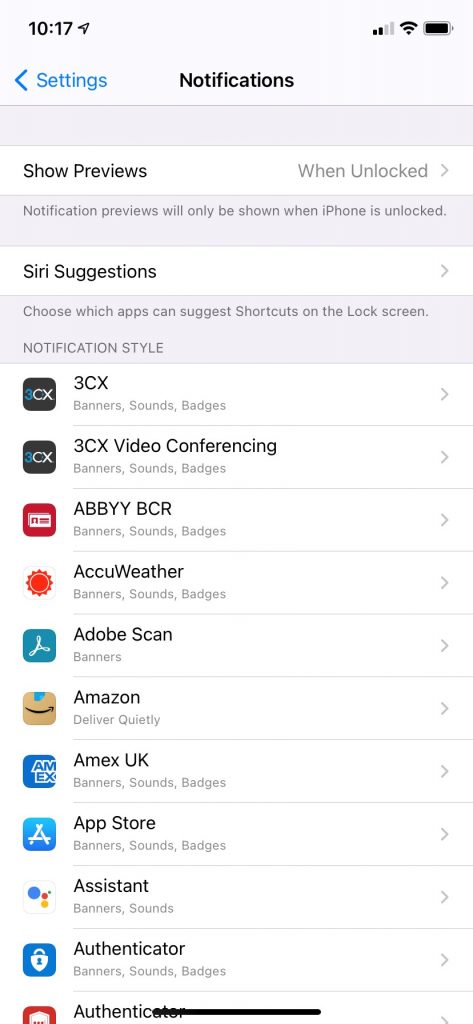
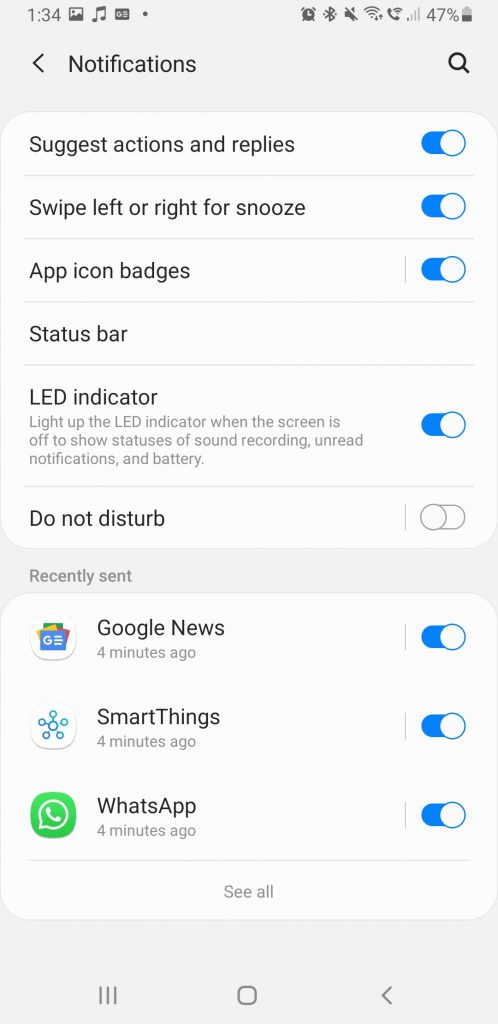
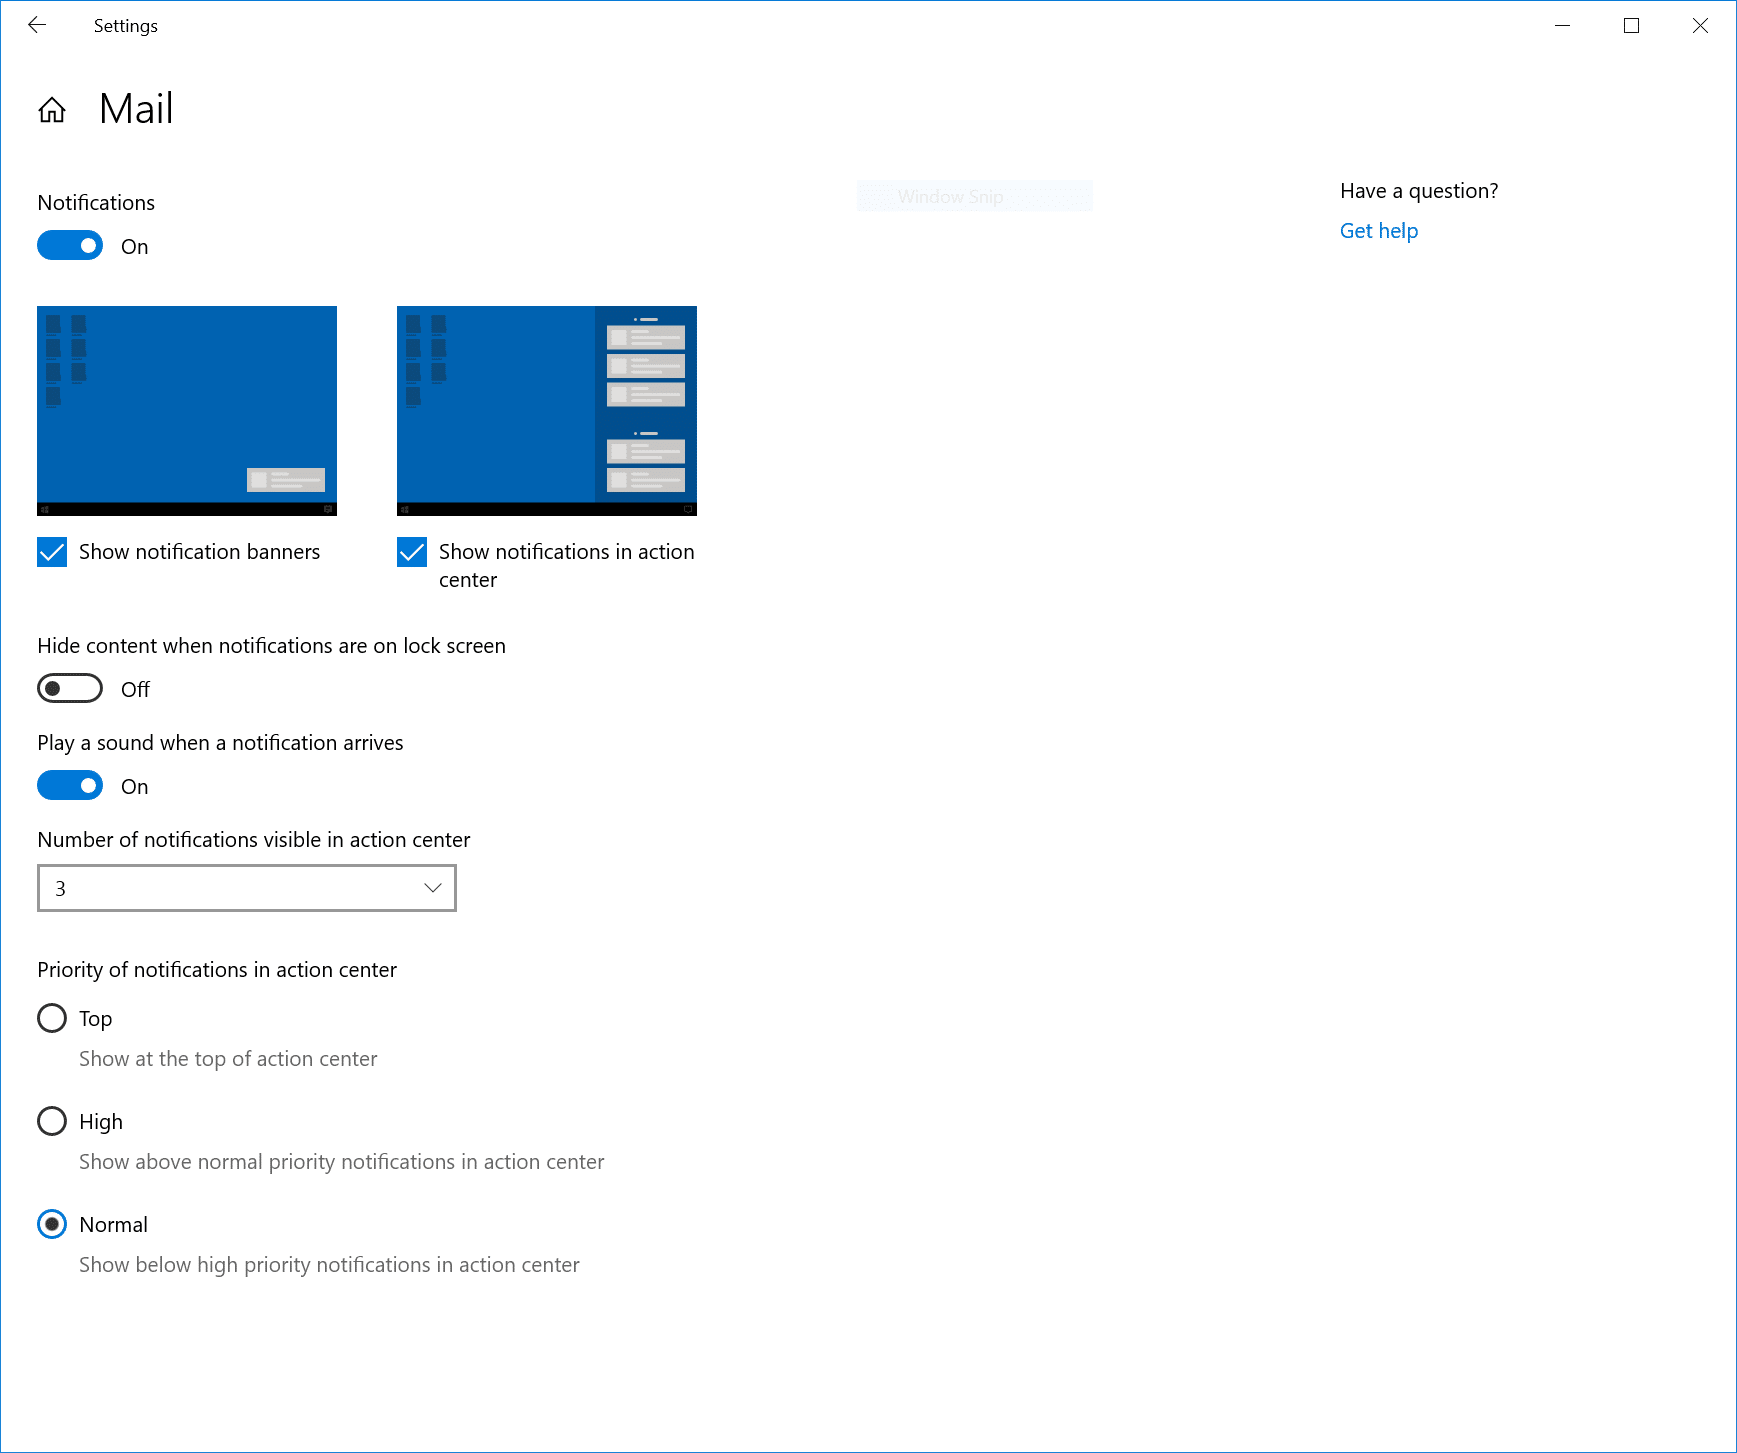
15. Email notifications

Once you’ve made a decision about when you are (and are not) going to check your emails, turn off your email notifications.

Email notifications encourage you to check your emails more often than you want to. These interruptions into your working day also mean you waste additional time ‘reorientating’ yourself back into the task you were interrupted from. Gloria Mark’s research for the University of California showed that participants who only checked their email when they wanted to felt they had been more productive, compared to other participants who checked their emails each time a notification arrived.

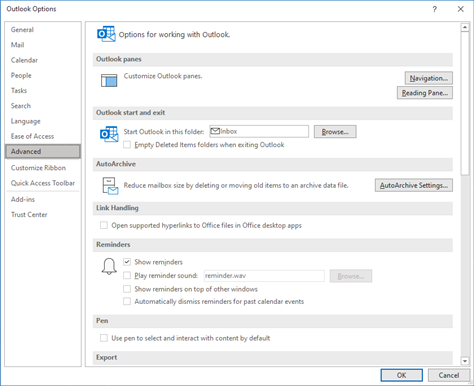
To turn off your notifications in Outlook go to File, Options and then Mail. You’ll see a section titled Message arrival. You can untick all of these to ensure that you aren’t interrupted every time an email arrives.

16. Weekly slot to get down to zero

While you might need to check your emails a few times each day, you don’t necessarily need to feel pressured to get your inbox to zero every day (although this does suit many people).

However, it’s good practice to get into the routine of reducing your inbox to zero at least once a week.

It helps to have a regular, weekly slot for clearing your inbox. Book a regular event out in your calendar each week to clear your emails. That way you won’t get stressed if your inbox starts to build up a bit, because you know you’ll get it all dealt with in your regular timeslot.

If your regular email clearing time is in the evening or at weekends (not ideal, but it might be the best time for some people) you may find the Delay Delivery function in Outlook’s Options menu useful. This can schedule your email to send at a date and time you specify. So, if you’re clearing your emails on a Saturday morning, but don’t want to trouble your colleagues with emails on the weekend, you can schedule them to send on Monday morning instead.

On a side note, Microsoft provides you with a range of personal insights into your working activity. These can help you to set aside specific periods each day to focus on tasks rather than emails. It can also help you to track how often you’re working outside your normal hours to ensure you’re not burning the candle at both ends: https://myanalytics.microsoft.com/.

17. Template responses

In Microsoft Outlook there’s a handy ‘Quick Parts’ function, which can be very helpful if you often send emails with the same content. It enables you to save chunks of text and then insert them into new emails.

To save a ‘Quick Part’, start an email and type in the text you want to save. Highlight the text, go to Quick Parts in the menu and save the text. When you type a new email, simply go back to the Quick Parts menu and your saved text will be there, ready to be inserted. Alternatively, you could install the Outlook plugin ‘My template’ which provides similar functionality.

18. Learn shortcut keys

When going through your emails there are a number of shortcuts you can use in Outlook to speed up the process, including:

  • Esc to close an email.
  • Alt+S to send.
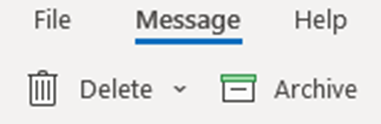
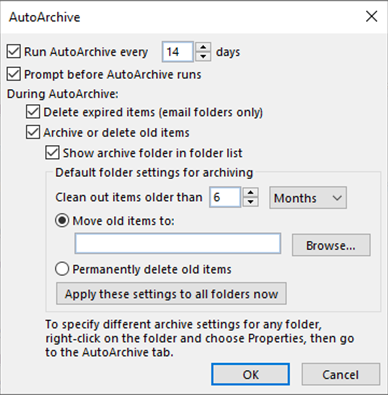
  • Backspace (not delete) to send it to your archive folder.
  • Delete to delete.
  • Ctrl+Shift+K to start a new task.
  • Ctrl+2 to switch to the calendar.

View the full set of shortcuts.

Let people know what you need

Bad human communication leaves us less room to grow.
Rowan Williams

Everyone has different preferences for dealing with emails and we don’t often think about how our methods impact others.

Letting your colleagues know how you prefer to receive emails could make your life a lot easier, particularly if you’re working with people who use emails in a very different way to you. Of course, the key to success is to reciprocate and email them according to their preferences.

Here are some practices you might ask them to adopt:

19. No thank you

You might request that colleagues don’t send non-essential ‘thank you’ emails.

Perhaps explain that you’re very happy to receive thanks if you’d done something stupendously amazing, but if you’ve just emailed them the document they asked for, then thanks is not required.

20. Ask for clear subjects

Having clear subjects for emails you receive makes it much easier for you to skim through them and identify what needs to happen with each one.

21. All in one or one for each

Some people prefer to have one email for each subject. Others would rather only receive one email a day from each colleague covering multiple topics.

If you have a particular preference, then share this with your team too.

Discover more ways to enhance your productivity

Heliocentrix is a strategic IT consultancy based in the south east of England. We work with businesses to define and implement the optimal IT strategy to increase their employees’ productivity, wellbeing and enjoyment.

Find out how we could help your organisation.

Much is made of the green benefits of sending ecards instead of traditional Christmas cards.

But are they really more environmentally friendly?

We sift through the evidence to uncover the truth…

The carbon footprint of emails

While, on the face of it, ecards might feel like a greener option, the fact is that generating and sending each ecard still requires the burning of fossil fuels.

The PC your ecard was created on needed electricity, as did the website server you accessed when you chose it, and the computer you were using at the time. Then there’s the servers used to send the card to its recipient, and of course the recipient’s own computer usage.

Last year saw the UK hit a milestone: more than half our electricity came from zero carbon methods (source). However, that’s still a lot of electricity generated by fossil fuels. And most other countries around the world have yet to hit this target.

How much carbon does an ecard use?

McAfee research, conducted in 2009 to look at the impact of spam emails, calculated that each email contributed 0.3 grams of CO2 into the atmosphere. At the time of the report there were 62 trillion junk emails sent each year, which means they’re using as much power as it would take to run more than 2.4 million homes (source).

I’ve sent 26 emails this morning (non of which, I hasten to add, were spam). So that’s almost 8 grams of carbon I’ve released into the atmosphere without even thinking about it.

Most spam emails just contain text, so are relatively small files which require less power to be processed. Ecards, on the other hand, usually include images, animations or videos. Their file size is much larger as is, therefore, the amount of power required to send them. eCO2 Greetings estimates that these larger emails can have a carbon footprint of up to 50 grams each (source).

The carbon footprint of traditional Christmas cards

A study by Exeter University in 2014 calculated that 140 grams of carbon is used for each traditional Christmas card (source). This might sound like a lot, but consider everything that has to be done to get that card to your recipient:

  • The paper for the card has to be produced, which is very energy intensive. Although 50% less energy is needed if it’s make by recycling used paper and card.
  • The card then needs to be printed and packaged (and the packaging materials need to be produced too).
  • The cards are then transported to your local shop, or directly to you.
  • You write the card then put it back in the post. It travels to a sorting office, then onwards to the recipient, in vans, trains and planes, which all use fossil fuels.
  • And if the card can’t be recycled, it releases methane (another greenhouse gas) as it decomposes.

We should note that the Exeter University research was carried out for an ecard supplier.

Beyond the issues of the fossil fuels used to manufacture and deliver Christmas cards, there’s also the problem of deforestation to provide the raw materials.

Steps are already being taken to make our traditional Christmas cards more environmentally friendly. Many are now printed on recycled card and the majority are recyclable. Some suppliers offset their carbon footprint by planting trees for each card sold.

Other considerations

Of course, your decision on whether to send an ecard or traditional Christmas card won’t just be based on the environmental impact.

Ecards are often free or very cheap to purchase, so can be a far more economical way to send your festive greetings. And you can send the same ecard to many different people, saving you time writing each card.

On the other hand, there’s something slightly impersonal about ecards compared to handwritten, traditional cards. Some recipients might be happy that you’ve switched to ecards, others might be offended.

What is the answer?

In terms of your carbon footprint, ecards are definitely the way to go. Even those sent as large attachments will still only account for 50 grams of carbon released, compared to 140 grams for posting traditional cards.

But, if we’re to be honest, there are bigger fish to fry in this debate. Sending a Christmas card does increase your carbon footprint, but only by about as much as having two cups of tea (source).

Ecards do still have an impact, but they make up a miniscule part of the 319.6 billion emails sent every day this year (source). And let’s not start on the carbon emissions needed to power streaming services for films or online gaming!

If you really want to be green, instead of sending cards, walk round to visit family and friends and tell them personally that you wish them a very Merry Christmas.

Of course, this isn’t practical for most people. But there are a few other ideas:

  • Purchase cards (ecards or traditional) from suppliers who support the environment. For example, cards printed on recycled card, which can continue to be recycled. (Although, of course, recycling processes also use electricity!)
  • Upcycle cards you receive into Christmas tags or cards for next year.
  • Send postcard Christmas cards – the card itself uses half the amount of card plus there’s no envelope needed. Even better, combine with upcycling and use the front part of the cards you received last year to make the postcards for this year.
  • Move to a green electricity provider, such as OVO.
  • Hand deliver as many cards as you can. The long walk will also be great for your winter wellbeing.
  • Agree with your friends to just stop doing Christmas cards. Obviously, you still need to send one to Auntie Ethel, but your mates might actually be relieved to save a bit of time and money each year by not sending to each other.

Reduce your business’ email carbon footprint

Businesses have become increasingly green over the last decade. Paper usage has fallen, many use electronic vans for transport and solar panels are appearing on companies’ rooftops.

But what about the business usage of email? Most companies haven’t even considered whether minimising the use of emails should be part of their environmental policies.

We can help you to better understand your email usage, make reductions where possible and ensure that your systems are working as efficiently as possible – to the benefit of your productivity as well as the environment.

Get in touch to find out more – call 01732 600 170 or email [email protected].

Technological solutions can give your organisation a substantial level of protection against cyberthreats. However, they aren’t infallible.

Many cyber criminals exploit the chinks in tech’s armour, often by using your own employees as their entry point into your systems.

In fact, the Verizon 2021 Data Breach Investigations Report found that 85% of data breaches involved a human element.

These nefarious opportunities are further increased when you have remote or hybrid working patterns and employees using personal devices.

Therefore, it’s critical to understand how your team should be trained to protect your business from cyberattacks.

We’ve teamed up with our HR partners, GF HR Consulting, to explore what this means for employers.

Common cybersecurity issues caused by employees

These are some of the most common cybersecurity incidents:

  • Revealing personal or company data as a result of opening phishing emails.
  • Downloading malicious programs from an email or website.
  • Lost/stolen devices or system access information.
  • Social engineering – where an employee is persuaded to breach security guidelines.
  • Using personal devices which don’t have the appropriate security software installed (eg phones or USB sticks).
  • Emailing data to the wrong recipient(s).
Your team is one of your greatest security risks. But, with the right organisational culture and strategy, they can become one of your greatest defences against cyberthreats.
Gemma Farina
GF HR Consulting


Mitigating the risk

The best way to deal with any problem is to stop it happening in the first place. There are a range of tactics you can use to minimise the risk of employees causing cybersecurity issues.

Lead by example

Your leadership team needs to ensure that there is a culture of good cybersecurity practice throughout your organisation.

In their working paper For What Technology Can’t Fix: Building a Model of Organisational Cybersecurity Culture Keman Huang and Keri Pearlson state:

Leaders have a special responsibility to understand, shape and align the beliefs, values, and attitudes of the entire organisation with overall security goals.

To make this happen, your leaders need to have a thorough understanding of cybersecurity, involvement in cybersecurity activities (eg attending training, communicating policies) and make it a key component of their strategies and decision making.

Training

Cybersecurity training is essential for every employee. It should be provided for any new joiners and repeated every six months across the organisation. This might sound like a lot of training, but cyberthreats change constantly, so it’s vital that your people are aware of the latest developments.

Rather than just dryly listing threats, the training should focus on changing the habits of employees that cause risks. Their knowledge of cybersecurity isn’t the answer to reducing the risk – it’s adapting their behaviours.

For example, if an employee receives 50 emails a day with invoices, it becomes automatic to click to open the attached invoice. This is difficult behaviour to unlearn in order to exercise more caution.

Training should also focus on the specific threats your organisation is likely to face. For example, it should have a different slant for companies with a large number of salespeople working remotely and often on mobile devices, compared to a small business which operates online sales from a single site.

You might consider simulating cyberattacks, such as phishing emails, to keep your teams alert to the risks.

Not only will good cybersecurity training reduce the risk of an employee causing a breach, it can also turn your team into an “early warning system”, alerting you to the possibility of an attack before it happens.

Make it easy to report a cyberthreat

With the right training, employees should be able to spot most cyberthreats. It’s important to make the next step easy for them – that of reporting the threat.

An open, transparent culture benefits organisations in so many ways, not least giving employees the confidence to report cyberthreats.
Gemma Farina
GF HR Consulting


There are a few reasons why employees might be reticent to raise the red flag:

They’re not sure if it’s a threat

It’s important in training to emphasise that no-one will judge them if they mistake a perfectly innocent client email for a malware attack.

They’re too busy

Your organisation needs a quick and easy way for employees to report a threat. If you expect them to spend more than a minute alerting the appropriate people then you significantly reduce the chances of them doing so.

They don’t want to “dob in” a colleague

If an employee suspects a colleague has caused a security incident they can feel split loyalties and find it difficult to report the problem.

This situation is worsened when the person they are suspicious of is at a more senior level in the organisation.

It is important that your team feels comfortable making this type of report. Being confident they know what will (and won’t) happen next can help with this.

They’re worried they’ve done the wrong thing

This is the hardest nut to crack – an employee who’s already replied to a phishing email or clicked on a dodgy link. Their anxiety about the consequences might prevent them from telling anyone about it.

It’s essential that employees understand that, firstly, the sooner they report it the more likely their IT department can prevent the attack happening. Secondly, it needs to be made clear that the consequences of making a mistake will be fair and proportionate – basically reassuring them that they won’t get sacked!

Cybersecurity policy

An effective cybersecurity policy will offer helpful guidance to employees and make it clear what is expected of them.

The policy should include, but not be limited to:

  • The storage, access and use of confidential data.
  • Protection of company devices.
  • Use of personal devices.
  • Guidance for emails received.
  • Guidance for downloading files and installing new applications.
  • Password management.
  • Process for transferring data.
  • Reporting of any security threats, including stolen equipment, wrongdoing or approaches from third parties.
  • Duty to disclose data breaches.

Most importantly, the policy should outline why this is important and the implications of any incidents for both the company and individuals.

This policy should also form part of your contract of employment (including for contractors). This emphasises the importance of cybersecurity to employees and also gives you the necessary legal foundations should you need to invoke disciplinary action against a repeat offender.

This should extend to ex-employees and employees on furlough/garden leave.

Dealing with employees who cause cybersecurity incidents

Unless you suspect a deliberate act, simply disciplining an employee who causes a cybersecurity incident is not the best approach.

To use an analogy, if someone falls down an open manhole, you don’t just blame them and move on. You put a fence and signs around the manhole to make sure the same thing doesn’t happen again.

To build a culture of trust and openness when it comes to cybersecurity, you have to do better than simply blaming the employee when something goes wrong.
Gemma Farina
GF HR Consulting


Training

Assuming that you already have company-wide cybersecurity training in place, you should consider additional training for anyone who causes a security incident.

More personalised training can take into account the security issue in question and also be adapted to the individual employee’s capabilities and learning styles.

First unintentional breach

On top of the additional training, a verbal warning may be an appropriate action for a first offence. Even security breaches which cause no financial loss or long-term damage should be taken seriously, to emphasise to the employee the importance of cybersecurity.

Repeated unintentional breaches

Should an employee repeatedly cause security issues, then additional training should still be provided. However, this may need to be coupled with more serious disciplinary action.

Each case should be treated individually:

  • In some cases, an amnesty might be appropriate, particularly if it is not a deliberate attack by the employee and if their cooperation is needed to investigate the breach.
  • In others, a formal warning, suspension or even dismissal may be a proportional response.

Intentional breaches

In some rare cases the security issues may have been caused by an at best negligent and, at worst, deliberate act by an employee.

To go back to our manhole analogy, this is where someone has ignored the sign, climbed over the fence and jumped in on purpose.

Often this is an emotional act (eg revenge against their employer) or for financial gain. It’s also possible that they are acting on behalf of a competitor or other third party who has persuaded them to sabotage their organisation.

In the vast majority of cases intentional breaches will result in immediate dismissal.

High risk employers

Organisations operating in highly regulated industries or who are part of a critical infrastructure, should consider themselves to be at additional risk of intentional breaches.

In these cases, pre-employment screenings and continuous security monitoring should be particularly intensive.

The potential cost of ignoring the problem.

The clever folks at Verizon have done some calculations in their Verizon 2021 Data Breach Investigations Report to estimate the average costs of data breaches (ie security incidents that lead to data loss).

They found that the median cost was $21,659 (£16,155). In 95% of cases the cost was between $826 (£616) and $653,587 (£487,507).

And it’s not just about short-term losses. Verizon found that breached companies listed on NASDAQ were still underperforming by about 5%, six months after the breach.

What this makes clear is that the impact of not taking cybersecurity risks seriously can be very damaging for your business.

Reduce your organisation’s cybersecurity risk

We offer a range of solutions to minimise the risk of cyberattacks:

To explore how we can reduce your organisation’s risk, call us on 01732 600 170 or email [email protected].


In recent years we’ve seen a spate of headlines relating to ransomware. The 2017 WannaCry attack, for example, affected over 200,000 devices in more than 150 countries. In the UK alone it’s thought to have cost £92 million.

This isn’t a problem that’s going away. According to SonicWall there were 304.7 million ransomware attacks in the first half of 2021.

Three quarters of businesses attacked by ransomware experience at least two days without access to their files.

Ransomware is a major cyberthreat and your company should be taking action now to prevent it.

What is ransomware?

Ransomware is an cyberattack whereby criminals secrete code on your computer system which encrypts your data and results in a ransom demand to decrypt it.

How do ransomware attacks happen?

Commonly they start with a phishing email. This is an email made to look like it comes from a genuine organisation, such as a store or government, or even a friend. The email encourages you to click on a link or open a file. This then downloads the ransomware code onto your computer.

Other methods of infection include employees connecting infected personal devices to the network, plugging in a spiked USB device or downloading a file from a website.

Once the code is embedded in your computer, it sends a message back to the attackers’ “command and control” server with an encryption key.

Once the encryption key has been transmitted, the ransomware will then proceed to encrypt all your data. This will happen on your PC and anywhere else it can get to – which could well be your entire company network. It will create an encrypted version of every file and then delete the originals. You’ll then see a ransom note appear on your screen. The ransom demand is often in bitcoins, as this virtually untraceable currency makes it much easier for the criminals to get away with it.

This phishing email, used in the CryptoLocker ransomware attacks, claims that the recipient has been fined for negligent driving. Naturally, the reader’s first instinct is to click on the link to see details of the infringement, but unfortunately that click downloads the ransomware onto their device.

Gangs may also steal your files before encrypting them. This then becomes a second threat to your organisation – that of the potential data breach should the files be published.

How to stop ransomware

Preventing infection

Firstly, make sure that your antivirus and antispam software is up to date. Check its scans include compressed or archived file types. This will prevent the majority of phishing emails getting through, and significantly reduce the threat.

In the case of Microsoft 365, if you have a Business Premium licence, all email attachments are assessed for suspicious activity and not delivered if any is detected. It also has a Safe Links feature which checks that hyperlinks aren’t sending you anywhere dodgy. If you have Business Basic or Business Standard then these are available as add-ons.

Your firewall, such as the Windows Defender Firewall, is another line of defence and should always be turned on and correctly configured.

Ensure that pop-ups are blocked by default in your internet browsers as these are another common entry point for an attack.

Establishing a list of allowed applications, and preventing the download of any not on this list, will reduce the risk of infected software being downloaded. Equally, keep people’s system access to the minimum needed, so if an account is compromised it will only provide limited access to your system.

However good your defences, some attacks will always get through. So it’s essential that all your staff receive regular cyber awareness training. This will teach them how to spot the threats and what to do about them. It will also give them advice on securing their accounts, such as using strong passwords.

Preventing encryption

Devices protected with Microsoft Defender Antivirus, or similar anti-malware systems, should give your common folders, such as your Desktop or Documents, protection against unauthorised access. This may prevent them being targeted by ransomware.

All of these defensive applications, and Windows itself, should be kept up to date. Don’t ignore a Windows update request – it may include a security patch which will prevent tomorrow’s ransomware attack.

If these defences don’t work, then there’s a chance that your server security tools will detect the message being sent back to the attackers’ command and control server and block it, however this can’t be relied upon.

Preventing spread

You should always monitor your network for suspicious activity. If the attack gets as far as encrypting your data, you will see a spike in your storage activity, which is your last chance to at least reduce the data loss.

Systems such as Microsoft Defender Endpoint provide automatic monitoring of your systems and can remedy any threats they spot.

If you catch the attack before it spreads, immediately disable your internet connection. Most ransomware attacks need the connection to their command and control server to implement the encryption. Don’t reconnect to the internet again until an expert has identified and removed the ransomware program.

However, if the encryption has completed, you only have two options: pay up or restore from backup.

Paying the ransom

We say two options, but paying up really isn’t one you should consider. You have no guarantee that you’ll receive the encryption key and ever recover your files. And, if they’ve stolen your data, you can hardly take their word for it that they’ve destroyed it once the ransom has been paid.

Plus, frankly, paying up means you’ll be funding a criminal organisation and perpetuating the problem.

Restoring from backup

Instead, you will have to restore your files from backup. Assuming you back up frequently, your data loss will be minimised to just the file changes since your last back up.

Restoring the files will be a much quicker solution than decryption. If you use the Microsoft OneDrive, for example, all your files are automatically backed up and version controlled, so you can simply restore to a date and time earlier than the attack.

But the best solution, of course, is to prevent an attack in the first place.

How Heliocentrix can help

We provide security advice and installations, ensuring that your IT systems are protected against ransomware and other cyberattacks by layers of defence.

This includes training your people to ensure that they don’t in advertently let an attack slip through the net.

Call us on 01732 600 170 or email [email protected] to find out more.

In July Microsoft publicised the launch of Windows 365, although their earlier Windows 11 announcement rather stole the limelight.

Windows 365 is a significant development for organisations looking to support more flexible ways of working and thrive in a hybrid world.

Source: Microsoft

What is Windows 365?

Windows 365 is a virtual computer hosted in the Microsoft cloud, called a “Cloud PC”. You can access your Cloud PC from any device, including those running macOS, iPadOS, Android or Linux operating systems.

When you log into Windows 365 via the Cloud PC website, it immediately streams your desktop, apps, data and settings to your device. So, you can start work on your office desktop, then pick up exactly where you left off on your iPad or phone.

Because you’re not downloading data onto your computer, you don’t have the wait times you might experience with, for example, One Drive. Everything is instantly available as it always remains on the cloud.

Will Windows 365 work on my device?

Probably, yes. It’s compatible with Windows devices using Windows 10 or Windows 11, and macOS, iPadOS, Android or Linux. You need to have a browser that supports HTML5 (most do) or the Microsoft Remote Desktop app to run it from.

If you’re accessing it over wifi then the connection speed needs to be good enough to stream a video.

Is Windows 365 free?

No, a licence is required for each user.

The licensing model is similar to that for Microsoft 365, with a fixed price for each user per month.

“Business” level subscribers can have up to 300 users with three levels of capacity/functionality.

“Enterprise” licences include unlimited user numbers, again with three levels of performance. It also has greater integration capabilities, for example with Microsoft Endpoint Manager and Azure Active Directory.

Contact us for the latest pricing information.

Note that Microsoft did initially offer a free trial period, but this is now on hold as they have “reached capacity”.

What are the business benefits of Windows 365?

As hybrid working becomes more common, there can be a ‘jarring’ moment as users switch between devices. It isn’t always easy to pick up where you left off, which can waste time and cause frustration.

Windows 365 improves productivity by ensuring that users receive an identical experience whether logging back onto the same device or a different one. When switching from office, to train, to home, to client meeting – they can get straight back to where they left off.

Further supporting flexible working, a single user can have multiple Cloud PCs assigned to them. Useful, for example, for contractors who work across several different companies.

Finally, the storage of all data on the Microsoft cloud is an excellent option for disaster recovery planning.

Windows 365 and education

Microsoft haven’t yet revealed a pricing model specifically for education, but in principle this could be a great solution for schools, colleges and universities.

The cloud-based nature of Windows 365 enables students to have a consistent experience whether using a PC at school or at home. The security benefits for businesses also translate well to the education sector.

The security benefits of Windows 365.

All the data held on the Microsoft cloud is encrypted, and this encryption extends to data in transit between the cloud and your device.

Using Cloud PCs removes the security risks caused by users logging onto your company network using their personal devices, because they only need to go to a browser to access their Cloud PC. System administrators for “Enterprise” users can also prevent data in the cloud from being copied onto users’ devices.

Is Windows 365 right for my business?

Windows 365 is an ideal solution for organisations who are operating a hybrid working model, with a workforce who have multiple places of work.

But it isn’t just for large organisations, a sole trader who relies on both a home PC and portable devices will reap the rewards of a more agile way of working. And, as we’ve discussed, this could also be a very practical solution for educational institutions.

If you’re considering Windows 365, contact us to arrange a meeting to explore the features of Windows 365 and whether switching to Cloud PCs would suit your wider IT and business strategies.

App/system: Microsoft Outlook
Learn: How to find emails which have been archived in Microsoft Outlook
Skill level: Beginner
Read time: 3 minutes

In this article we explore why you should archive emails in Outlook and how to find them afterwards. This is based upon users who have Microsoft 365 or Microsoft Exchange. If you use outlook.com or have POP/IMAP accounts then your set up will differ.

Why archive emails in Outlook?

You can manually archive emails or set up rules to archive automatically, for example to archive emails which arrived before a certain date.

There are two main reasons to archive emails:

1. Saving server space

Moving emails to archive removes them from your email server, so you only have a copy of them on your desktop. This prevents email servers becoming overloaded due to large mailboxes.

If you use Microsoft Exchange, Microsoft 365 Business Premium or Microsoft 365 Enterprise then this isn’t an issue, because you have ample storage in your email server. With Exchange you have 50GB and this increases to 100GB with Business Premium or Enterprise.

If you are on a different Microsoft 365 arrangement, however, your emails will be stored on servers which may have lower capacity limits. Therefore, archiving to your desktop may be necessary.

Backing up emails archived on your desktop

If you use OneDrive then you can also include your email archive in the files which are backed up to the cloud.

However, note that this backup won’t happen while Outlook is open. Therefore, if you tend to open Outlook as soon as you start your computer and leave it open until you shut down, then OneDrive may never have an opportunity to fully sync your email archive folder, so it will remain just on your desktop.

In this case you might want to consider an alternative backup method.

2. Organising your emails

Archiving provides long term storage for emails which you want to keep, but don’t need to have regular access to. It helps to keep your mailbox organised and minimal, enabling you to focus on your most current emails.

This isn’t the only way to organise your emails. For example, you could instead set up multiple folders to file them in. However, these would be stored in your email server and, therefore, not solve any server space issues.

Where is your Outlook email archive stored?

By default you will have an Archives folder in Outlook, which cannot be deleted:

The emails in your archive are stored as an Outlook data file (.pst or .ost file type) on your computer. These can be stored in a variety of places, depending on the set up you are using. The simplest thing is to search in Windows Explorer for *.pst or *.ost.

How to find archived Outlook emails

Open Outlook and go into your Archives folder. Use the Outlook Search function at the top of the screen.

Click in the Search box and type in what you’re searching for (in this example we’re searching for archived emails which contain the word “Heliocentrix”).

Then click on the little drop down arrow to the right, which reveals this menu:

Select Current Folder to just search in your archive folder.

You can use the other options to narrow down the search range, for example by the date received or the subject of the email.

If you’re not sure whether the email you’re looking for is in archive or elsewhere, select All Mailboxes instead:

Outlook will then display all the emails which match your search criteria.

How we can help

Microsoft Outlook is an immensely powerful took for businesses, however many organisations only use a fraction of its functionality.

We are Microsoft 365 specialists in Kent and with our support, you can make sure you’re getting the most from Outlook and all your Microsoft applications.

Call us on 01732 600 170 to find out more about our IT support services.

We are gradually adapting to hybrid working practices, where some employees are working remotely, while others are in the office.

For many activities, hybrid working can make little or no difference to the outcomes achieved. In fact, working at home without the disruption of the office environment can make some tasks quicker and easier.

However, where collaboration is needed, particularly for creative or innovative working, bringing people together is still essential.

Often this can mean holding meetings where some attendees are in the office and others working from home. This approach runs the risk of “presence disparity”, where those attending remotely have an experience of the meeting which is less rich, less engaging.

Microsoft are working hard to develop their meeting room functionality to be equally inclusive for all meeting attendees.

What is Microsoft Teams Rooms?

These are a suite of communication and meeting room solutions that incorporate Microsoft Teams along with Teams-certified hardware from Microsoft and their partners.

The Teams Rooms set up is highly flexible and can be scaled to suit any size or configuration of room.

Image courtesy of Microsoft.

Screens

Microsoft’s Surface Hub 2S is an expansive, high quality screen which gives you a feeling that remote participates are truly “in the room”.

Image courtesy of Microsoft.

But, beyond just relaying images, the Surface Hub 2S also acts as a digital white board. This can be seen and, most importantly, used by both physical and virtual attendees.

For the ultimate Teams Rooms set up, partner two Surface Hub 2S screens, one to display attendees and the other for collaborative whiteboard working.

Smart web cams

Microsoft Teams Rooms smart web cams further enhance the feeling of authentically being in the meeting for remote attendees. The cameras focus on the person in the room who is speaking and track them as they move, to ensure that all attendees can focus on the speaker.

Audio

A wide range of microphones and speakers are available to suit your space and budget.

One of our favourites are the subtle ceiling tile microphones which are non-intrusive and give the meeting a more natural feeling.

The Microflex Advance ceiling tile microphone with accompanying speaker, courtesy of Microsoft.

Another smart option is intelligent speakers. These don’t just relay the voices of those in attendance with crystal clarity, they also provide an automatic transcription service to save participants taking notes. The integrated 7 microphone array can recognise up to ten different voices to ensure an accurate record of who said what during the meeting.

Control consoles

Tablet-sized touch screens provide easy meeting controls during the meeting.

Teams panels

These are panels located just outside your meeting room to act as a booking system. Users can view the meeting room’s availability, reserve a slot and report problems. They can even be customised to blend in with your office décor!

An example Teams panel display, image courtesy of Microsoft.

Microsoft Teams

Of course, to partner all this hardware, we have the Microsoft Teams software.

We are continuing to see Microsoft building upon the underlying video conferencing capabilities of Teams, bringing in an astounding number of new features over the last year or so.

Here are just a few of the innovations which will help to give everyone at your hybrid meeting the same immersive experience:

  • On screen chat and action list functions.
  • Reactions to allow you to show agreement, applause or even a little love to your colleagues, without interrupting them.
  • Blurred or customised backgrounds.
  • Pinning the video of specific attendees to give them the spotlight while they’re speaking.
  • Various video layouts, including “together mode” which places participants in a scene, such as an auditorium, to provide a more immersive experience for those working remotely.
  • Breakout rooms to facilitate smaller group discussions.
  • Five minutes left warning to help you wrap your meetings on time.

Get Microsoft Teams Rooms for your organisation

Setting up a Microsoft Teams Rooms environment is an investment which will pay dividends for organisations adapting to hybrid working.

They create a more natural and immersive experience for all attendees, improving collaboration and creativity when not everyone can be in the room at the same time.

To discover more about Microsoft Teams Rooms and how they could transform hybrid working for your organisation, call one of our IT support experts on 01732 600 170.

In June Microsoft announced the launch of Windows 11. This took many of us by surprise, as Microsoft had promoted Windows 10 as the “last version of Windows”! Best laid plans and all that …

So, what does Windows 11 have in store for us?

Image courtesy of Microsoft

When will Windows 11 be available?

The launch date is 5th October 2021.

What’s new in Windows 11?

There appear some interesting changes coming with Windows 11:

  • A fresh new look called “Fluent Design”. This incorporates more themes and wallpapers to personalise your experience.
  • The start menu has been moved to the centre of the screen and changes according to the time of day and activities you’re working on.
  • The taskbar (now renamed “dock”) has been optimised for touch as well as mouse users. Like the start menu, the widgets in the dock (eg weather, maps, news) dynamically change throughout the day.
  • New “Snap Layouts” enable you to multitask more effectively, with options to arrange multiple windows across the screen in different configurations.
  • The Snap Layouts are further enhanced by “Snap Groups” which allow you to return to previous configurations of snapped windows.
  • Improved voice and handwriting recognition.
  • Windows Updates will be smaller and you’ll see an estimated installation time so you can decide whether to update now or later.
  • Greater integration with Microsoft Teams, Outlook and Calendar, making it easier to join meetings, calls or chats.
  • A redesigned Microsoft Store, with content including Android apps from Amazon.
  • For those who use Windows at home, Windows 11 promises to transform the gaming experience. This includes improvements to accessing games, managing them and the speed of play.

What does Windows 11 look like?

You can see for yourself in this introductory video from Microsoft:

Will Windows 11 be free to current Windows users?

If you already use Windows 10 then you may receive a free upgrade to Windows 11. The rollout of the upgrade is due to start in late 2021 and continue into 2022.

If you use an older version of Windows you might be able to upgrade for free, but it is likely to require a clean install/reinstall on your PC, which will remove your apps and settings. If you need support to do this, please contact us.

Is my PC Windows 11 compatible?

You can check this through the Microsoft PC Health Check app.

Most business PCs should be compatible, however older devices and home computers may not be. If you’re concerned about compatibility, then call one of our team on 01732 600 170 and we’ll be able to help.

What devices will Windows 11 work with?

Microsoft assure us that Windows 11 will work on “all your favourite brands”, including Acer, Asus, Dell, HP, Lenovo, Microsoft Surface and Samsung.

One of the problems which Windows 11 purports to fix is the experience on tablets. It promises an improved touch experience including touch keyboard and dictation upgrades.

Windows 11 also appears to be another step towards Microsoft having their own phone operating system.

What if we have problems with Windows 11?

So long as you do it within 10 days of upgrading your computer, you will be able to downgrade back to Windows 10. After 10 days, you will need to do a clean install to go back to Windows 10, which will mean losing your settings and apps.

How does this impact Heliocentrix clients?

When the Windows 11 rollout begins we’ll review its performance and feedback from users to assess whether it’s the right fit for each of our Managed IT Support clients.

Where the decision is made to switch to Windows 11, we will ensure that upgrades are installed smoothly alongside any additional training requirements. Equally, we will consider the Windows 11 option for any new client set-ups from October onwards.

App/system: Microsoft Outlook
Learn: How to archive emails in Microsoft Outlook
Skill level: Beginner
Read time: 5 minutes

Why archive emails?

Archiving emails can help to solve two problems:

Email server overload

All email servers have capacity limits. Archiving emails removes them from the email server and stores them on your PC.

Most Microsoft 365 services come with ample capacity, so archiving emails isn’t necessary: Exchange provides you with 50GB and Business Premium or Enterprise have a 100GB capacity.

However, if you are using Microsoft 365 with an email server which has a more limited capacity, or you often send/receive very large file attachments, then archiving may become necessary.

Clutter overload!

A good archiving system will help to keep your mailbox well organised and under control. You will only see current emails, rather than years’ worth of old emails you are unable or unwilling to delete.

You can still find archived emails easily using the Outlook search function.

Your Outlook archive folder

An archive folder is included as default in Microsoft 365, outlook.com and Microsoft Exchange accounts. Like other default folders (eg inbox, sent items, deleted items) the archive folder cannot be deleted.

If you use Outlook for POP or IMAP email accounts then you can create your own archive folder.

How to send Outlook emails to your archive folder manually

When you open an email you’ll see an Archive button in the top menubar:

Simply click on this to send the email to your archive folder.

Alternatively, click once on the message (so it appears in the reading pane) and use the backspace key on your keyboard (not the delete key) to send it to archive.

Note that the backspace function to archive emails can be disabled by modifying the registry. Your IT administrator should be able to do this for you or contact us for help.

Why won’t my Outlook emails manually archive?

If the message is open in its own window (rather than just in the reading pane) then you won’t be able to archive by using the backspace key. Instead, use the Archive option in the menubar, or close the window before hitting backspace.

AutoArchive function for Outlook emails

Microsoft Outlook allows you to set rules to automatically archive emails.

However, we do not advise the use of AutoArchive in a business setting. In our experience this can cause more problems than it solves, particularly because the AutoArchive function removing emails from the server, which means there is no longer a backup version.

Instead we recommend that organisations set up a default archiving policy to manage emails, providing users with the ability to override it for specified folders or emails. See Centralised email archiving and retention policies later in this article.

If you do wish to use AutoArchive, this is how to do it…

Set archive rules for all emails

To set up your rules first go to File then select Options and you’ll see this pop up window:

Select Advanced from the right hand navigation so you see the screen above.

Under the AutoArchive heading click on the AutoArchive Settings… button.

This pops up a window of AutoArchive options:

On this screen you have a number of options enabling you to determine how often AutoArchive should run, whether you want it to give you a prompt (ie let you know) before it runs and what it should do when it runs. Select the options you require.

Finally, click OK to close the AutoArchive window and OK to close the Outlook Options window.

Set archive rules for individual email folders

You can also amend your AutoArchive rules for individual email folders.

To do this, go to the folder in your navigation pane, right click on it and choose Properties.

This opens a new window where you can amend the AutoArchive options just for that folder.

Select the Archive this folder using these settings: option, then adjust the settings as required.

Click OK to complete.

Why can’t I AutoArchive my Outlook emails?

If you use Outlook through an Exchange server, you might not have access to use AutoArchive. In addition, your company may have an email retention policy in place which overrides AutoArchive. Check with your IT support and they’ll be able to tell you if this is the case.

Centralised email archiving and retention policies

Rather than using AutoArchive we recommend that your system administrator sets up a default policy to move emails to archive after a set period of time. Users can then be given the ability to override this for particular folders or mail items.

This is particularly useful for organisations who have regulatory obligations or company policies to retain certain types of emails, but equally wish to maintain good housekeeping of content which has no legal or business value.

Setting up an archive policy for Outlook

Your system administrator can set up a default archiving protocol by adjusting the email “retention policy”. This can be applied across your whole organisation and/or adjusted for individual users or user groups.

This is managed through a series of “retention tags” – which are instructions about how to deal with emails. For example, you could have retention tags to “Move to archive if 2 years old”, “Delete if 5 years old” or “Never move to archive”.

Usually, you will have a default “policy tag” for archiving (eg “Move to archive if 2 years old”) then a series of additional “retention policy tags” which the system administrator can apply to specific folders, and finally a number of “personal tags” which end users can apply to specific folders or individual emails.

Applying personal tags to folders and emails

If you have access to apply personal tags to your folders and emails this is very straight forward to do.

Go to the appropriate folder in your navigation pane (or the email you wish to apply the tag to) and right click. Select Properties and then go to the Policy tab where you will find your Archive options. If you’re using Outlook on the web then, when you right click, you’ll instead need to select Assign policy and then choose from the list which appears.

Finding archived emails

Once your emails are archived they are still easy to find. Read our ‘how to’ guide for finding your archived emails.

Get the support you need for all Microsoft apps

We provide Managed IT support and pay as you go support to businesses around the south east. Contact us at [email protected] to find out how we can make Microsoft work harder for your business.

As the need to work from home swept across the country, video conferencing technology suddenly became a focus of attention. No longer the preserve of multinationals, even the smallest business turned to online communications for their day-to-day operations.

Now businesses are gradually bringing staff back into their offices, adopting hybrid working practices which balance working from home with working in the office. These aim to keep people safe and make the most of the beneficial ways of working we learnt through lockdown.

Technology is, again, in the spotlight as businesses seek the most efficient methods of managing hybrid working.

What is hybrid working?

Hybrid working combines working from home with working in the office – with the aim of getting the best from both worlds.

Before the COVID pandemic, only 32% of British employees had ever working from home. By September 2020 this had risen to half the working population. And, according to a YouGov survey, 18% want to continue to work solely from home, 39% want to work from home some of the time and 39% don’t want to work from home moving forwards.

For some people working from home is a more productive way of working, free from the distractions of an office environment. There are clear cost advantages for employers who can reduce their office space thanks to having fewer employees to accommodate. And, of course, home working keeps people safer from the risks of COVID and other infectious diseases.

But home working isn’t ideal when high levels of collaboration are required. It can lead to declining productivity and reduces the opportunities to develop company culture and monitor people’s wellbeing. Bringing people back together, albeit not all the time, should re-energise the workforce and promote greater creativity and innovation.

Businesses are increasingly seeking technology solutions to achieve the benefits that hybrid working has to offer.

The importance of file accessibility

Hybrid working requires people to continually switch between devices, often from a laptop at home to a desktop in the office. It’s essential that they have the same experience on all devices and access to the same files.

Using cloud storage for each person’s filing provides them with immediate access to all their data from anywhere. There are many options for reliable, secure cloud storage of data, including OneDrive, SharePoint (both part of the Microsoft 365 package), Google Drive or Amazon.

Storing files in the cloud also facilitates file sharing for more collaborative working, although it is important to select software which includes the necessary security to control file access.

Managing hot desking

Once you have cloud storage set up for each person’s file storage, hot desking suddenly becomes much easier.

Whether users bring their own laptop in, or log into a shared desktop/laptop device, they will have instant access to their own files.

An online booking system can further support hot desking and enable businesses to monitor who is going to be in the office and when. Microsoft have their own bookings application which can be used for hot desk bookings. There is also a wealth of third party applications which organisations can use, many of which will integrate with Microsoft 365 and Outlook calendars.

Inclusive team communications

When not all of your team are in the office at the same time, it’s important to maintain communication channels that don’t exclude those working from home.

Email remains the primary internal communication method for many businesses – Microsoft saw a 40.6 billion increase in the number of emails sent between February 2020 and 2021 (source: Microsoft).

But there is a growing trend towards online chats. A chat function is automatically available in Microsoft Teams and there are many alternatives, such as Slack or Google Chat.

These asynchronous communication tools lessen the dependence on online meetings. This reduces the risk of “Zoom fatigue” and allows people to become part of the conversation when it suits them.

However, it’s important to set boundaries for your team’s wellbeing. Technology can support this too; for example, you could set your server to delay the delivery of any emails out of office hours to discourage people from working at the evening or weekends. Or you could even go so far as to set up calendar reminders to prompt your teams to disconnect at the end of the working day.

Managing meetings

Online meetings have become an essential part of our working day. Between February 2020 and February 2021, the time spend in Microsoft Teams meetings has more than doubled globally and the average meeting length has increased from 35 to 45 minutes (source: Microsoft).

Many businesses are continuing to hold meetings fully online, even when some workers are in the office, to prevent “presence disparity” – so all attendees have a consistent experience of the meeting.

Improving meeting room technology can help to create a more immersive experience for everyone, and lessen presence disparity for those working from home.

Upgrading audio and webcam equipment in meeting rooms can prevent those dialling in remotely from missing out. And innovations such as digital white boards can greatly improve collaboration. Read about how Microsoft Teams Rooms are working to enhance the hybrid meeting environment.

Microsoft have also tried to tackle the issue of meeting-overload, following research which showed the benefits of having space to mentally reset and transition between meetings. There are now settings in Outlook that allow you to automatically ensure breaks between meetings, which can be the default for your entire organisation.

Company communications

The sharing of company information and announcements can also become more problematic with remote or hybrid working. You’re unlikely to be able to gather a whole team together very often, let alone the whole company. But, in many ways, it becomes even more vital to do so. Not just to share information, but to develop a positive company culture.

Larger companies with their own intranet already have the solution to this, so long as they have the expertise and time to maintain it.

For smaller businesses, creating and maintaining an intranet is not an option. For those who use Microsoft 365 there is a simple and effective answer to this; SharePoint. This collaboration tool enables you to replicate all the capabilities of a company intranet, without requiring the expert knowledge or expensive set up.

Employee wellbeing

The flexibility and freedom provided by hybrid working can have a positive impact on wellbeing, by giving employees more control over their work and home lives.

However, this isn’t true for all employees all the time.

Managers may find it difficult to monitor their team’s wellbeing, particularly if staggered working hours mean that they aren’t in the office at the same time as all their team members.

Brief surveys of people’s wellbeing can be a useful way for managers to check on how their teams are doing. With just a few carefully worded questions, employees can quickly give you a snapshot of their mental health and motivation levels. Tech solutions to support this include Microsoft Forms, Google Forms or Survey Monkey.

Apps such as Headspace support employees in mindfully disconnecting and developing other healthy tech-use habits. Microsoft have integrated many of the Headspace features in Teams and Outlook, so you may find you already have access to these useful tools.

Performance management

Over the course of the pandemic, employers have had to be more understanding of variable productivity. However, longer term, businesses need to ensure that employees are equipped to achieve the required levels of performance and that managers are able to monitor this effectively.

As well as being useful for larger meetings, video conferencing applications such as Microsoft Teams or Zoom are a good way to ensure you regularly connect with individual team members when you can’t be in the office together.

Sharing files in collaborative environments, such as Microsoft SharePoint, Google Drive or Slack, gives managers the opportunity to assess their team’s progress on specific tasks. For larger organisations, more complex workflow management technology is available to track progress.

For Microsoft 365 users a ‘productivity score’ is available which benchmarks how efficiently your people are using their technology and how well that technology is responding to their needs. While seen as slightly contentious by some, it’s a useful tool to measure how well your technology is supporting hybrid working.

Security measures

When adopting hybrid working practices, all the normal security measures are still needed (physical device security, data security, network security, etc). But, to complicate matters, they need to take into account multiple working environments for each employee.

As well as having the right infrastructure in place, it’s essential that cybersecurity training and support is adapted to the new needs of hybrid working. In particular, technical support needs to be easily available to those working from home to swiftly respond to security-related questions or concerns.

Training

There are many ways technology can support hybrid working. But if your people don’t know how to make the most from that technology, then it’s a wasted investment.

People need to feel comfortable using the software you provide, or they won’t get the best from it. This is particularly true of collaborative applications where the users need to feel “at home” in the online environment in order to participate to the maximum.

There is a danger in assuming that employees can just get to know software by themselves, or will have the motivation to undertake self-learning. This can result in reduced productivity and poorer job satisfaction.

When people are spending time in the office this can be a great opportunity to schedule face to face training, instead of online. It’s also important that managers check in with their teams to ensure that they are comfortable with the tech they’ve been asked to use.

Hybrid working in New Zealand

Having eased lockdown restrictions sooner than many other nations, New Zealand has more experience than most of new hybrid working practices.

The graph below demonstrates the reduction in isolation for employees as restrictions ease and hybrid working patterns take effect.

Source: Microsoft

The data is based on aggregated data relating to email and meeting interactions across Microsoft Teams and Outlook emails in New Zealand.

Hopefully the future of hybrid working will bring a similar improvement as it beds in across the UK.

Reap the rewards of hybrid working

Hybrid working is likely to be around for some time to come, maybe forever, so it’s essential that your organisation is positioned to get the most from these new ways of working.

At Heliocentrix we provide the equipment, software and IT support to enable you to smoothly switch to more productive and enjoyable ways of hybrid working. Email [email protected] to discover how we can support your businesses’ future working practices.

Many of us will be setting our out of office responses over the coming weeks, letting people know that we’re taking a well-earned break.

To give you some inspiration for your out of office message, we’ve trawled the internet to bring you some of the funniest and cleverest we can find! *

Disclaimer – funny out of office responses only work for some businesses and some recipients. Often better reserved for colleagues, not clients. Keep this in mind when writing yours!

And, if you’re not sure how to set up yours, read our handy ‘how to’ articles:

This one comes courtesy of Reader’s Digest. We love the creativity that’s gone into it – Salima is certainly very excited about her holiday!

Of course, there’s no reason why out of office responses shouldn’t include images. This example from Yesware has a bit of a ‘wow’ factor, while still giving you all the information you need to find the right alternative contact to speak to.

Another visual one, this time from PhD Comics. It’s funny…but in a scarily true way.

This one from Social Talent isn’t out-and-out funny, it’s a bit more on the professional side, but we’re still desperate to see that video about the dinosaurs vs snowmen nightmare!

This is another one from Reader’s Digest. A funny, personal approach – perfect for out of office responses to your own team, maybe not to clients.

A final one here which is fun to decipher and, despite the lack of text, still tells you everything you need to know. Via @benstapley.

And, if you’re still stuck for inspiration for your own auto response, have a play with this out of office email generator from HubSpot: https://ooogenerator.com/

About Heliocentrix

We provide a range of IT support services to small and medium sized business. Our aim is to take the hassle out of IT – providing effective and reliable systems and support services. We can even help you set up your out of office response! Get in touch to find out more.

App/system: Microsoft Outlook
Learn: How to set up Outlook out of office responses with Microsoft Exchange
Skill level: Beginner
Read time: 2 ½ minutes

Using the Microsoft Exchange server makes it very easy to set up and manage professional out of office responses.

To check if you’re using Exchange, open Outlook and click on File in the navigation bar. If the email address in question has this symbol next to it, then it uses Microsoft Exchange:

If it doesn’t, you can still use rules to set up your out office response instead, however you will need to keep Outlook running while you’re away.

Using Automatic Replies in Outlook

  1. Click on File in the Outlook navigation bar and it will open your Account Information screen. Make sure that the Microsoft Exchange email account you wish to set up the out of office for, is showing in the drop down list at the top.
  2. Click on Automatic replies:

3. A new window will pop up:

  1. Select the Send automatic replies option at the top. Assuming you want them to send for a certain time period, also tick the Only send during this time range box and select your start and finish dates and times. Alternatively, leave this box unticked and the responses will be sent until you manually turn them off.
  2. You have two tabs below this which allow you to write your automated message:

Inside My Organisation

This is the email which will go to your colleagues.

Outside My Organisation

This is the email which will be sent to people outside of your business. You may wish to only send your out of office response to emails you receive from your existing contacts (so it isn’t sent in response to newsletters or spam emails). In this case, choose the My contacts only option.

6. Then click on the OK button to save your changes.

Note that when your out of office response is active it will only send once to each person. So, if someone emails you multiple times they won’t be bothered by receiving lots of the same out of office response.

Turning off your out of office

When the Automatic Replies service is working you’ll see a yellow notification when you open Outlook which includes a Turn off button. Alternatively, you can go back into the main Automatic Replies functionality to turn it off.

Managing Automatic Replies from your phone

You can also set up and manage your out of offices responses from your Outlook phone app.

  1. Tap on the home icon then go to the Settings icon at the bottom left of your screen:
  1. Under Email accounts, tap on the email address in question.
  2. Select Automatic replies and tap on the toggle to turn it on. You’ll then see this screen:
  1. Choose to Reply to everyone or Reply to only my organisation. If you opt to Reply to everyone then you can tap on the Use different messages toggle to send a different messages to each group.
  2. Type in your message(s) at the bottom of the screen and tap on the tick at the top right when you’re finished.

The automated responses will be sent until you go back in and turn them off.

Need Outlook support?

We provide Managed IT Support and “pay as you go” services across the range of Microsoft products, including Outlook.

Give us a call on 01732 600 170 to find out more.

App/system: Microsoft Outlook
Learn: How to set up Outlook out of office responses if you don’t use Microsoft Exchange
Skill level: Beginner
Read time: 4 minutes

Outlook comes with an excellent Automatic replies function which allows you to set up automated out of office responses.

However, this function is only available if you use the Microsoft Exchange email server. You can tell whether you use this or not by opening Outlook and clicking on File in the navigation bar.

If the email address in question has this symbol next to it then it uses the Microsoft Exchange server:

In this case, please follow our instructions for setting up out of office responses using Microsoft Exchange.

If it doesn’t have this symbol, then, unfortunately, you can’t use the Automatic replies function. Instead, you’ll need to use Outlook rules to set up your out of office response.

WARNING! Setting up rules-based out of office replies can lead to hideous loops where your out of office response responds to someone else’s out of office response, which then replies back to yours, and so on ad infinitum until your (or their) mailbox is full. Make sure you include exception criteria to minimise the risk of this happening.

Using rules to set up an out of office response

It’s important to note, that Outlook rules only work when Outlook is open. This means that you need to leave Outlook running while you’re away. Keep in mind that you can only set up rules on the desktop/laptop version of Outlook, not on your phone.

Create your out of office email

  1. Create a new email in Outlook and enter an appropriate subject and message for your out of office response.
  2. Select File from the navigation bar then Save As. Give your email a name and, in the Save as type section, select Outlook Template from the drop down list:

3. You can either save the template in the default location (usually c:usersusernameappdataroamingmicrosofttemplates) or choose somewhere else to save it. Click on Save.

Amending your out of office email

When you need a different out of office message, you can either amend the original template, or set up a new one using the instructions above.

Set up a rule to send your out of office email

  1. Go to File in the navigation bar then select Manage Rules & Alerts.
  2. A new window will pop up. Check that the correct email address is displaying in the Apply changes to this folder box then click on New Rule…:

3. Click on Apply rule on messages I receive so it’s highlighted (as shown below), then click on the Next > button.

4. You move to a new window:

5. Assuming you want the out of office response to go to everyone who emails you, leave these options unticked and click on Next > and click Yes when asked if you want to apply the rule to all messages. If you want to set conditions for who should or shouldn’t receive your out of office response, then complete this window as appropriate before clicking on Next >.

6. In the What do you want to do with the message window, tick the reply using a specific template option under Step 1, then under Step 2 click on a specific template.

  1. From the next pop up window select User Templates in File System using the drop down options.
  2. Next, select the template you created, click on Open and then Next >.
  3. You then have the option to set any exceptions to this rule. This is an important step to avoid never-ending ‘loops’ caused by out of office responses replying to each other. The following exceptions can be useful in minimising the risk of this:
    • “except if it is an automatic reply” – setting this exception will block most, though not all, auto reply loops.
    • “except if the subject contains specific words” – you can specify words or phrases such as “auto”, “automatic reply” or “out of office”, which are commonly used in out of office subject lines.
    • “except if the body contains specific words” – again specifying words commonly found in out of office response emails.
  4. Finally, give your rule a name. Note that the Turn on this rule tick box is ticked by default. If you don’t want the rule to run straight away, untick the box. Click on Finish to save your rule.

How to turn your Outlook out of office rule on and off

  1. Go to File in Outlook’s main navigation and select Manager Rules & Alerts.
  2. Under the E-mail Rules tab you should see your out of office rule listed:

3. Simply tick the box to the left of your rule and select OK to turn it on. Untick the box and click on OK to turn it off.

Make out of office easier with Microsoft Exchange

Using the Microsoft Exchange server to host your emails offers a raft of benefits, including easier out of office management, without the need to keep Outlook running.

Contact us to find out more about Microsoft Exchange services for businesses.

You can also read our guide on how to set up out of office responses using Microsoft Exchange.

App/system: Microsoft Outlook
Learn: How to add automatic signatures onto Microsoft Outlook emails
Skill level: Beginner
Read time: 4 minutes

Having a smart, customised, consistent signature at the bottom of your emails is very beneficial:

  • It looks professional.
  • It contains important contact information your reader might need (such as your phone number).
  • It’s an opportunity to reinforce your brand and promote your marketing messages.
  • And, of course, it tells the reader who you are!

Setting up automatic email signatures saves time and creates a consistent ‘on brand’ message to go out with each communication.

There are two ways of setting up automated signatures in Outlook:

  • Client-side
  • Server-side

The following instructions are based on Outlook 365, but the steps are the same, or very similar, in older versions of Outlook.

Client-side automatic email signatures

Setting up client-side signatures means that each individual needs to manually add the signature to their Outlook application, on each device they use.

This could be a useful option if you are a very small business with just a few people and devices. For larger organisations it would quickly become unwieldy.

How to set up client-side signatures in Microsoft Outlook

On a desktop

  1. Open a new email in your Microsoft Outlook application.
  2. Find the Message menu and click on the Signature
  3. Under the Select signature to edit section click on the New A pop up box will appear; type a name for your new signature into the box and click on OK.
  4. Go into the section titled Edit signature and type in the signature you want to use. There are various formatting options and the ability to add images, business cards and hyperlinks.
    If you prefer, you can set up the signature in Word (which means you can also use tables, bullets and borders) then copy and paste it into the Edit signature box. This is also a handy way of sharing the layout of the signature with others. You can also access email signature templates from Microsoft to help you style yours.

  1. When you’re happy with your signature, go to the Choose default signature In the E-mail account drop down list, select the email account you want to use this signature for. In the New messages and Replies/forwards drop downs, select which signature you want to use when sending a new message and when replying to a message or forwarding one. In most cases, you’d use the same signature for both.
  2. Click on the OK button at the bottom right to save your signature and its settings. Close the new email you had opened.

On a mobile phone

  1. Open the Microsoft Outlook app on your phone.
  2. Swipe right to open the menu then tap on this icon at the bottom left to open the Settings menu:
    Outlook Settings icon
  3. Scroll down to the Signature option and tap on it.
  4. If you have more than one email account and wish to use a different signature for each one, tap on the Per Account Signature toggle so it’s on (it will turn blue).
  5. Tap on the word Signature or, if you’re doing different ones for different email accounts, tap on the word Signature under the account you want to change.
  6. Type in the signature you want to use. Note that you won’t have the formatting options which are available from the desktop version of Outlook.
  7. Tap on the tick at the top right of the screen to save your signature.

How to change email signatures in Outlook

  1. Open the signature screen, either by opening a new email in Outlook (on desktops) then clicking on the Signature button, or by going to Settings and the Signature option if you’re using a mobile phone.
  2. On desktop go to the Select signature to edit section and select the signature you want to amend, then make your changes in the Edit signature

On mobile, simply overtype the signature that’s on the screen beneath the appropriate email account name.

How to add a logo, photo or social media icons to your email signature in Outlook

A picture in your signature attracts the eye and gives you an opportunity to highlight important information. However, don’t rely solely on images for your signature as some email clients may not display them.

Businesses often include their logo, a photo of the individual and/or icons for their social accounts (eg LinkedIn, Instagram, YouTube).

Images can only be added to your Outlook signatures on your desktop, not on your mobile phone.

  1. Open a new email and click on the Signature button in the Message
  2. Opt to create a new signature or edit an existing one.
  3. Click on the Insert image icon:
    Outlook add image icon
  4. Browse to find the right image and click on Insert.
  5. The image will be added into your signature. You can add text above or below it. Note that you cannot resize the image once it’s in the signature, so this will need to be done before inserting it.

If you want the image to appear side by side with the text, the simplest way to do this is to use tables in Microsoft Word to create the signature. Make sure your table borders are set to No border if you don’t want them to be visible. When you’re happy with it, select the entire table, copy it and paste it into the Edit signature section in Outlook.

Alternatively you can use Microsoft’s signature templates, this gives you a Word document containing various example signatures in tables which you can adapt to your own details, then copy and paste into Outlook.

Server-side automatic email signatures

How to set up server-side signatures in Microsoft Outlook

Settling up server-side signatures is a much simpler way to achieve a consistent signature across your organisation.

You simply set up the signature and it’s automatically appended to all emails regardless of where they are sent from.

There are many advantages to using an email signature management system:

  • Consistent, professional signatures automatically applied across your organisation.
  • Quick and easy to update signatures for everyone simultaneously.
  • More control over the design of the signatures (you can even create custom signatures from scratch in HTML).
  • No reliance on the people in your business having the technical capability to manage their own signature.
  • Confidence that the signature will appear consistently across various devices and operating systems.
  • Ability to schedule signatures for particular time periods, for example to align to specific marketing campaigns, events or seasonal messages.

Exclaimer email management system

There are many different email management systems out there. We have chosen to work with Exclaimer.

Exclaimer logo

Here’s a quick overview of how their automatic signatures work:

What your email signature should contain

Now you know how to set up your automatic email signatures, what should go in them?

Here is ours as an example:

We’ve kept it quite succinct and simple, including the individual’s contact information, our logo and our social media links.

But there are plenty of other things you could include, for example:

  • A photo of the individual.
  • Information on your latest marketing initiative.
  • A link to your latest news article.
  • Customer satisfaction survey.
  • Accreditation or award logos.
  • Seasonal touches, such as Merry Christmas messages.

Basically, anything which will help to reinforce the expertise and professionalism of your organisation.

How we can help

We’re experts in all aspects of Microsoft 365 and, thanks to our partnership with Exclaimer, we can now extend those services to helping you set up an email management system for your organisation.

To find out more about this and our other services, give us a call on 01732 600 170.

Sometimes it feels like technology is designed to break the day after the warranty runs out.

It isn’t, of course, but on the occasions when this does happen it might not just be a nuisance. It might mean significant cost and disruption for your business.

Heliocentrix extended warranties

We understand the frustration when technology lets you down. In fact, our whole purpose is to ensure this happens as little as possible.

To support this aim, we have now introduced extended warranties across a range of IT equipment.

This can save you from costly hardware replacements, and it means you will not have any difficulties or long waits getting replacement parts for your equipment.

Devices we can cover

We can provide extended warranties for the majority of IT equipment, including:

  • PCs/laptops/tablets
  • Networking equipment
  • Servers

Enquire about our extended warranties

Our warranties start from as little as £50 per year for a PC or laptop*. The price depends on the type of equipment, the make/model and its age.

We offer extended warranties as part of our Managed IT Support packages, or as a standalone service.

Call us on 01732 600 170 for a quotation.

* Pricing correct March 2021.

Vodafone has been made aware of a Flubot SMS scam and are advising customers to be especially vigilant with this piece of malware and to always be very careful about clicking on any links received in an SMS. The scam text message in this instance is impersonating DHL on the Vodafone network and is affecting Android phones. The malware is acting as an SMS generator within affected devices and seeking to steal personal banking information from Crypto wallets or banking apps.

Here is an example of the text received:

Customers should forward anything suspicious to 7726 so the links can be tracked. The best advice if you’re unsure is to ignore, report and delete. Vodafone has stated that they will refund any customers who have plans that have resulted in them being charged for SMS messages sent by the malware. However, only a handful of customers have been affected thus far.

If you believe that they have been affected, please perform a device factory reset.

We are highlighting this on Vodafone as the network has brought this issue to our attention, however that is not to say that the same scam has not affected other network providers too.

Vodafone is working as quickly as possible to remove the scam, but in the meantime please ensure that your end customers are aware of this and that they stay vigilant.

Studies have been going on for years about how mobile devices can affect our health and our productivity. Apple and Google have recently started to implement more features to help us users.  Below are our top tips for reducing your stress levels, improving your health and making you more productive by changing settings on your iPhones and Android devices.

Tip 1: Tun off notifications

Everyday Billions of notifications are sent to mobile devices the world over. Many of these devices have no real requirement and just cause users to stop and read them. Studies have shown that people with push notifications turned off are more productive. (“Silence your phones”: Smartphone notifications increase inattention and hyperactivity symptoms”)

You can easily set notification preferences per app, reducing the number of distractions you receive a day.

iOS Notifications

To change your notification settings go to: Settings > Notifications

Android Notifications

To change your notifications settings in Android go to: Settings > Notifications

Tip 2: Set time limits to certain apps

Some apps on your phone can become a drain on time, whether it is your favourite game, social media or work emails. We have long known about the effects of using smart devices on people’s back’s and necks and the effect it can cause on people’s sleep. For the last few years, many smartphones have had the options to set limits on the worst offending apps. You can often set this per category or per app and if you want you can still override it.

iOS Screen time

To change the settings in iOS to setup screen time go to: Settings > Screen time

Android Digital Wellbeing

To enable this on Android go to: Settings> Digital Wellbeing and Parental Controls


Tip 3: Separate work and personal

We all need time to switch off regardless of whether it is evenings or weekends, but emails and other work notifications can get in the way. It would be nice to have two phones but that is not always practical.

We recommend that if nothing else users look to separate their work and their personal emails. We suggest using the built-in app for your personal emails and then the Microsoft Outlook App for work emails (for 365 customers – if you are a Google workspace user then there are similar apps). This immediately separates your emails so you wont get drawn into replying to a work email when you are checking on status of your amazon order. You can also then separate out your notifications between the two apps so that you are not bothered by work emails at all when you are off.

The Microsoft Outlook app also has a number of other features that are designed for work including improved security.

Why should you care?

Health and money. Your health matters, we have no idea as to the long-term effects smartphones will have on our bodies and our brains.  Some studies have shown that some people find ways to interrupt themselves as quickly as just 20 seconds in to settling into focused work, could that be down to the number of disruptions in our modern workplaces (How Do Interruptions Affect Productivity? | SpringerLink).

Ultimately our bottom line, as businesses rely on us being productive. The more we can achieve with less the better it is.

Final thought

While researching this article I found that researchers have found that even the presence of your phone can reduce your available cognitive capacity. (Brain Drain: The Mere Presence of One’s Own Smartphone Reduces Available Cognitive Capacity | Journal of the Association for Consumer Research: Vol 2, No 2 (uchicago.edu)) It might be worth considering putting your phone out of the way every now and again.

App/System: Microsoft Word and Microsoft Outlook
Learn: How to use the dictation services while writing documents and emails
Skill Level: Easy
Read Time: 2 min

Microsoft tried a few years ago to implement dictation services into Word and in my opinion it wasn’t reliable enough for most business purposes. However, having recently retried the services, we have found that actually it performs very well considering there is no training required.

Where can I use dictation?

Many of the Microsoft products now integrate with their cloud voice recognition software and we have seen that has started to have new uses like subtitles in PowerPoint. At the time of writing dictation exists in Microsoft Word for writing documents and Microsoft Outlook for writing emails.

How to use dictation?

While writing documents or an email the user simply needs to press the Dictate button on the top bar


You then start talking.

What can you say?

As with all dictation programs sometimes you want to give the system commands for things like punctuation and formatting. Here are some of the things you can say (you can find more in Microsoft Help).

How to dictate punctuation in Microsoft Word and Outlook

Phrase(s) Output
period, full stop .
comma ,
question mark ?
exclamation mark/point !
new line new line
apostrophe-s ‘s
colon :
semicolon ;
open quotes close quotes ” “
hyphen
ellipsis, dot dot dot
begin/open single quote end/close single quote ‘ ‘
left/open parentheses right/close parentheses ( )
left/open bracket right/close bracket [ ]
left/open brace right/close brace { }

How to dictate edits in Microsoft Word and Outlook

undo
delete*
delete that*
delete last [1-100] words/sentences
delete [word or phrase]*
insert space
backspace
backspace [1-100]
Top tip

  • Saying “delete” by itself removes the last word or punctuation before the cursor.
  • Saying “delete that” removes the last spoken utterance.
  • An example of using [phrase] would be dictating “what a super nice day” and then saying “delete super.” You would then be left with the phrase “what a nice day.”

How to dictate formatting in Microsoft Word and Outlook

bold
italics
underline
strikethrough
<format*> [word or phrase]
superscript
subscript
indent
decrease indent
clear all formatting
align [left, center, right]
Top tip

  • You can bold, italicize, underline, or strikethrough a word or phrase. An example would be dictating “review by tomorrow at 5PM”, then saying “bold tomorrow” which would leave you with “review by tomorrow at 5PM.”
  • Try phrases like “bold last word” or “underline last sentence.”

How to dictate lists in Microsoft Word and Outlook

start list
start numbered list
next line
exit list

How to dictate comments in Microsoft Word and Outlook

add comment [your message here]*
Top tip

  • Saying “add comment look at this tomorrow” will insert a new comment with the text “Look at this tomorrow” inside it.
  • Saying “add comment” by itself will create a blank comment box that can be manually typed into

How to get help, pause and exit while dictating in Microsoft Word and Outlook

show help
pause dictation
exit dictation*
Top tip
To resume dictation, please use the keyboard shortcut (ALT + `) or press the Mic icon in the floating dictation menu.

How to dictate symbols in Microsoft Word and Outlook

Phrase(s) Output
asterisk *
backslash  
forward slash /
vertical bar sign, pipe character |
backquote, backtick `
underscore _
m-dash
n-dash
paragraph sign/mark
section sign §
ampersand, and sign &
at sign @
copyright sign ©
registered sign ®
degree symbol °
caret symbol ^

How to dictate mathematic symbols in Microsoft Word and Outlook

Phrase(s) Output
percent sign %
number/pound sign #
plus sign +
minus sign
multiplication sign x
plus or minus sign ±
division sign ÷
equal sign =
less than sign, left angle bracket greater than sign, right angle bracket < >

How to dictate currency in Microsoft Word and Outlook

Phrase(s) Output
dollar sign $
pound sterling sign £
euro sign
yen sign ¥

How to dictate emojis/faces in Microsoft Word and Outlook

Phrase(s) Output
smiley face 🙂
frowny face 🙁
winky face 😉
heart emoji <3

We support organisations of all sizes to help them make the most out of Microsoft products.

Call us on 01732 600 170 to find out more about our services.

It’s great to hear that finally, Microsoft is going to release an update to Teams to accommodate webinars and registrations. 

The rollout of the new feature will start to be released at the end of April 2021 and is due to be deployed by the end of May 2021.  Previously, to do any sort of event, users had to make use of Live Events, which required an Enterprise licence.  With this new webinar feature we are pleased that Microsoft have said it will be available to the following licences; Office 365 or Microsoft 365 E3/E5/A3/A5/Business Standard/Business Premium – which covers most users.

How will you know when you have the new feature?

When scheduling a meeting, your users will see the Webinar option on the Calendar drop down menu in Teams (desktop/web).


Users will be able to allow registrations for meetings and webinars for internal and external users.

What you need to do to prepare

By default, all users within your 365 account will be able to schedule webinars unless current policy configuration prohibits it. If you want to block any part of this, please speak to your provider today.

We will be releasing more information about this feature as soon as we have it.

Always be the first to know by joining our mailing list.

App/system: Email
Learn: How to set up an SPF record so your emails aren’t treated as spam
Skill level: Moderate
Read time: 2 minutes

Finding your emails going to someone’s spam folder and you don’t know why?

Well, over the last couple of years we have found more email providers putting stricter controls on spam filters, including looking for what is called an “SPF record”. If your emails are going to spam then this is the number one likely reason.

What is an SPF record?

SPF records might sound technical but really it is just a public record telling people what services you use for email (e.g. 365, Google, Mailchimp etc). We see so many companies missing this simple record and it causes them hours of headaches.

How to tell if you have an SPF record

The easiest way to see if you have an SPF record is to go to: https://www.whatsmydns.net/

Enter your domain name in the first box, select TXT from the second box and press search:

Once done you will see a list of results for different locations. You should see a record like this:

v=spf1 include:spf.protection.outlook.com include:servers.mcsv.net -all

If you don’t see anything which says “v=spf1” then you likely don’t have an SPF record. Read on to find out how you set one up.

How to setup an SPF record

This quick 10-minute fix needs to be made to your DNS records.

DNS is basically a fancy phone book that lists where to send your emails to and where your website is hosted.

For most people your DNS will be stored wherever you host your website or wherever you renew your domain name. Most of the time the company that hosts or manages your website / domain name should be able to set up the SPF record for you.

An SPF record is simply a bit of text (TXT) attached to your domain which is made up of 3 parts:


1. The first part is:

v=spf1

This tells you that this is an SPF record.


2. The second part is a list of all the different services that you use for email. You need to list all the ones you use. These are a few common ones below:

Email service Text to include in SPF record
Microsoft 365 include:spf.protection.outlook.com
Mailchimp include:servers.mcsv.net
Salesforce include:_spf.salesforce.com
Google Workspace include:_spf.google.com

Most hosting providers will have information on their website to tell you what text you need to add to your SPF record. If you use more than one service, then you just list them all in the text record.


3. The third part of the spf record is

-all

This tells the system to fail emails sent from other locations.


So, putting these three parts together, the SPF record for Microsoft 365 and Mailchimp would read:

v=spf1 include:spf.protection.outlook.com include:servers.mcsv.net -all

What if I need some help?

If you need some assistance setting up your record then our technicians are available to assist you. Please give us a call at 01732 600 170.

Whether business or personal the chances are you have used Zoom, Teams or Google  over the last year, but what platform is best? Having used all three platforms to differing degrees this is what we think are the Pro’s and Con’s of the different platforms.

Zoom

It seems that Zoom has become synonymous with online meetings and now often appears to be a verb for the process of online meetings. For many of us we hadn’t even heard of Zoom before last March but now its everywhere, and there is a reason for that.

Pros – most people seem to either use zoom on a regular basis or at least have used it at some point. This means that if you send a zoom meeting to someone they will probably have a good chance of connecting.

Pros – Zoom was fast acting last year getting features such as breakout rooms widely available.

Cons – Many features like meetings longer than 45 minutes, SSO and transcription require subscription and sometimes minimum number of users.

Cons – several security concerns over the last year.

Microsoft Teams

For the avoidance of doubt, here I am reviewing the paid for version of Teams which is part of Microsoft 365. Now while teams can do video conferencing it is only a small part of the overall product whereas Zoom and Google Hangouts video conferencing is the primary feature.

Pros – No additional payment required, it is just part of Microsoft 365.

Pros – Contains lots of useful business features such as transcription, recordings going to Microsoft Stream and now together mode as standard.

Image from: Enabling Together Mode in MS Teams – Microsoft Tech Community

Cons – As this is a small part of the overall feature set of Teams, and as such Microsoft was slow at rolling out some features that competitors like Zoom had as standard. (e.g. Breakout Rooms).

Cons – While Microsoft has made some significant improvements with access by non-365 users some people still struggled to get into meetings.

Google

From my experience this is probably the least used platform out of the three. I have only been invited to meetings in Google and never had to actually arrange them.

Pros – Out of the three I would say that Google is by far ahead of the others on the ability to have a nice simple interface.

Pros – Google Meet comes as part of the Google Workspace subscription

Cons – Invite links appear to go on all meeting invites and I have often received emails from suppliers who end up having google and zoom links in their emails.  This could be something that can be turned off but if it is then it would seem most Google users don’t know how to.

Cons – not as well known as the others

Our Verdict

Each platform has its place. Zoom is great for networking and meeting with groups of external people whereas we find Microsoft Teams better for business meetings. Zoom does have some nice features in the higher pricing bands but it is a minimum of 10 users and with those features already included as standard with 365, why pay twice? Likewise if you are a Google Workspace user than it makes sense to use Google more.

More detailed review

This is only a quick view of the platforms based on my personal experience.  What is clear is that the last 12 months have seen a lot more use of Video conferencing and all of these manufacturers working hard to release more features.  Gartner is an independent body who review different industries and compares them objectively. 

You can find out more about what Gartner say about these through their Magic Quadrant report for Meeting Solutions (Oct 2020)

Image From: Gartner Reprint

App/system: Microsoft PowerPoint
Learn: How to use subtitles/captions during presentations
Skill level: Easy
Read time: 2 mins

Microsoft have introduced the ability to include real-time, automatic subtitles in your PowerPoint presentations.

What are PowerPoint subtitles?

PowerPoint subtitles are text which appears on the screen, transcribing your words as you speak. They can also translate your words into another language.

Why are PowerPoint subtitles useful?

In a live presentation, your audience may benefit from subtitles for several reasons:

  • If they are deaf or hard of hearing.
  • If they speak a different language.
  • If they are watching your presentation remotely with the sound off.

How to set up PowerPoint subtitles

  1. Go to the Slide Show menu and select Subtitle Settings:

  1. Set the Spoken Language to the language you will be speaking.
  2. Set the Subtitle Language to the language you want PowerPoint to display. This is a useful option if some or all of your audience speak a different language to you.
  3. Select the Microphone you will be speaking into.
  4. Then opt for one of the four positions your subtitles could appear in:
    • Bottom (Overlaid)
    • Top (Overlaid)
    • Below Slide
    • Above Slide
  5. Clicking on More Settings gives you a range of additional options, such as subtitle sizes, colours and backgrounds.

Turning PowerPoint subtitles on and off

When you have started your slideshow, access the toggle buttons at the bottom left of the screen:

The second from the right will turn your subtitles on or off. If you click on the menu button to the far right (the three dots), this will allow you to reposition your subtitles during your presentation.

How well do PowerPoint subtitles work?

We’ve done a few tests, both in English and translating to other languages, and it’s pretty accurate.

No automated system is going to be perfect, but it’s a great step forward to help you open your presentations to a wider audience.

Anything it can’t do?

The main failing we have found so far, is that it isn’t possible to record a presentation with subtitles running. Hopefully this is a function which will be added in in the near future.

However, this can be worked around by using a third-party screen recorder, such as OBS Studio.

Get the most from Microsoft

We are Microsoft 365 specialists in Kent and offer expert support to help you get the most from Microsoft PowerPoint and the full suite of Microsoft 365 applications. Call us on 01732 600 170 to find out more.

Its 2021 and for some businesses it has now been nine months or more since they were all together in an office. Managing your teams and their wellbeing during this time is harder now we are not seeing our teams every day.  We are going to have to rely on new tools to keep get feedback.  The good news is that Microsoft 365 offers us some tools to help. 

We have worked with GFHR Consulting to produce a simple guide on how to use Microsoft Forms to collect feedback from your team to help manage their wellbeing.

Importance of Managing Mental Health & Wellbeing

There’s no denying Lockdown 3.0 feels different. This time round it's hard, very hard. The morale boosting rainbows and long summer evenings feel as though they have long since gone and a lot of people are left with overwhelming anxieties about health, missing loved ones and the demands of more home schooling, let alone financial uncertainties about the future. It's not just NHS workers who are facing burnout; it's a bleak time for a lot of people, even those lucky enough to be in work.
Gemma
GFHR Consulting

You may notice that mood levels are low, productivity has declined or absences have increased. There may be higher levels of friction between colleagues or a lack of team spirit that is emerging as a result of increased periods of isolation. You may even have no idea how people are doing. Whatever it is, it’s perhaps worth now checking in with everyone in your organisation to see how the land lies and to see if there’s anything practical you can do to help people personally or professionally. There are a huge number of ideas of little ways you can help – such as a simple takeaway offer for the family (instead of a team lunch out) or setting up regular zoom drop-in chats for people working from home, as well as considering professional input from Employee Assistance Programs.”

How to manage Mental Health & Wellbeing

Now is a vital time to check in with your employees to ensure that they feel well supported and to ensure, where possible, issues are dealt with at an early stage. This will help them and will help you too in the future.  The first step to managing this could be to complete a short survey with your teams about how they are feeling currently. 

There are several ways to do this, but Microsoft Forms makes it very quick and simple for Managers to send a short survey out to their teams and get a feeling of how people are.

What is Microsoft Forms?

Microsoft Forms is a survey tool that can help you create a quick, simple, reusable form to collect survey data and review the results. It is based inside your Microsoft 365 environment and is therefore under the same security that you have with all the rest of your company data. The good news is that for most 365 customers you already have this tool and just need to set it up.

How do I use Microsoft Forms?

To create your first form, visit https://forms.microsoft.com or pick Forms from the application list on the 365 portal.

Click New Form and you will see a blank form that you can now edit.  From here you can start to create questions and answers.  See our video for a basic guide to get started:

https://youtu.be/xA9vPxtCnHE?rel=0

If you want to download our prepared survey using questions from GFHR Consulting, then you can download a template which will insert directly into your Microsoft Forms account which you can then edit and send to your teams.

Next Steps

Once you have the results then you can look to develop a strategy for you to act appropriately, proportionately and sensitively to ensure you are doing your best to support your employees through this crisis and beyond.

If you have any help determining with this or any other HR related issues then GFHR Consulting are always available to give practical advice and real support.

For other tips on managing wellbeing during lockdown visit https://gfhr.co.uk/articles/tips-to-improve-employee-wellbeing/

If you are using Microsoft Teams for voice calling you may come across times when you need to Transfer a call to another user. This guide will quickly show you how do to that:

In order to transfer a call, open the call that you are currently on and click the 3 dots near the top right of the window.

In this menu you have the option to transfer or consult then transfer:

  • Transfer – this will transfer the call straight to the person you choose.
  • Consult then transfer – this will allow you to speak to the person that you choose before you transfer the call to them.

Simply click the option you wish to do.

Once you have clicked transfer or consult then transfer the below window will come up. Click in the ‘Invite someone or dial a number’ box and type the name of the person you wish to transfer the call to. Their name should pop up below the box. Simple click on their name and click transfer.

You also have an option for ‘Ring back if there’s no answer’ – this means that if the person you transfer the call to does not pick it up the call will ring back to you. I would recommend having this option turned on.

If you found this guide helpful you may also find our other guides on Microsoft Teams useful.

App/system: Microsoft Teams
Learn: How to get Teams calls to ring through your speakers, not your headset
Skill level: Easy
Read time: 1 minute

If you use Microsoft Teams for your audio calls you may find that it tries to ring your headset rather than your speakers. This guide shows you how to update the settings to ring on your speakers but continue to speak to the caller through your headset.

Open Teams and click your profile picture at the top of Teams, then click Settings.

Once Settings is open click on Devices.

Once in Devices look for the option for Secondary Ringer. This is the device that will ring when you get a call. Set this device to your speakers and leave the speaker option at the top set as your headset.

If you found this guide useful then you may find our other guides on Microsoft Teams helpful.

Get the most from Microsoft Teams

Microsoft 365, which includes Teams, is an essential tool to enhance business communications and productivity.

We offer Microsoft 365 training and support as a managed service, or on a pay-as-you-go basis.

Speak to our friendly team to discover how your business could get more from Microsoft.

Would you sit with a 20kg bag of cement on your head for 8 hours a day and not expect to suffer problems? More people I speak to talk about how they have been suffering from headaches over the last year. Some of that could be due to the situation we are in but for others it is quite possibly, completely avoidable.

Now I should say before I continue that I am not a medical expert but I talk about my personal experiences, and if you are suffering from consistent headaches then you should seek a medical opinion.

We all spend long hours at our desks but how much of an impact does this sitting have on your back. At the start of this article I posed the question – “Would you sit with a 20kg bag of cement on your head for 8 hours a day?”. On average the human head exerts 10-12lbs (4.5-5.5kg) of pressure on your spine when you are upright, but as you incline your head so the pressure on your spine can increase. At just a small incline of 15 degrees the force increases to 27lbs (12.2kg) and at 60 degrees 60lbs (27.2kg).

Posture and stress on the cervical spine. Image Courtesy of Dr. Kenneth K. Hansraj

That’s an incredible amount of force to apply to the spine and some people sit like that for the whole day working.

What can I do to help the headaches?

I know that I find stretching helps me when I have had a day sitting at a computer. Now, there are plenty of advice on the internet for how to stretch, certainly I have found this one useful but if you are unsure at all then it is worth speaking to a professional. This is provided totally without guarantee and if you follow any of the advice then you do so at your own risk.

How can I better setup my workspace to avoid headaches?

Laptops have become essential to the modern business and there is no doubt that they have saved many businesses during the last year but have you thought about how you have set up your workspace. Personally I wish that Laptops were never called LAPtops, the worst thing you can do is work on one on your lap.

But we all have to take some responsibility to make sure we are working in the best way possible and here are my top tips for working with laptops:

1. Get your laptop up higher.

Ideally you want the screen to be up level with your eyes, this will stop you bending your neck and increasing the chance of headaches. Now there are plenty of options to help with this – could be something as simple as stacking a few old books (luckily I have some nice large ones left over from university!)

Or it could be making use of a laptop raiser:

Amazon.co.uk : laptop raiser desktop

Or something more complicated. But it is about getting the laptop screen up and in your line of site.

2. Use a separate keyboard and mouse

Laptop keyboards are often smaller than a full size keyboard and they are flat which puts your wrists in an odd position. Even if you like working with a laptop keyboard then once you have lifted your screen you wont be able to use the keyboard. Separate keyboard and mice are easy to come across and quite often you will have one hanging around. It can be as simple as plugging one in.

3. Use external screen

Laptop screen screens are often smaller than at 22″ or 24″ that you would get in an office, but most laptops will support an external screen. If you can fit one into your workspace then they are worth it. Again it would be suitable to get the screen lifted so that they are level with your eyes – If you have the space then something like this can be ideal:

An example laptop and monitor stand to reduce headaches : Amazon.co.uk : laptop screen stand

It’s all about the right tools for the right job.

If you found this useful then you might also find my article about vertical mice and how they can help your arms and reduce discomfort.

This week Apple have announced an important security update for iOS and iPadOS 14. This is to fix some security vulnerabilities found in their operating system.  Whereas some vulnerabilities are essentially theories that someone could exploit the vulnerability, these, apple say that these have been actively exploited. 

Ultimately this means your phone is at risk now and we are recommending that clients update their devices this week. If you are not sure how to update your iPhone, then we have a guide on our website.

As a business should I worry?

Ultimately this is a vulnerability that could put company data at risk and as businesses we have a duty of care to the data. It is an issue that has been widely reported and if there were a breach it would be hard to justify why no action was taken.

How do I manage this as a company?

We recommend that clients have a MDM solution (Mobile Device Management) to cover all mobile devices that access company information.  This is regardless of whether the device is a personal device or a business device.

MDM Solutions allow businesses to monitor mobile devices and ensure they meet the standards the company set.  For example, in this instance we will be advising our clients to update the settings to warn all their users that they need to install this update within the next 5 days or risk losing access to company data on their device.  We would then be able to see each device and contact the effected users that have not updated.

Are MDM solutions an invasion of privacy?

No – even on a personal device, MDM solutions do not tell the company about apps that you have on the device nor any of the data on the device.  It is just there to make sure the device is compliant with company policies and where requested to, it will keep company data from mixing with personal. MDM solutions make the devices more secure for users regardless of whether they are for personal use or business use.

Are MDM solutions expensive?

No – Microsoft 365 Business Premium includes Intune which is a perfectly good MDM solution for most Small Businesses.

How do I find out more information?

If you are concerned about any of this and want to find out more about how to protect your businesses then contact us on 01732 600170.

Apple have made it very easy to update your iPhone and to help with security they encourage users to have automatic updates enabled.

Why do phones need updating?

The obvious answer is that by updating software you gain access to new features. However, as well as new features the updates help protect you against known security issues.

All software has security vulnerabilities and as manufacturers find out about these they release updates to fix the issue.

To meet security standards all your devices should have the latest security updates installed at all times.

How to Turn on Automatic Updates for IPhone

For iOS 14:

Go to Settings  > General > Software Update.

Tap Customize Automatic Updates (or Automatic Updates). You can choose to automatically download and install updates.

How to Update and iPhone Manually?

For iOS 14:

Go to Settings  > General > Software Update.

The screen shows the currently installed version of iOS and whether an update is available.

How to Update older versions of iOS?

More information about how to update your iPhones can be found on the apple website.

iOS 13

iOS 12

Cyber security is an issue we take very seriously at Heliocentrix – both for our clients and ourselves.

We are pleased, therefore, to announce that we have achieved recertification in the National Cyber Security Centre “Cyber Essentials” scheme.

In order to renew our certification, we were assessed on our knowledge of security controls and a wide variety of cyber-attack scenarios. Our responses were independently verified before our recertification was awarded.

Bringing cyber security to your organisation

As well as achieving our accreditation, we also assist other organisations in obtaining their own Cyber Essentials and Cyber Essentials Plus certification – find out more.

Discover how we can keep your organisation more secure – call us on 01732 600 170 to speak to one of our experts.

Have you found your forearm or shoulder aching when you have been on the computer all day?  Over the years there have been many times I have suffered with RSI or other pains in my wrists, forearms or shoulders and I know I am not alone.

Now, as I have mentioned in other blogs – I am not a medical professional, I can only speak from personal experience and if you have persistent problems then you may want to speak to a medical professional.

When I did suffer from this pain it occurred to me that it was always on the side that I use the mouse and that was the same time someone introduced me to Vertical Mice.  I had never heard of them before and so let me explain what they are and the principal behind it.

Vertical Mice work with your hand being in a vertical position over the controls rather than horizontal:

Anker | Anker 2.4G Wireless Vertical Ergonomic Optical Mouse

The idea is that your arm is more used to working in this position than the way a standard mouse will work.  They may look odd and they will take a few hours to get used to but that is it.  I would say that it honestly does feel a lot more natural holding a mouse this way than the traditional way we have all done for many years.

I was recommended to try this mouse by John as I was experiencing pain in my right arm and shoulder, which I put down to my desk set up and particularly the excessive use of my current mouse. I went to a physio and he told me that my right arm was not in the right position, caused by being desk based more than usual and my right arm and shoulder forced to tip inwards to operate my mouse. The vertical mouse has enabled me to keep my arm straight and my shoulder back which is helping with my overall desk position. It is also very comfortable to operate due to it’s shape. I would highly recommend this mouse for anyone with posture issues or not.
Jo Hayes
Hayes HR
A picture of the anker vertical mouse
There are several different brands but the one I chose was the Anker Wireless Vertical Ergonomic Optical Mouse and at less than £20 it was a real bargain in my book.
John Speed

You might also be interested in our article about how to avoid tension headaches while working at a computer.

Taking screenshots has always been a necessary processes on computers, right back to the early days of Windows 95. People often know that there is a way of doing it but forget which key it was to take a picture of the screen, even then if they did manage to take the screenshot then they had to work out how to cut out the bits they didn’t need.

Well over the years Microsoft have created new tools, first the snipping tool which has helped, then more recently the Snip and Sketch Tool.  This has been a great evolution.

So why is Snip and Sketch so useful?

If you are creating guides or documenting systems then being able to ‘snip’ the screen is essential.  This version of the tool is useful because there is a simple shortcut key that will freeze the screen, allow you to draw a box around the bit you want to ‘snip’ and then put it onto your keyboard so you can paste it into whatever document or email you want.  Very simple very efficient.

How to use Snip and Sketch?

So to use Snip and Sketch Press Win + Shift + S.  So that is the Windows Key (the one that looks like a flag), the Shift key and the S key (S for Snip and Sketch).  You will find that the whole screen goes dark and you can then click and drag around the section you are interested in.  Once complete go to your document and choose paste.

Watch this video for a quick demo:

If you want to edit the screenshot or ‘sketch’ over it then either click on the notification that appears after you have taken a screenshot:

Or open the Snip and Sketch tool from the start menu and follow the instructions to take the screenshot from there.

We are delighted to announce that we are now a Gold Microsoft Partner.

Huge congratulations to the members of our team who passed the rigorous Microsoft exams and skill validations. Thank you all for your hard work in helping us achieve this.

What is a Gold Microsoft Partner?

The Microsoft Partner Network is a community of certified Microsoft experts around the world. Any company can sign up as a member.

To advance to Gold Microsoft Partner status, you need to pass a series of exams and skill validations. And your business needs to achieve the high performance standards set by Microsoft.

Microsoft Gold competencies

Our Gold status relates to two specific competencies:

Small and midmarket cloud solutions

This demonstrates our excellence in providing cloud productivity and security solutions to small and medium sized business, using Microsoft 365.

Cloud productivity

Our second competency reflects our skill in delivering innovative Microsoft 365 solutions. Helping businesses to get the most out of cloud-based applications such as Exchange, SharePoint and Teams.

What does this mean for you?

Gold accreditation demonstrates that we have a high level of expertise across a range of Microsoft products and services, which we use to the benefit of our clients.

As part of this network, we gain access to exclusive technical information and support from Microsoft. This resource enables us to pass on these new ideas and developments to you.

Microsoft services

Our Gold Microsoft Partner status spans our Microsoft services, including:

Call us on 01732 600 170 to discover how our support could be “worth its weight in gold” to your business.

2020 is now behind us and what a year it was.

We saw the upgrades we had been expecting to take 5 years completed within a year. But what does that mean now?

I personally think the most successful businesses this year, of any industry, are going to be the ones who make themselves as efficient as possible. Whether that is through technology and processes or other aspects of their business.

Those businesses who continue with ‘business as usual’ I think will find it harder.

When it comes to business owners and technology these are our top 3 tips for 2021:

1. Audit your Hardware

Get the right tools to do the job. Hardware, like laptops and phones are tools. They are an asset in our businesses and they should be paying for themselves. That doesn’t mean you go for the most expensive machine all the time but it is a tool that should be relatable to the person using it.

Start by looking at what you have, how long you have had it and then is it actually doing the job. I have seen too many times where people have kept on to older machines that are costing businesses money because they are disrupting users from working. We recommend that companies refresh their machines every 3 years, so if you split the cost of a machine up, how many hours of disruption is it worth?

£600 spent on a machine every 3 years is about 70p per day. For someone on a salary of £25,000 a year, that’s less than 4 minutes a day you would need to save to make it pay for itself.

Our recommended best practice for most businesses is to use laptops plus docking stations and provide docking stations at work and if room then at home. You should not be expecting staff to use a laptop constantly without a bigger screen, keyboard and mouse.  More to come in future articles, do be sure to sign up for these in our monthly e-newsletter here.

Capital costs can be challenging at the moment and there are several options out there to split the cost of machines over several years making this something that is achievable right now.

2. Audit your Software and Web Services

This has the same purpose as tip one. Get the right tools for the job! This might be new tools to manage files or to-do lists or even how you manage emails. It could be you have the right tools but don’t know how to use them.

Where you used to have all your software on a computer we now find that companies are increasingly using services in the cloud. Quite often we find that there are services being used which haven’t made it on to your GDPR documentation.

We recommend asking everyone to make a note for a few days of every piece that they use. The compile this into a list and find out what it is all being used for.  We regularly find that organisations are paying for similar functions on one or two platforms or spending time duplicating information between them. Either way there are plenty of improvements to be made.

Once you have the audit consult with suppliers or someone who knows how these platforms work to find out what else it can do and how you might use it to be more efficient.

3. Look at your most time consuming 3 procedures

Look at your most time consuming 3 procedures and then work with someone to talk through the processes and look at whether there are alternatives. Quite often tasks and procedures evolve over time and actually they can be outdated or incorporated into other processes.

When we do this work with clients we regularly find that either some work is doubled up or that actually making use of some existing services in a different way they can save time. For example we have helped a successful businesses in the financial services industry save themselves over 30 hours a week by implementing templates and styles properly inside Microsoft Word. A feature that few people know about but has been available for over 20 years.

What Next?

I like to feel that Heliocentrix is different to so many Kent IT support providers out there. We are able to help with the technology but also help with making that technology pay for itself. Our client reviews speak for themselves. This is experience which has come from doing this as an owner of multiple businesses for over ten years, growing a team from one to several and on behalf of many clients.

If you want to find out more than contact us and arrange a short meeting to discuss how we can help.

One of the common complaints I hear from people using Microsoft 365 is that their outlook is slow. There are a few things you can do that could speed up your Outlook, but by far the best improvements can come from reducing the number of folders.

When using Office 365 or other Exchange based email solutions it takes longer to keep more folders up to date than just having lots of items in one or two folders.

My email account contains thousands of items and I have no issues with speed in Outlook. The difference is that I have folders based on the state of an email, not who it is from.

I operate with 3 basic folders:

  1. Inbox – All emails come into here
  2. Scheduled / For Action – All emails that need a reply or some work completing go into here
  3. Archive – All items that are completed

It might seem like a dramatic change and clients often show concern over how they find emails but, even if you have folders most people seem to search for emails. I plan to talk about outlook search in a later blog.

This method of working means that you can filter your emails very quickly a few times a day and make a ‘to-do’ list almost of emails that need something to happen to them rather than spending your days constantly watching emails. More advice on managing your emails.

I will also do a future post on how you can create a couple of buttons at the top of the screen which will allow you to easily move your emails between folders making it a very fast method to process your emails.

Other options to speed up Microsoft Outlook

Disable Unwanted Add-ins in Outlook

Many programs such as Adobe Acrobat, Zoom, and others put add-ins into outlook. Quite often you do not need these add-ins and they just slow down your outlook. To review these add-ins:

  1. Open Outlook
  2. Click on File in the top Left
  3. Click Manage COM Add-Ins

Then review the list and choose to disable to add-ins you no longer require.

Change Cache Settings

There are two ways you can improve performance of outlook regarding the cache settings. Cache is the temporary storage of emails that Outlook has downloaded from Microsoft 365. By default, Outlook will download 1 years’ worth of emails to your machine but when you search you will be searching all emails.

You can change this by going to File, Account Settings, Account Name and Sync Settings

Use the slider to change the volume of emails to download.

If you also have access to Shared Mailboxes, then click on More Settings and Advanced. Next uncheck the option “Download Shared Folders” like the below:

To save the settings click OK, Next, and Done

Remote Workforce

Remote Workforce is a remote connection tool similar to LogMeIn, managed by Heliocentrix.

You will have been given an account to login to Remote Workforce, which you can access by going to our website https://heliocentrix.co.uk and clicking on “Remote Access” at the bottom of the homepage. You can also reach Remote Workforce by going to https://help.heliocentrix.co.uk

Once you’re on this page, click on “Login” at the top right corner.

You’ll be asked to login, simply sign in with your username (your email address) and password which will be provided.

Once you have logged in, you will be taken to a page showing your PC, just hit “Join” at the top and you’ll be connected to remote control your PC.

Similarly to LogMeIn, your Office PC desktop will open in a new window.

If you have require assistance or cannot login, please get in touch and we’d be happy to help. You can reach us on [email protected] or 01732600171.

App/system: Microsoft Teams
Learn: How to use custom backgrounds during Teams meetings
Skill level: Easy
Read time: 4 mins

Microsoft Teams adoption has grown dramatically over the last few months, with more and more people working from home. It has meant that Microsoft have released more features and this is the one something people have been waiting for.

Microsoft has given us the ability to change backgrounds in Teams conversations. Unlike Zoom, Teams has given you more backgrounds to choose from and it does not have the same restrictions for use without a green screen.

Microsoft Teams has come to market with a good group of backgrounds already installed, going from formal to more casual options.

But you do not have to be limited by this selection. You can use your own, personal custom background instead.

For anyone who doesn’t know, a custom background is one where you could use your company logo or some other image or message, to cover up what is happening behind you. Ideal for all of us working from home, especially if you haven’t had a chance to tidy up before your meeting.

Don’t use Microsoft Teams?

Get Microsoft Teams for your business Get Microsoft Teams for personal use

Creating your Custom Background for Microsoft Teams

What image can you use as your Teams custom background?

You need to create the custom background as a jpg or png file.

Top tip
We recommend using jpg or png files with a minimum resolution of 1920 pixels × 1280 pixels.

Remember you must have rights to use the image. We recommend businesses make use of backgrounds that incorporate their logo and branding. This is ours:

Once your image has been created, save it somewhere safe.

Where can you find images for Teams custom backgrounds?

For many business meetings, a simple background using your business logo and branding would be best.

However, for less formal meetings, you might want to choose a background to suit the nature of the meeting or your mood!

Fox tweeted a selection of Simpsons backgrounds which would bring a touch of humour to your Teams meeting.

Here are a few excellent sources of Microsoft Teams backgrounds:

  • A selection of empty sets from classic BBC programmes, including Doctor Who, Swap Shop and Eastenders.
  • Star Wars scenes – who wouldn’t want to host a meeting from within the Millennium Falcon?
  • HBO have also shared backgrounds, including one from Game Of Thrones.
  • Demonstrate your love of all things Scandi with these Ikea backgrounds.
  • Or select from a wide range of images on free-to-use stock photo sites such as Pixabay and Unsplash.

How to add your background to Microsoft Teams

You can import the background image directly into the Teams application, before or during your Teams call.

How to enable your custom Teams background before a call

Before joining a meeting, you will see the following bar appear under the video preview, where you would select whether you want video and/or audio enabled before joining. Select the Background filters option:

The background settings options will appear to the right.

Click on + Add new at the top of the background settings section.

Find your image and upload it to the gallery, then select your image from the gallery to apply it to your call. The selected image will have a little tick at the top right and your video preview will update to show the background.

Then click on Join Now at the bottom to start the call.

How to add a custom background during a Microsoft Teams call

Firstly, while in a call, click on the menu button at the top of the screen:

Next, click on Apply background effects and select + Add new at the top of the screen.

Select your image to upload to the gallery, then select your image from the gallery (a tick will appear in the top right corner of the image). Click on the Preview button to see what it will look like (only you will see the background) and then on Apply to make it live in your call.

Not working?

If you can’t see the options for background effects then make sure your Teams is up to date by clicking on the menu button in the top right of Teams, this will either be your profile picture or your initials. Then choose Check for updates.

Find out more

Discover how Microsoft Teams can support productivity and engagement in your organisation.
Speak to one of our experts

Microsoft Teams training portal

To find out more about Microsoft Teams you can visit the video training portal Microsoft has created to help train you and your team.

To recall and replace a message

1) In the folder pane on the left of the Outlook window, choose the Sent Items folder.

2) Open the message that you want to recall. You must double-click to open the message. Selecting the message so it appears in the reading pane won’t allow you to recall the message.

3) From the Message tab, select Actions > Recall This Message.

Notes
1) If you don’t see the Recall This Message command, you probably don’t have an Exchange account or the feature isn’t available within your organisation.
2) You cannot recall a message that’s protected by Azure Information Protection.
3) You cannot recall a message in Outlook on the web.

4) Click Delete unread copies of this message or Delete unread copies and replace with a new message, and then click OK.

If you’re sending a replacement message, compose the message, and then click Send.

To check on the recall

The success or failure of a message recall depends on the recipients’ settings in Outlook. In the following table, five scenarios are presented:

Action Result
You send a message to someone. You recall the original message and replace it with a new one.
On the recipient’s computer, under Tracking, the Automatically process requests and responses to meeting requests and polls check box is selected.
Note: To view this setting, File > Options > Mail. Scroll to the Tracking section.
Both the original message and the recall message are received in the recipient’s Inbox.
Assuming the original message hasn’t been read, the original message is deleted and the recipient is informed that you, the sender, deleted the message from his or her mailbox.
Note: If the original message is marked as read (viewing in the Reading Pane isn’t reading in this scenario) when the recall message is processed, the recipient is informed that you, the sender, want to delete the message. However, the message remains in the recipient’s Outlook folder.
You send a message to someone. You recall the original message and replace it with a new one.
On the recipient’s computer, under Tracking, the Automatically process requests and responses to meeting requests and polls check box isn’t selected.
Note: To view this setting, File > Options > Mail. Scroll to the Tracking section.
Both the original message and the recall message are received in the recipient’s Inbox.
On the recipient’s computer, one of the following results occurs:
If the recipient opens the recall message first, the original message is deleted, and the recipient is informed that you, the sender, have deleted the message from their mailbox.
If the recipient opens the original message first, the recall fails, and both the original and recall messages are available.
Note: If the original message is marked as read (viewing in the Reading Pane isn’t reading in this scenario) when the recall message is processed, the recipient is informed that you, the sender, want to delete the message. However, the message remains in the recipient’s Outlook folder.
You send a message to someone. You recall the original message and replace it with a new one.
On the recipient’s computer, either by rule or by action of the recipient, the original message is moved out of the Inbox to another folder and the recall message remains in the Inbox (or it is moved to another folder also).
If the recall message and the original message exist in separate folders, the recipient receives a message that states a recall attempt failed. This occurs regardless of the Outlook configurations and the read status of the message.
The original message and the new message are both available to the recipient.
You send a message to someone. You recall the original message and replace it with a new one.
On the recipient’s computer, either by rule or by action of the recipient, both messages are moved to the same folder. This results in behavior similar to what occurs when Outlook isn’t configured to automatically process messages.
On the recipient’s computer, one of the following results occurs:
If the recipient opens the recall message first, the original message is deleted, and the recipient is informed that you, the sender, deleted the message from his or her mailbox.
If the recipient opens the original message first, the recall fails, and both the old and new messages are available.
You send a message to a public folder. You recall the original message and replace it with a new one. One of the following results occurs:
If the recipient who reads the recall message has read access to all the items in the public folder but didn’t read the original message, the recall succeeds, and only the new message remains. You, the sender, receive a message that states the recall succeeded.
If the recipient has already marked the original message as read, he or she is informed that the recall failed, and only the recall message is deleted.
If a user who has any other public folder rights opens the recall message, the recall fails, and the user receives a message that states the recall failed. Both the old and new messages remain in the public folder.
If the recipient reads the original message and then marks it as unread, it is considered never read and recall is successful.
In the public folder, it is the reader’s rights, not the sender’s, that determine the success or failure of the recall.

Spending more time at our computers doesn’t have to mean we suffer from more headaches.  Having the right lights and monitors can help dramatically reduce suffering.  How much do these headaches cost your business?

During our annual review with clients we have noticed an increase in the number of cases where clients have been commenting on 1 or more of their staff suffering from headaches.  There can be many reasons for this ranging from bad ambient lighting in the office, through to bad posture and eye strain.

The human eye is a fantastic piece of engineering, it is adaptable to many different situations and will work hard to accommodate whatever conditions you put it under. This is great as it means we can continue to work but if people don’t take breaks then your eyes can suffer.  In turn this can then cause headaches and other problems.

The Problem

The primary business focus on acquiring new equipment tends to be around the purchase of new computers and software.  Buying the best of these often means that budgets for other devices such as monitors is greatly reduced.  We are all very guilty of not replacing monitors as often as we replace our computers.

While it can be a contested issue whether monitors degrade over time it doesn’t mean that their quality isn’t as good as modern monitors.  This can mean that the time has come to renew your monitor.

How much does this cost your business?  One person losing half an hour a week of productive time could be costing your business hundreds of pounds a year.

The Solution

Several manufacturers including BenQ have started developing specialist eye-care monitors.  While it would be sensible that all monitors are eye-care it would appear, they are not.  The BenQ monitors come with several features that our clients have found useful:

  • Brightness Intelligence
  • The monitor will adjust the brightness depending on the ambient light levels in the room.
  • Low Blue Light
  • Reduced levels of blue light which are reported to cause issues to eyes.
  • Reduced Flickering

BenQ say that their monitors have managed to move away from technology that causes unperceivable flickering that can hurt eyes.

What do people say?

This monitor has helped to alleviate my eye strain. I suffered with headaches and eye pain for over a year but within a week of using the Eye Care Monitor the pain has almost gone away entirely.
Amanda
Financial Services

What next?

Get in touch with us to find out how we can help you.

We are able to supply your business with hardware using our TaaS set up which means you could have all of your new hardware cost spread over a 3 year plan.

Office 365 is great because it is in the cloud and is available everywhere.  Office 365 is vulnerable… because it is in the cloud and is available everywhere!

Under GDPR regulations business owners have a responsibility to protect their clients and staff data.  It would be great if this were just a one-off exercise that we ‘put’ security in place and then never have to worry about it again.  The problem is that technology moves on and so does the methods of attack.

Working with a professional IT company specialising in solutions for small businesses means you can stay up to date on the best approaches for securing your data.

If you do nothing else we recommend you take the following steps:

Step 1 – Change your Password

I don’t mean change your password on a regular basis, instead I mean change it once, to a unique password.

Many attacks against organisations start by a password being stolen from a third party website.  Every time you setup a new account with a company assume that everyone at that company has access to your email address and password.  From that think, what damage could this cause me?

It would be nice if every website had high levels of security but unfortunately that is not the case.  Time and time again we hear of companies having breeches and personal information can be stolen.  Even if the website used encryption to protect your password, your password may still be crackable.

Our best advice is:

  • Change your password
  • Make it a series of words or something random
  • Include UPPER CASE, lower case, numbers and symbols
  • Consider making the password a phrase that is easy to remember

Step 2 – Enable MFA

Multifactor Authentication or MFA or Dual Factor Authentication are all different words for the same process.  This approach to security is based on the following principal that a person is trusted if they have:

  • Something you know, like a password.
  • Something you have, like a trusted device.
  • Something you are, like biometrics and fingerprints.

MFA is included with the different Office 365 packages because it is so important.  It is very easy to turn on but requires an administrator to do so.  Once this is turned on users will be prompted for how they want to authenticate, this can be through:

  • Desktop Phone
  • SMS Text Message
  • Mobile App
  • Email

Read here to find out how to implement MFA today!

Once MFA is enabled, you can set separate passwords for each of your Microsoft apps.

Step 3 – Setup Message Quarantine

We are all constantly being attacked by email attackers trying to obtain our information.  Your Office 365 administrator can turn on a second level of Junk Mail filtering which will reduce the chance that you will get harmful emails.

Quarantine sits above your junk mail folder in terms of priority.  The idea of quarantine is that only the worst of the emails go there and then anything else that looks a bit suspicious will be moved to junk.

When a message is sent to quarantine you still have an opportunity to remove the email from quarantine in case it was a false positive.  When setting up the service your administrator can specify how often your receive those messages.

What Next?

Heliocentrix offers a fixed price service to customise these and other settings in Office 365 based on the size of your organisation.  The goal is to improve your security reducing the chance of a breech.

By working with us we can help you implement the changes on Office 365 and also help you implement the changes with your team.

If you would like any further information or would like some help implementing any of these changes then do speak to us.

The naming structure has been along the lines of 1803, 1809, 1903, 1909.  When these updates were installed you would have found that your computer often took a lot longer to restart while the update was applying.

The good news with this update is that isn’t the case this time.  Microsoft has made this update very much like the standard updates you get each week.  So this means that you wont have any down time while the update is applying.  Having just installed this update myself it only took 1 minute and 34 seconds to reboot, this is much better than the last big update.

The reason for this is that there are only a few minor changes.

Features

A few features that are worth bringing to your attention:

Quickly Adding new Calendar Appointments

If you make use of the Windows Calendar app as a quick alternative to Outlook then you can now quickly add new appointments by clicking on the time in the system tray.

More information on the Navigation pane on the start menu

Not sure what all the icons are to on the navigation pane on the start menu, just hover over them and a new panel appears giving each of them names.

More customisable options on the notification centre

So I think the notification centre (the small speech bubble in the bottom right) can sometimes be annoying.  Often getting notifications for things that I don’t need to know.  Now with 1909 Microsoft have released even more controls to cover how you want notifications from different applications to appear.

If you want to customise settings per App you can either click on cog when a notification appears or go into Settings > System > Notifications and select the app you want to customise.

On this page you can then change how the notifications will behave.

Improved Battery Life

Machines with certain processors will now see improved battery performance.

Improved Performance

With changes to the way Windows uses processors you may also notice improved speed in some applications.

How to Install

If you manage your own updates and do not make use of our Managed Services then you can install the update by going to Settings, Update & Security, Windows Update, Check for Updates.  Then you should see a feature update for Windows 10, Version 1903 listed along with a Download and Install button. Press this and restart your computer when prompted.

Windows 10, Version 1803 – End of Life

With the release of 1909 update the early update for 2018 is no longer supported.  For users still on 1803 they need to update to a newer version soon.  If you are not sure which version you are running click on the search icon by the start menu and type Winver and then select the application listed.  Your  current version will be listed next to Version

Update Management

If you are trying to manage these updates for a number of computers in your office or for remote users it can become time consuming and a hassle you do not need.  As part of our Managed Services we can manage all these updates for you.  Find out more about our Managed IT Services  or contact us for more information.

1. Navigate to settings

2. Find Control Centre

3. Click on Customise Controls

4. Find Screen Recording on the list and select the green + button to add it to the panel, if you want to remove this, simply select the red – button

5. To use the recorder, on any page, swipe down from the top right hand corner and this will bring up your control panel.

6. Find the icon, when you click this it will start a 3 second count down to when it begins recording.

7. To stop recording, click on the top of the bar where the red dot is showing, it will ask if you want to stop or cancel

What are Hosts Files?

Often when previewing a website before it goes live you may be required to trick your computer into thinking that a website is on a different server to where the live site is.  To do this you will need to edit the host file.

Modifying Hosts Files

For Windows 10 and 8

  1. Press the Windows key.
  2. Type Notepad in the search field.
  3. In the search results, right-click Notepad and select Run as administrator.
  4. From Notepad, open the following file: c:WindowsSystem32Driversetchosts
  5. Make the necessary changes to the file.
  6. Click File > Save, to save your changes.

See below for an example of a hosts file.

You can add an entry by providing the the following

[your hosting account's IP address] [your domain name]
For example: 
12.0.0.1 sampledomain.com
Top tip
Once you are done testing the website. Remove it again on the hosts file or include a hash symbol (#)  before the IP address to comment the line out.

Never change the below lines:

127.0.0.1      localhost
::1            localhost

Use Microsoft Authenticator with Office 365

If your organization is using 2-step verification for Office 365, the easiest verification method to use is Microsoft Authenticator. It’s just one click instead of typing in a 6-digit code. And if you travel, you won’t incur roaming fees when you use it.

Download and install Microsoft Authenticator app

Set up the Microsoft Authenticator app

Choose the mobile app

Open a browser on your computer and go to portal.office.com. Sign in to your Office 365 for business account.

Use these steps if you see this screen:

  1. Click Set it up now.
  2. Choose Mobile app from the dropdown.
  3. Make sure “Receive notifications for verifications” is selected. Click Set up.

Use these steps if you see this screen:

  1. Choose Settings > Office 365.
  2. Choose Security & Privacy > Additional security verification > Update my phone numbers used for account security.
  3. In the drop down box under What’s your preferred option, choose Notify me through app.
  4. Check the box for Microsoft Authenticator app, click Configure.

Wait for configuration pop-up box.

You should see a window on your computer that looks like this.

Add account to Microsoft Authenticator

  1. Open the Microsoft Authenticator app on your phone.
  2. Tap the + > Work or school account.
  3. Use your phone to scan the QR square that is on your computer screen.
    Notes:

    • iPhone users may have to enable the camera in Settings in order to scan.
    • If you can’t use your phone camera, you’ll have to manually enter the 9 digit code and the URL.
  4. Your account will be added automatically to the app and will display a six-digit code.

Confirm activation status on your computer

  1. Switch back to your computer and click Done.
  2. Now wait for the Checking activation status text to finish configuring your phone.
  3. When it’s complete, you’ll be able to click the Contact me button on the right.
    Note: If configuration fails, just delete retry the previous steps again.

Approve sign in on your phone

  1. Switch back to your phone and you’ll see a notification for a new sign in.
  2. Go to the Microsoft Authenticator app.
  3. Tap Approve to allow it.

Finish set up

  1. Back on the computer, follow any prompts that you might see such as adding a mobile number.
  2. You’re good to go!

From now on, whenever you have a new sign in or add your Office 365 work or school account to an app, you’ll open the Authenticator app on your phone and tap Approve.

App/system: Microsoft 365 (aka Office 365)
Learn: How to set separate passwords for each app you use (eg Outlook)
Skill level: Moderate
Read time: 2 mins

To create an app password

Please note that if you are using Office 2019 you do not need to set up a separate app password because it already supports the latest authentication protocols. Therefore, you simply need to ensure that multi-factor authentication (MFA) is turned on (see step 2 below).

1) Sign in to Office 365 (now called Microsoft 365).

Go to https://aka.ms/SetupMFA
This will display the following page:

If you do not see this page then you may not have MFA turned on and you will need to speak to you IT Administrator.

2) At the top of the page, choose App Passwords.

3) Choose create to get an app password.

4) If prompted, type a name for your app password, and click Next.

5) Choose copy password to clipboard. You won’t need to memorise this password.

Top tip
You can have more than one app password for your Office 365 account, for example, if you want one for Outlook and another for a different application. To generate another app password, simply repeat the process.

6) Go to the app that you want to connect to your Office 365 account. When prompted to enter a password, paste the app password in the box.

To use the app password in Outlook

Some applications do not support MFA. For these you will need to use what is called an App Password. This is a random password that is allocated to the specific application you are trying to configure. You create an app password through the portal. You’ll only need to do these steps once.

1) Open Outlook, such as Outlook 2010, 2013, or 2016.

2) Wherever you’re prompted for your password, paste the app password in the box. For example, if you’ve already added your account to Outlook, when prompted paste the app password here:

3) Or, if you’re adding your Office 365 account to Outlook, enter your app password here:

4) Restart Outlook

Top tip
You can have more than one app password for your Office 365 account, for example if you want one for Outlook and another for a different application. To generate another app password, see Create an app password instructions above.

Secure your Microsoft applications easily and effectively

Optimising the security of your IT services, including Microsoft 365, can seem a daunting and complex challenge.

At Heliocentrix we make it simple for you.

Whether you are setting up Microsoft 365 for the first time, or looking for IT support for existing systems, we can help.

Speak to one of our experts on 01732 600 170 or email us at [email protected].

Set up 2-step verification for Office 365

Once your admin enables your organization with 2-step verification (also called multi-factor authentication), you have to set up your account to use it.

By setting up 2-step verification, you add an extra layer of security to your Office 365 account. You sign in with your password (step 1) and a code sent to your phone (step 2).

1. Check whether your Office 365 admin has turned on multi-factor authentication for your account. If they haven’t, when you try to do these steps you won’t see the options in Office 365.

2. Sign in to Office 365 (https://portal.office.com) with your work or school account with your password like you normally do. After you choose Sign in, you’ll see this page:

3. Choose Set it up now.

4. Select your authentication method and then follow the prompts on the page. Or, watch the video to learn more.

5. After you verify your alternate contact method, choose Next.

6. You’ll get an app password that you can use with Outlook, Apple Mail, etc. Choose the copy icon to copy the password to your clipboard. You won’t need to memorize this password.

7. Once you complete the instructions to specify how you want to receive your verification code, the next time you sign in to Office 365, you’ll be prompted to enter the code that is sent to you by text message, phone call, etc. To have a new code sent to you, press F5

We strongly recommend setting up more than one verification method.

For example, if you travel a lot, consider setting up Microsoft Authenticator for your verification method. It’s the easiest verification method to use, and a way to avoid text or call charges.

To use the app password in Outlook

Some applications do not support MFA. For these you will need to use what is called an App Password. This is a random password that is allocated to the specific application you are trying to configure. You create an app password through the portal. You’ll need to do these steps once.

1. Open Outlook, such as Outlook 2010, 2013, or 2016.

2. Wherever you’re prompted for your password, paste the app password in the box. For example, if you’ve already added your account to Outlook, when prompted paste the app password here:

3. Or, if you’re adding your Office 365 account to Outlook, enter your app password here:

4. Restart Outlook

Top tip
You can have more than one app password for your Office 365 account, for example, if you want one for Outlook and another for a different application. To generate another app password, see Create an app password.

Chat with support

Installing Microsoft Teams

If you do not already have Microsoft Teams on your mobile phone, please go to the app store and search “Microsoft Teams”. The app, with the below logo, is free to download:

Once Microsoft Teams is installed, please open the app and sign in with your Office 365 credentials, which will be your company email address and password. If you are asked to allow any permissions, please click Allow.

Conference Calling

Microsoft Teams allows you to call anyone within your organisation. You can also have a conference call with multiple people in your organisation, free of call fees, using your mobile data or WiFi.

We’d always recommend to use WiFi where possible to save your mobile data, and ensure call quality is the absolute best it can be.

To start a conference call, open Teams and go to Calls. Click the + at the top right, and search for those you wish to call. Once you have selected everyone, click Call.


To add additional callers mid-call, click the plus at the top right, search for the person who you would like to add and click Add.

Frequently asked questions

  • As I am signing in with my work account, can work access my phone?

No – although Microsoft Teams uses your work account, it has no access to the rest of your mobile phone.

  • I have forgotten my Office 365/Email account password, can it be reset?

No problem, if you give us a call on 01732 600171 we’ll be happy to reset this for you.

  • I’m having issues installing the app, is there anyone who can help?

Absolutely, we’d be happy to. Simply call us on 01732 600171 and we’ll help you install the app and get up and running.

  • How many people can I add into a conference call?

Technically, up to 5,000 people can join a Microsoft Teams conference call.

  • I’d like to join a Teams call from my laptop/PC, is this possible?

Sure, you would need speakers and a microphone, which may be built in if you have a laptop. You’ll also need to install Microsoft Teams, which is available here.

  • Can I customise the background of Microsoft Teams?

Yes you can. Have a read of our Microsoft Teams custom backgrounds tutorial.

Creating the Meeting/Call

Microsoft Teams is a very powerful tool for conference calls. It can be used for internal conference calls without a license, but with the addition of an Audio Conferencing license, you can arrange meetings and add in external contacts to your calls.

In order for a call to have a phone number and ID for external callers, the call must be scheduled as a meeting.

To begin, open Microsoft Teams either on your PC/Laptop or your Phone. Go to the Calendar tab and click the + to create a meeting.

Give the meeting a name, add the participants within your organisation you’d like in the call, set the time/date of the call and click Save. You can also set the meeting to repeat, if it’s a regular occurrence. The participants you have chosen will receive a meeting request and calendar invite automatically.


Once you have clicked Save, you will notice the meeting is in your calendar. The meeting will also go into the invited participants calendar. Everyone invited will be able to see the meeting details.

You can click on the meeting to view the details either on your PC/Laptop or your Phone/Tablet. There is a phone number and call ID within the meeting details.

If you wish for an external contact to join the call, they just need to call this number to join the meeting and type the ID when prompted and they will be automatically added into the call via their phone.

Frequently Asked Questions

  • I don’t see a phone number or ID on my meeting?

You’ll only see a phone number and ID on the meeting when the organiser or one of the attendees has an Audio Conferencing license. Heliocentrix can check this for you and add one if required. Just give us a call on 01732 600171 or email us on [email protected].

  • Are the calls expensive for external callers?

The phone number for meetings will be a local number in your area. Typically, in the UK this will be a London 0203 number and as such the call would be included in most UK mobile and landline call bundles.

  • I have a caller from outside the UK, is there another number they can call?

If you have a caller from outside of the UK, click on “Local Numbers” in the meeting details and you will be presented with phone numbers around the world which you can call to join the meeting. If you have several callers from different countries, they can call their local number and use the same ID to join the same meeting.

  • How do I know an external caller has joined my meeting?

When the external caller calls in and provides the ID, they are asked to specify their name. As they are added into the call, the other participants will hear an automated message saying “*Contact Name* has joined the call”.

On 1st July 2019, new switching regulations were introduced by Ofcom, and we want to ensure you are fully informed when it comes to requesting switching information from us. You can also request a PAC or STAC code via text, your online account or by phone. 

We’re always sorry when our customers are thinking of leaving us, however we aim to provide a great service from the day you join to the day you leave.  

Requests by SMS 

Switching Information – We will provide you with an SMS/Email detailing relevant information such as your contract end date and your early termination fees. 

Text “INFO” to 85075

PAC – We will provide you with an SMS/Email listing your PAC, which can be used to transfer your number over to your new provider. We will also include your early termination fees. 

Text “PAC” to 65075 

STAC – We will provide you with an SMS/Email listing your STAC, which can be used to enable your new provider to disconnect your existing number if they are providing a new one. We will also include your early termination fees. 

Text “STAC” to 75075 

Requests by Phone 

Our support team is here to help. Our staff can provide all the information you need to know around switching and all of our other services. Call us now on 01732 600 170. We’re happy to help, whether the query is regarding moving to, or away from, our mobile services. We may request confirmation in writing following your phone call. 

Points of Note:  

  • PACs and STACs are Valid for 30 days 
  • The above ‘Request by SMS’ processes can only be utilised for a single request at a time and can only be used for the mobile phone number sending the SMS 
  • Requests for between 2-24 numbers can be requested by post, email, or by phone, and are covered within the policies laid out under the new regulation. Requests by post should be sent using recorded delivery with proof of postage obtained. 
  • There is no charge for an SMS being sent or received when using this service 
  • Contracted notice periods and related fees are not chargeable when using this service, but you may have to pay an early termination fee and the remaining balance of your contract. 

FAQs 

Q: How quickly should I receive my switching information from my provider?
A: For the most part, all requests will be actioned within hours. However, official timescales for business customers is two working days. 

Q: What is an Early Termination Fee (ETF)?
A: An ETF outlines all costs associated to your mobile subscription if you terminate your agreement prior to the agreed contract date. 

Q: Can I request a standard disconnection?
A: In the event you wish to simply cancel your agreement, you can still do this. You will be required to confirm your request in writing with 30 days’ notice.  

Q: What happens to my other services if I switch my mobile provider?
A: Other services, un-associated with your mobile subscriptions, will remain unchanged. 

Q: What if I want to switch 25 numbers or more?
A: This legislation covers switching for up to 24 numbers. Requests of 25+ numbers will be subject to standard terms and conditions including notice fees and associated charges. 

Bespoke software solutions – how do you know if one is right for you?

Are cumbersome tasks that take you and your team too long to complete costing you money? Do they lose you hours of productivity or possibly even clients? Are you struggling to find a system that could automate these processes?

If you have these challenges, then you might want to consider a bespoke software solution.

What is a bespoke solution?

Choosing to build a bespoke software solution means that you can design a program around your business needs rather than shoehorning your processes into a system that isn’t quite right.

A new software solution could be anything from a case management system, a CRM solution, or a billing system to a data capture application for use off site.

Bespoke applications are usually web-based so they work in your browser and can be accessed anywhere with an internet connection. They can also be built to work on mobile and tablet devices.

A bespoke solution can have huge benefits:

  • It is built around your own business processes
  • It can save you time on manual and inefficient tasks
  • It can save you money on licences
  • It allows you to control the user journey which reduces training needs
  • It is customisable and gives you infinite flexibility
  • It allows you to keep up with the latest technology
  • It ensures total control over data usage

Is your business ready?

Your organisation has identified a business challenge that is costing you too much time or money and needs a solution. It is likely a process driven task that an otherwise skilled worker would be carrying out. Your business needs to overcome this challenge in order to grow.

You know that the answer lies in technology.

However, selecting the right technology solution for your company is not easy. Not only are there often too many ‘standard’ products to choose between, but none of them fully satisfy your requirements and you probably want a few features from each.

Does that sound like your business?

Calculating the costs

When considering designing software from scratch, often business owners see the upfront cost as too high to invest, and don’t consider that over the longer term, the overall costs to the company can be, and most of the time will be, lower.

When working with a standard software package, it is likely that it won’t do exactly what your business needs it to do. This could mean finding lengthy work arounds which in turn could lose revenue for a business, or it could mean spending time and money on customisation. And adjusting a standard system is not without its own technical challenges.

The big outlay with a new software solution is the cost of development. However, with rising employment costs, as well as the significant expenditure required for off-the-shelf systems, this outgoing is becoming fully justifiable. A new system could be in the region of £20-30k to develop. However, with licence fees for CRMs for example, you could be looking at recouping your development costs in less than two years. You can also choose to finance your development costs, spreading your budget over three or more years.

So, you need a bespoke system… What’s next?

If your business is being held back by clunky processes and you need a system that can help accelerate your growth, then you are ready to develop a software solution that works for you.

Speak to the team at Heliocentrix to find out if it is the right move for you.

We believe that complex problems often have simple solutions. Our UK-based team will walk you through every step of the process of building a bespoke system – to ensure your business requirements are met today, and tomorrow.

[email protected]

01732 600170 

It has been 30 years since Tim Berners-Lee founded the World Wide Web. I attended the celebration at the Science Museum in London where Tim shared his thoughts on how he started the web, and his vision for it; and it made me think about how much the web has changed in this time.

To share a brief history, Tim created the web in 1989 while working at CERN as a way of automating the sharing of information that was stored on computers. The idea was that it provided a way for scientists to collaborate better. When Tim prepared his memo on the idea his boss said it was ‘vague but intriguing’. But it was enough for him to allow Tim to continue with his idea.

The very first web server on the internet.

The system Tim developed could have been licensed and commercialised, but he chose to make the web free and open to all.

Just 30 years later, half the world is online.

While we should of course celebrate this, we should also look at the opportunities of how we can evolve and improve the web for future generations.

The thing that strikes me most about the web is that at its core, every person potentially has an equal voice – when you publish something online, your content has an equal chance of being heard as anyone else’s. Of course, with the likes of Google, we lose this sense of equality as different websites are promoted in different ways. However, you do still have the opportunity to reach a much larger and wider audience than ever before. And with that comes a whole set of challenges.

We’re now at a time of shaping the third generation web

When the web was introduced, it was simplistic, with basic pages and information sharing. Then we moved into a more complex world of web applications, e-commerce and social networks.

Today, I would argue that both the internet and the web are entering a third age – an age of responsibility. It’s a cliché, but the world is changing and we should all be asking ourselves “just because we can do something, does it mean that we should?”.

Money now plays a huge part in the motivations of users of the web. Today, the internet is dominated by giants like Google and Facebook. These companies are businesses who make profit and have to report to shareholders. Without that money their innovation would be delayed.

But, I ask, what is the cost to us?

Most of the people we know will likely have access to the web and will have had some sort of interaction with Google, Facebook, or other tech giants. We hear reports in the news of how technology is having an adverse effect on all of us – whether that is loss of privacy, or contributing to mental health issues, to name just two.

Social media is becoming a growing concern for these groups. So too is it partially blamed for the rise in ‘fake news’ that has potentially changed the political landscape across the globe. However, there seems to be a disconnect between legislation, how the population is responding to what it sees on the web, and the self-regulation of these companies.

Although not exclusively about the web, GDPR is the first in what I think will be a long list of new legislation that governments will bring in to address the issues created by technology. But we all, as citizens of this World Wide Web, have to take some level of responsibility.

We should all fight to make the web a better place

The Web Foundation is working with governments, organisations and of course, people, to design a contract for the web. We acknowledge that half of people have access to the web. That also means that half of the world’s population does not. Those that can get online might have access to a whole world of treasures – satellite navigation, instant news, on demand tv programmes… But we are all faced with challenges that we are not yet quite equipped to face.

The Contract has core underlying principles that The Web Foundation wants governments, companies and citizens to commit to. These principles are built on bringing people together and creating content, ensuring everyone has access to the web, keeping the web as an open and free resource and also ensuring it is not a playground for malicious intent.

The Contract is designed to deliver what we as citizens want the web to be. We should all think about what is important to us and take action so that we can all continue to take advantage of such as great creation. Web Foundation Principals

‘A Toxic Cause of Stress’ – Push v. Productivity

You are at work deeply engrossed in a piece of work that is near completion and suddenly there is a ‘ping’ and you see you have a new notification. Do you a) click on it – you can’t help it, it might be important b) ignore it but know it’s there like an itch you can’t scratch. Either way, your brain is now disengaged from the task in hand. It can take well over a minute to regain your concentration. Add into the equation the urge to respond immediately – you are now both off task and under stress. Our constant connectivity has shifted from the social sphere to the workplace and our brains are bombarded – all the time.

It is a reasonable assumption that a drop in our cognitive ability is unavoidable as our brains try and process all this information and our emotional response often puts us in a fight or flight mode, which in turns leads us to more caffeine/ sugar/ nicotine as we try and re-focus our minds. People who juggle huge amounts of information are eventually compromised by an inability to filter irrelevant information and this in turn, slows them down.

At Heliocentrix we understand the issues around adopting a healthy relationship with technology and how technology can have a negative influence on well being in the workplace. Here are our top 3 tips for combatting ‘interruption culture’.

Top tip
Tip 1
Turn off push notifications.

All of them, every single one – on your phone and your computer. You should only be aware of incoming text messages or phone calls.

We promise you won’t miss them – be on your phone when you want to be, not when you are drawn by a ‘ping’ where an algorithm on an app says you are statistically more likely to buy stuff. Go to settings and turn it off. You may need to do this app-by-app but we promise it will be time well spent.

Askwonder.com writes that in North America alone, marketers are sending 671 million push notifications DAILY.

We suggest going one step further to increase technological wellbeing in the workplace and…

Top tip
Tip 2
Remove your work emails from your smartphone.

You can’t effectively respond to emails from your phones; you are merely monitoring what is coming in. Our email gratification comes from being able to delete an email as a task accomplished, you can’t do that thoughtfully or to the best of your ability from your phone during Love Island or waiting for a train. There is a very real culture of being available 24/7 and email pressure is directly associated with a very negative effect on home life.

And if email pressure is alive and well as part of your office culture then…

Top tip
Tip 3
Designate certain times in the work day to deal with emails and stick to it.

Never send emails late at night or early in the morning. Ever. Do not read emails after 6pm.

It has been widely accepted that working cultures filter down directly from management – and it is more likely that an internal email sender expects a quicker response than an external email sender. Lead by example, offer CPD or an email charter which shows acceptable response times. For this to be accepted as a proper culture shift, align it to your corporate values.

For help in how your business can use technology to improve productivity, we can help. Email [email protected]

Read about more ways to manage your email inbox (particularly if yours is rather large and scary).

I did NOT steal your car!

I didn’t STEAL your car!

I didn’t steal your CAR!

The emphasis you put on different words, can directly influence the meaning. Try it. Read the statements out loud putting in the emphasis.  Now imagine you are reading it in an email…

The Importance of Email Etiquette

Every now and then an email exchange goes viral reminding us all that a hastily written email can sometimes come back to bite us.  Now that 50% of emails are scanned on our mobile phones, we digest information in a hurry – and a quickly fired off email can have disastrous repercussions. Not only can you damage your personal reputation, but also that of your company with one click.

Here at Heliocentrix, we understand how important it is to communicate clearly, responsively and to avoid any mis-interpretation. Here is our latest guide to email manners.

The danger of the ‘reply all’

If you are replying to just say ‘thanks’ then don’t send it to everyone, you will send out unnecessary emails and people won’t thank you for it.  Most people find the number of emails they receive overwhelming – don’t add to the noise.  This includes any ‘all staff’ emails asking who has taken your sandwich from the fridge!

When you send an email to the wrong person

The majority of email gaffes are often when a snide comment meant for one person gets sent to the very person it was aimed at. My manager thought she had sent me an email about a dress code crime a team member had committed writing that her shirt ‘should be retired from public life’.  Unfortunately, she sent it to the lady herself.  It didn’t go well.  We would recommend not writing anything you wouldn’t be comfortable with everyone reading.  Anything else should be kept for your lunch break.

Emoji Abuse

If you are writing an email in frustration or anger, adding a smiley face to the end of it will not change the tone.  Equally, a slip of the keys and you may end up blowing a kiss to your new boss! Keep emojis out of the workplace.

It’s all in the tone

Research shows that people are usually spot on at picking up the tone of an email – but it’s often dialled up.  Remember, what you think of as straightforward and to-the-point, someone else may see as brusque and rude.  We recommend that you read your message out loud. Be honest, how does it sound?

Over-familiarity

Asking someone what their plans are for the weekend when you have never met them is probably not a good idea.  Particularly if you are dealing with international clients where your message may get lost in a different cultural context, keep your emails formal rather than casual.  As a rule of thumb – no abbreviations OMG and avoid cheesy comments – ‘Happy Friday everyone!’

And finally, what’s the worst that could happen?

A London lawyer stood down from his position over an email to his secretary about a £4 dry cleaning bill. In it he demanded payment for his dry-cleaning bill after she accidentally spilled tomato sauce over his suit. Having just returned from her mother’s funeral she copied in 250 colleagues and sent this response:

“I must apologise for not getting back to you straight away but due to my mother’s sudden illness, death and funeral I have more pressing issues than your £4. Having already spoken to and shown your email to various partners, lawyers and trainees, they have kindly offered to do a collection.”

Contact us for your IT support needs.  We offer genuine solutions.

www.heliocentrix.co.uk

[email protected]

Tel: 01732 600170

Dr Mike McGuire, a Senior Lecturer at the University of Surrey, teamed up with a virtualisation tech company, Bromium, and produced ‘Into the Web of Profit’ – a research study investigating the socio-economic and spending differences among cybercriminals. The headlines read like the script of a B list Hollywood movie with 15% of cybercriminals spending to gain status – high stakes gambling, flash cars, gold, drugs, jewellery and prostitutes.

So how does it work?

Cybercrime, Dr McGuire states, is not a business, it is an economy. Top cybercrime earners include sales of prescription pharmaceuticals, counterfeit products, corporate trade secrets, intellectual property theft and the data trading market (including stolen passwords, credit cards and identity theft).

So how do cybercriminals convert their ill-gotten gains to cash? Cash can readily change hands under the pretence of paying for a service – online platforms like AirBnB, and Paypal are allegedly not immune to being used for the exchange of illegal funds.

But what about the more shadowy world of cryptocurrencies? According to Europol about £100 billion has been laundered this way.

Cryptocurrency (n) A digital currency in which encryption techniques are used to regulate the generations of currency and verify the transfer of funds, operating independently of a central bank.

To keep this blog brief, what you need to know is that decentralised cryptocurrencies now provide an outlet for personal wealth that is beyond any formal control. As Interpol succinctly puts it:

There are no borders in cyberspace.

The key to cryptocurrency success is in the confirmation process – the ‘blockchain’. Once a transaction is confirmed, it can’t be reversed. And here is where computer experts come in – called ‘miners’, only miners can confirm a transaction. They add your transaction to the currency ‘database’ and it becomes part of the blockchain. Although their knowledge of cryptography and ciphers make their work sound like a Dan Brown novel, it is simply mathematics, though so advanced it would probably make the average head spin.

What is the future of Cryptocurrency?

According to Blockgeeks.com the market of cryptocurrencies is ‘fast and wild’. For crime purposes the higher the level of anonymity the better, as at some point the cryptocoin of choice must be exchanged at some point for ‘real money’. Altcoins, Zcash, Dash, Verge, NavCoin – new variants are popping up and digital transactions are becoming virtually untraceable.
It seems that organised cybercrime is just that, organised. Structured, well-prepared, methodical and controlled – it is being run on an industrial sized platform with access to borderless currencies and law enforcement lagging one pace behind.

If you are interested in attending our Cyber Awareness Training Session, we have spaces available on 22 May 2018 in Royal Tunbridge Wells where we will focus on different types of threats, what they mean for your business and how to stay one step ahead.

The race between hackers’ and defenders’ capabilities is increasing in pace and intensity.

The publishing of the Cyber Threat to UK Business Report 2017/18, the new GDPR regulations and the ongoing scandal of Facebook condoning the harvesting of private data means that data security is first page news.

We are going to examine some key points of the report in real terms to SMEs. If you think that tech horror stories such as ransomware, WannaCry, crypto-jacking, worms and trojans will never affect your organisation, you can think again. According to data compiled by a leading insurance company, in the past 12 months 875,000 SMEs across the UK have been affected by a serious cyber-attack. Of the companies hit, just over a fifth reported that it cost them more than £10,000 and one in 10 said that it had cost them more than £50,000.

Our Cyber Awareness Training sessions are an effective way to make your team the first line of defence and not the last resort. We firmly believe that knowledge is power so have created an 2 step program covering the most critical aspects of Cyber Security. If you are interested in attending a Cyber Awareness Training session, our next session is on 22 May – you can find out more and reserve your place by clicking here.

What does Heliocentrix recommend?

Risk Assess! It’s sounds an obvious starting point, and even if you believe that your organisation has excellent cyber security, until you have written a comprehensive Business Continuity Plan (BCP) and tested it thoroughly and explored every possible scenario, you are still susceptible.
By now, you are probably well under way with your preparations for the new GDPR regulations and feeling confident that your data is under ‘lock and key’. We probably don’t need to remind you that, under certain circumstances, the financial penalties for failing to prevent data breaches could be crippling.

Attackers will target the most vulnerable part of a supply chain to reach their intended victim
NCA report

Now that you believe you are secure, what are the guarantees that any contractors, third party suppliers or software that you download have such stringent practices in place? Like any virus, the contagion will spread across your network and needs only one entry point. Your business partners must be as diligent about cyber security as you are. Test them.

You are the weakest link. Human error will be the biggest risk to your business in 2018. Business Email Compromise (BEC) is one of the most common forms of cyber attack (and fraud). Cyber criminals can be very patient and, once they have gained access to your emails, they sit in the background waiting for their opportunity.

It (BEC) represents one of the fastest growing, lowest cost, highest return cyber crime operation.
NCA report

Sending a hoax email from your email is harder to detect than you think. In this socially connected world we can all use business terminology effectively, learn industry language and personal references from social and professional networking sites can make the deception appear authentic and personal.

So do cyber criminals only attack bigger corporations? The easy answer is that they don’t. It is a more likely outcome that bigger firms have dedicated IT teams to spot attacks far earlier than the average UK based SME. The WannaCry attack that hit the NHS, also hit over 300,000 other businesses globally.

We have spotted a cyber attack – who do we tell?

Early reporting is key to finding a solution and mitigating the damage done – both practically and reputationally. Under new GDPR guidelines you must report any security breach to the ICO within 72 hours. Always keep a timeline of events.

The Heliocentrix Top Five Tips for SMEs from the report

  1. Use up-to-date and supported operating systems and software
  2. Protect the network: use firewalls, anti-virus solutions and network segregation to protect services
  3. Protect information: implement an access rights procedure for staff for all devices and services and use multi-factor authentication to protect sensitive information
  4. Use password managers to prevent password reuse ensure that all services are protected by strict authentication and authorisation controls
  5. TRAIN YOUR STAFF IN CYBER SECURITY PROTOCOLS

For more information on how malware can affect your business please look at our March 2018 blog postor get in touch…..

The team here at Heliocentrix are already helping local and national SME’s with their IT systems, from offering friendly advice to security and peace of mind with our fully Managed IT support – and everything in-between.

Our Cyber Awareness Training sessions are an effective way to make your team the first line of defence and not the last resort. We firmly believe that knowledge is power so have created an 2 step program covering all aspects of Cyber Security.

If you are interested in attending a Cyber Awareness Training session, our next session is on 22 May and will focus different types of threats, what they mean for your business and to how to stay one step ahead of security breaches. – you can find out more and reserve your place by clicking here.

Be aware
Malware

Short for malicious software, this is an umbrella term used to refer to hostile or intrusive programs designed to infect harm on a computer.  It can include viruses, worms, Trojan horses, ransomware, spyware, adware, scareware and other intentionally harmful programs.

What you need to know about the malware threat

In Quarter 3 in 2017, the biggest number of the quarter was the count of new malware, which reached an all-time high of 57.6 million new samples, an increase of 10% from quarter 2. Source: McAfee.

In May 2017 the NHS was attacked by the WannaCry virus which encrypts data on infected computers and demands a ransom payment to allow users access.  35% of NHS Trusts were believed to be disrupted.  The investigation into the incident led to this blunt summary:

The WannaCry cyber attack had potentially serious implications for the NHS and its ability to provide care to patients. It was a relatively unsophisticated attack and could have been prevented by the NHS following basic IT security best practice. There are more sophisticated cyber threats out there than WannaCry so the Department and the NHS need to get their act together to ensure the NHS is better protected against future attacks.
Amyas Morse
Head of the National Audit Office, 27 October 2017

What are the chances of my business being attacked?

Higher than you might think.  The obvious target for cybercriminals is banking information – credit card details and passwords but you may be surprised to know that basic account customer information alone can fetch a good price on the black market. Cyber security cannot remain on a business ‘to do’ list.  It is vital that you take action to defend your business from cyber attacks.

Specialist IT firms, like Heliocentrix, have moved swiftly to arm themselves against this ever-growing risk to business – particularly in the light of the new General Data Protection Regulations (GDPR), coming into force in May 2018.  These regulations update the current Data Protection Act. Within these updated rules, a business that handles ANY personal data about individuals, can be prosecuted for not storing this data securely against attack.  It doesn’t matter how the data is stored – paper, local servers or in the cloud.  If your business does experience a data breach, it must be found and reported to the ICO within 72 hours.  The penalties for non-compliance are fierce.

What does the future hold?

We can expect to see a volatile stage in cyber security with new threats appearing every day. The tit-for-tat battle between defenders and attackers means that you need to protect your business from any potential for disruption. With the high growth in connected devices that we are putting in our homes and businesses, we are under constant surveillance. We may be sharing far more about ourselves than we would ever wish to. We predict that some corporations may weigh up the risk of being caught against the profits they can make with intrusive data capture, and that discoveries of corporate snooping will be making the headlines in 2018.

March 2018 – First update

London based firm Cambridge Analytica stands accused of violating its privacy policies by using harvested private information from the Facebook profiles of more than 50 million users in the US without permission.

What did they do wrong? The company worked on Trump’s presidential campaign developing a powerful software programme to predict and influence choices at the ballot box during the last US election. They are accused of using the data from these profiles that they should not have had access to. They then used online social media and advertising to target users to ‘move them to action’ during the election. Facebook has suspended the account for investigation and has issued a blogpost stating that Cambridge Analytica had certified this information had been destroyed back in 2015. Cambridge Analytica has defended its actions as legal.